Performance Tracking And Dashboard
Setting up the Dashboard after you've created a forecast
To get the most benefit from the Dashboard, you'll need to enter two sets of financial information into LivePlan:
Your future forecast, from the Forecast section
Your past actuals from your accounting solution
Once these two sets of values are in LivePlan, the Dashboard can accurately show you how your business is doing compared to your forecast.
Note: This article assumes you have already created a company with a forecast. If you haven't, you can follow the process in Starting LivePlan through the Dashboard, or see Preparing a forecast.
Step 1: Connect to your accounting solution or directly enter your results
Click the Connect Accounting button located near in the lower-left of your LivePlan window:
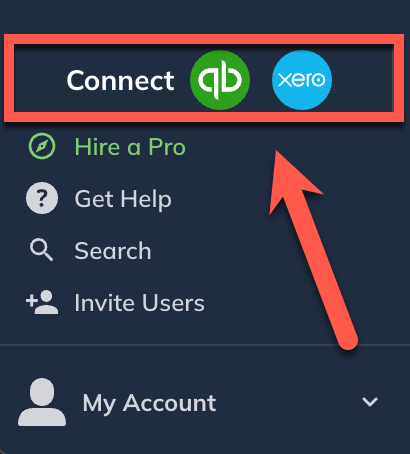
Then, select either QBO or Xero:
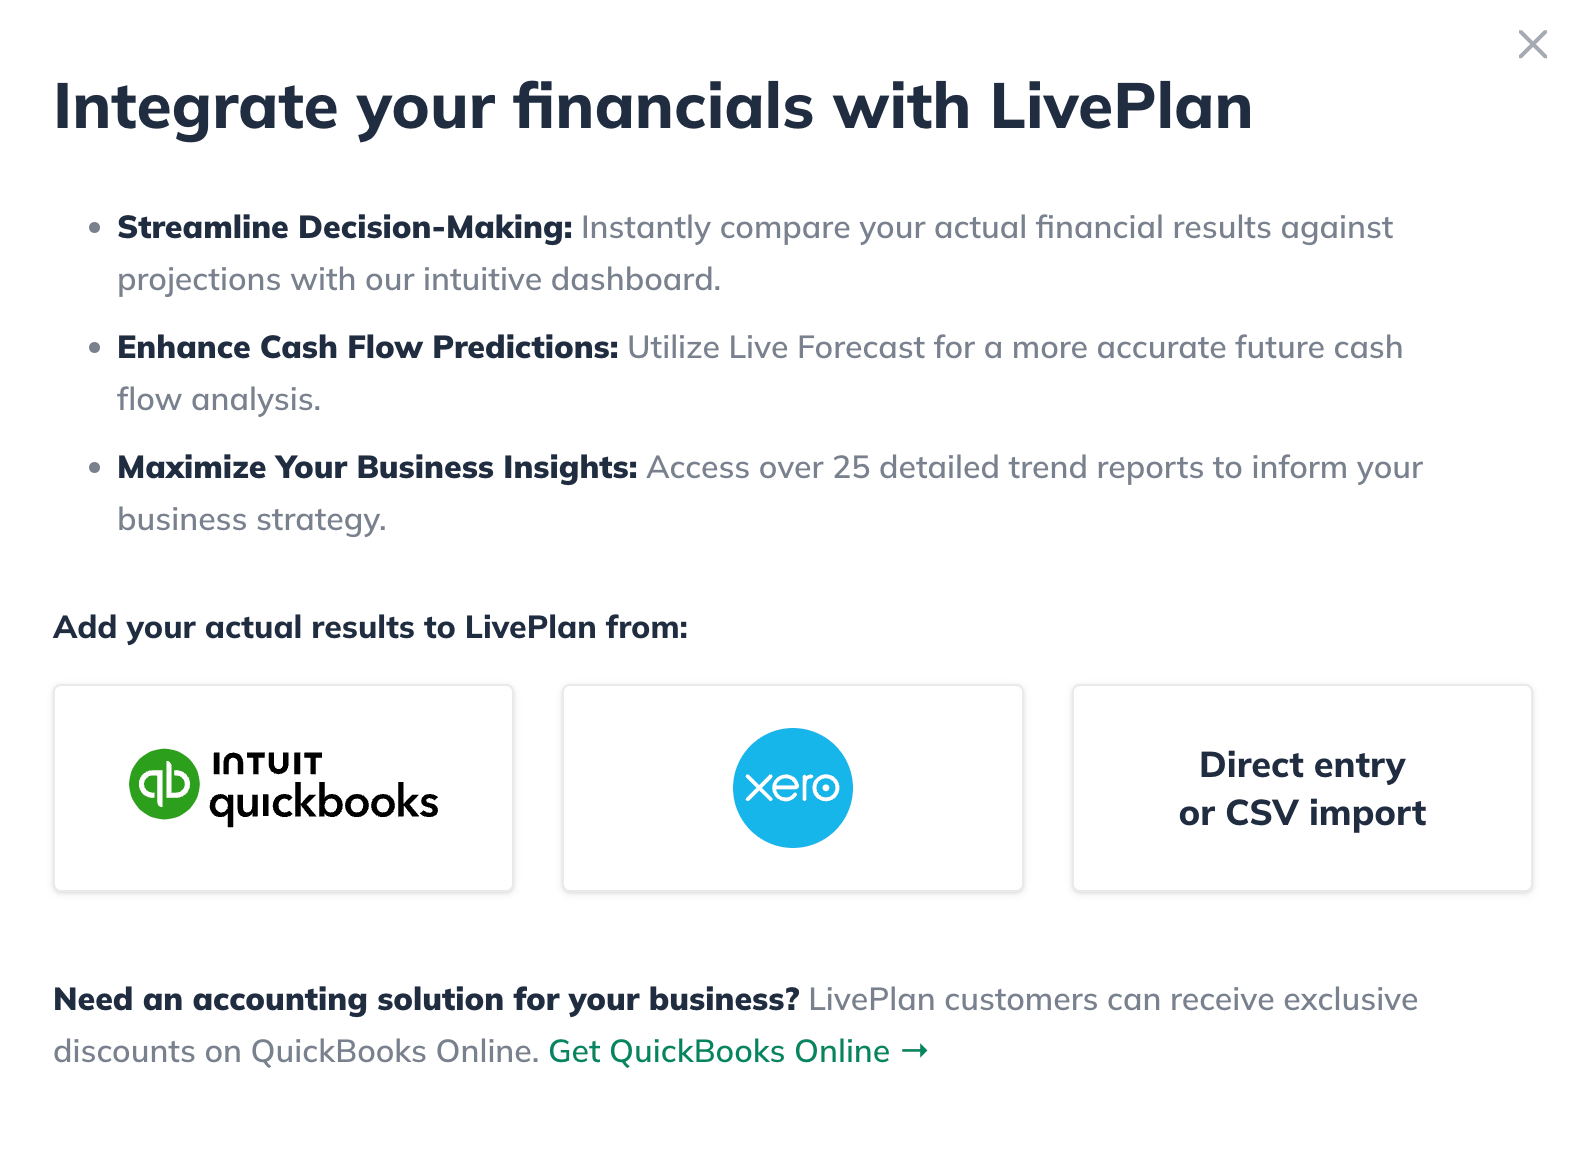
These articles go step by step for connecting to either QuickBooks Online and Xero:
If you aren't using one of the integrated accounting solutions, you can use the direct entry interface to enter your actual results or import your financials from a CSV file.
Step 2: Map your accounts
Once you've connected to an accounting solution, you'll need to map its chart of accounts to the appropriate forecast categories in LivePlan:
Note: If you entered your actuals directly, you'll skip this step.
Step 3: Use the overview and trend views to track your progress
Once you have both sets of values in LivePlan, these articles will help you interpret your data: