Performance Tracking And Dashboard
Entering your actuals into the Dashboard directly
If you aren't using QuickBooks Online or Xero, you can also enter your actuals into the Dashboard directly in the LivePlan app.
This feature is available to LivePlan Premium users. To learn more about LivePlan Premium, please click here.
You can use this feature either before or after you've created your Forecast to provide a starting point for a forecast for an existing business or to improve the accuracy of an existing forecast by enabling easy comparison between forecasted values and actual results.
Note: If you don't already have a forecast in place, you can enter your actuals as totals for each category, such as total revenue or total expenses. If you've already created a forecast, you can enter your actuals in more detail, covering individual revenue streams, expenses, and more.
Directly entering actuals:
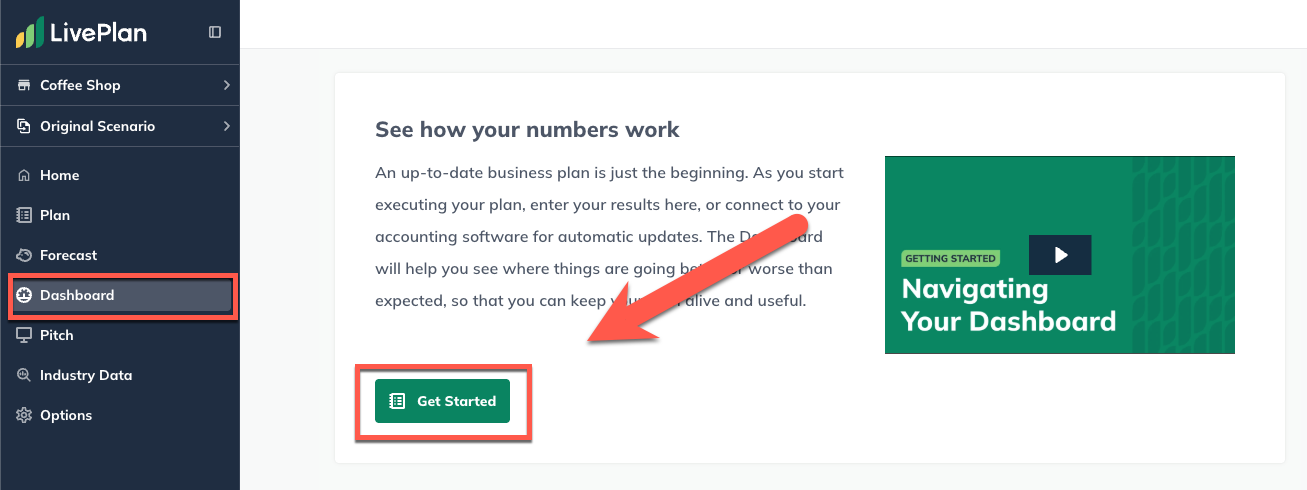
If this is your first visit to the Dashboard section for a particular company, click the Get Started button to move past the initial video:
In the overlay that appears, choose the Direct Entry option and then click Continue:

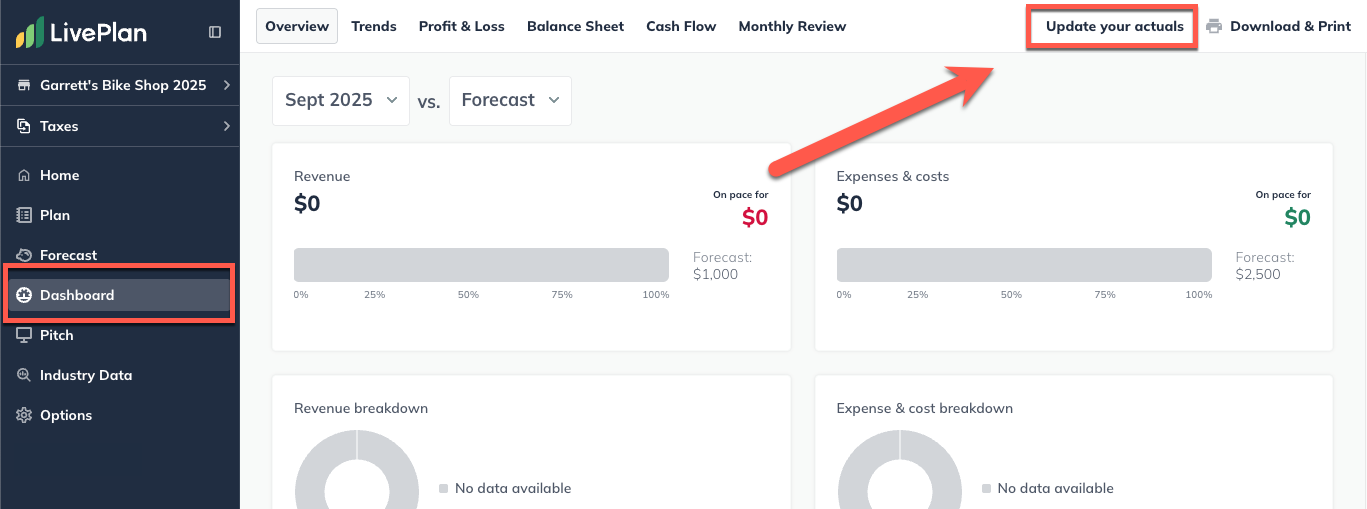
Click the Update Actual Results link near the top-right of the Dashboard:
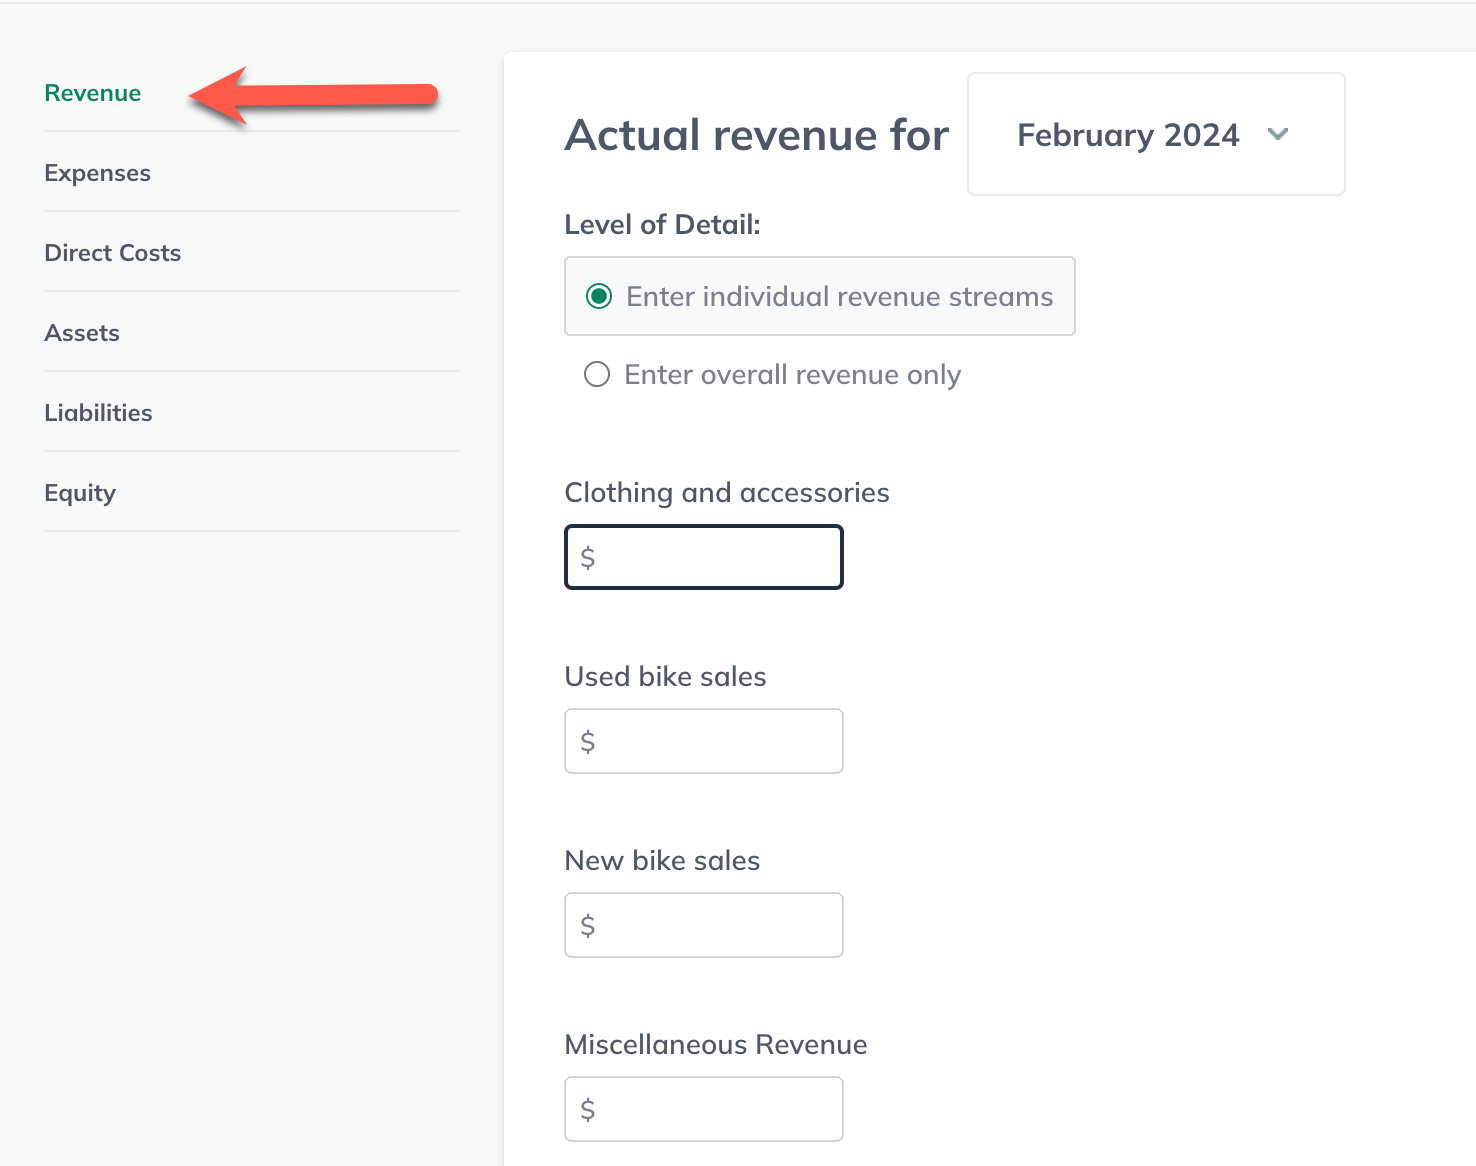
The sidebar will list all the actuals you'll enter: Revenue, Expenses, Direct Costs, Assets, Liabilities, and Equity. To begin, select Revenue:
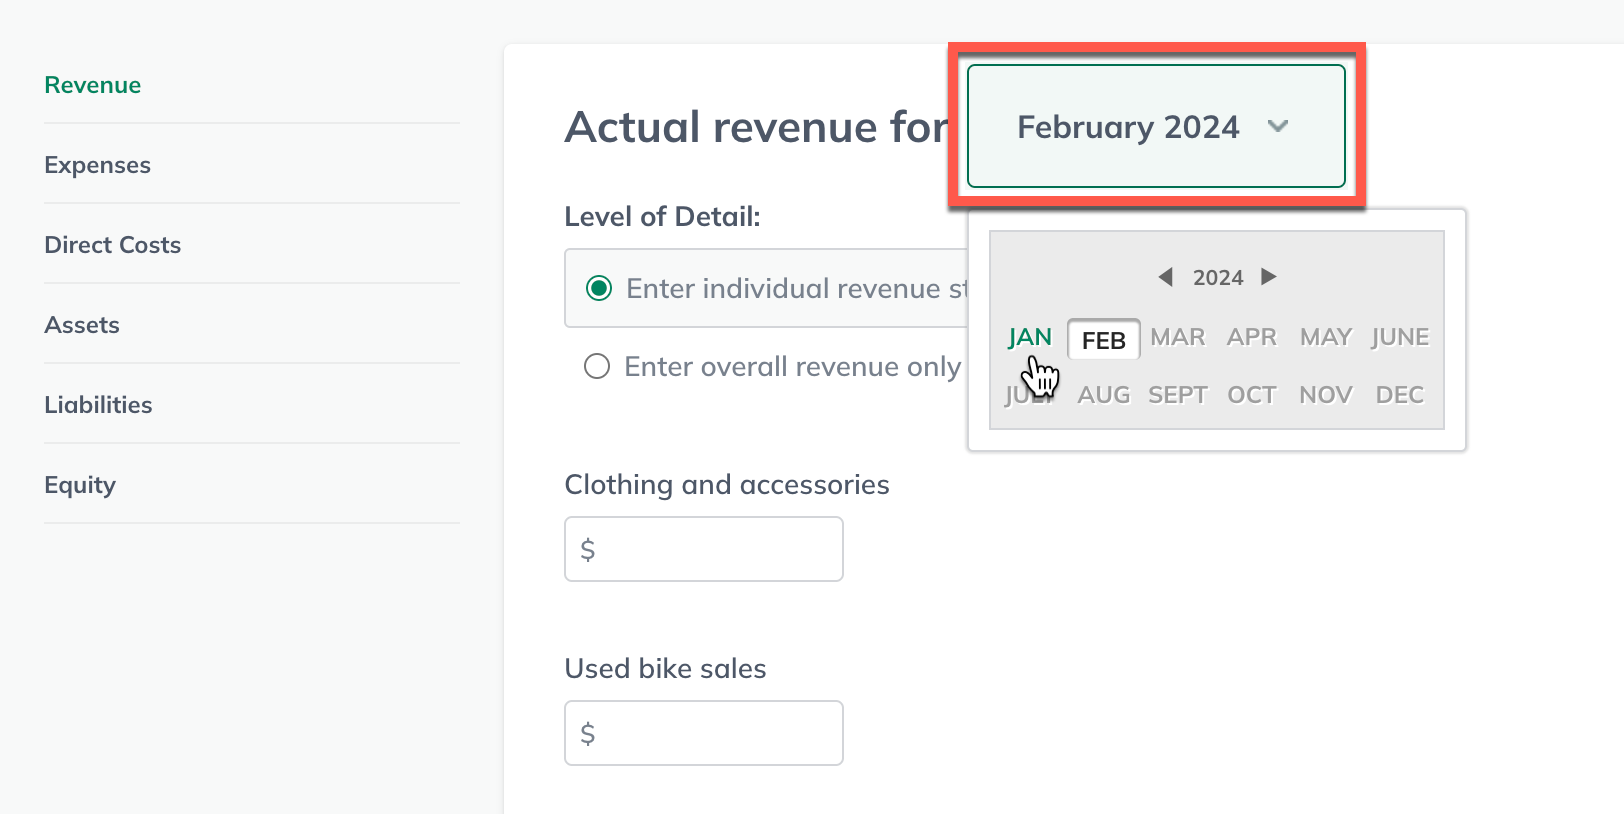
Click the month heading to open the date selector. Choose the past month for which you want to enter actual revenue: Note: You can enter actuals for up to two previous years based on the month you've selected as the start of your forecast.
You can enter actuals in one of two ways: either by individual revenue streams (available if you've created a forecast already) or overall revenue. Click the toggle button for the option you prefer:
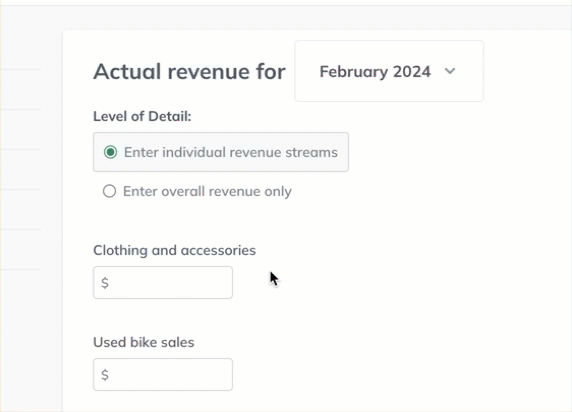
Note: When you choose Enter individual revenue streams, you'll see the same revenue forecast items you created in the Forecast section. If you have not started the Forecast section yet, you'll see a message directing you to start your forecast before making this entry. If you'd prefer not to begin your forecast yet, just use the Enter overall revenue only option.
Your numbers will be saved automatically as you enter them. When you've finished entering actual revenue for the chosen month, click Expenses in the sidebar to move on to that category:
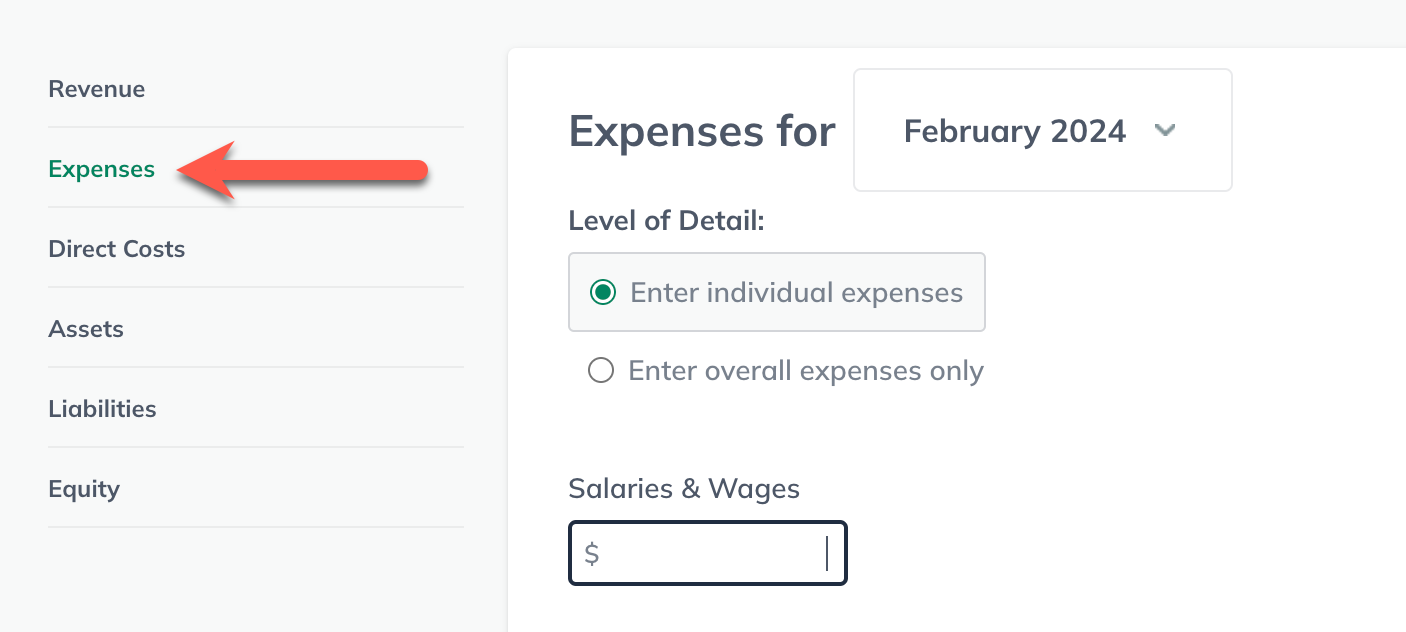
Repeat Step 6 to enter your actual expenses, then move on to the Direct Costs section and repeat the process.
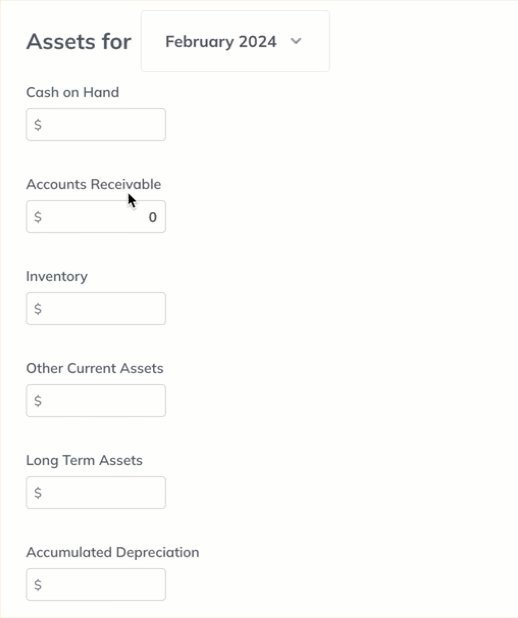
In the Assets section, you'll enter totals as of the end of the chosen month. Click each field to display more specific instructions, as shown below. Your numbers will save automatically as you enter them:
In the Liabilities section, you'll also be entering totals, and detailed instructions for each entry will display when you click the field, as shown below. Your actuals will save automatically as you enter them:

Repeat steps 4-10 for each month of actuals you wish to enter directly.