Advisors And Consultants
Setting up your clients in LivePlan
Setting up clients in LivePlan is a two-step process. The first step is to create a business plan for your client to work on (create a company). The second step is to invite the client to access their company through your account (add a Contributor). Use the guide below to make sure that things are set up correctly:
For an interactive click-through guide, please use this link below.
Creating a company
After signing into the LivePlan site license account for your organization, in the left-hand sidebar menu, click on the company drop-down, and then click Create New Company
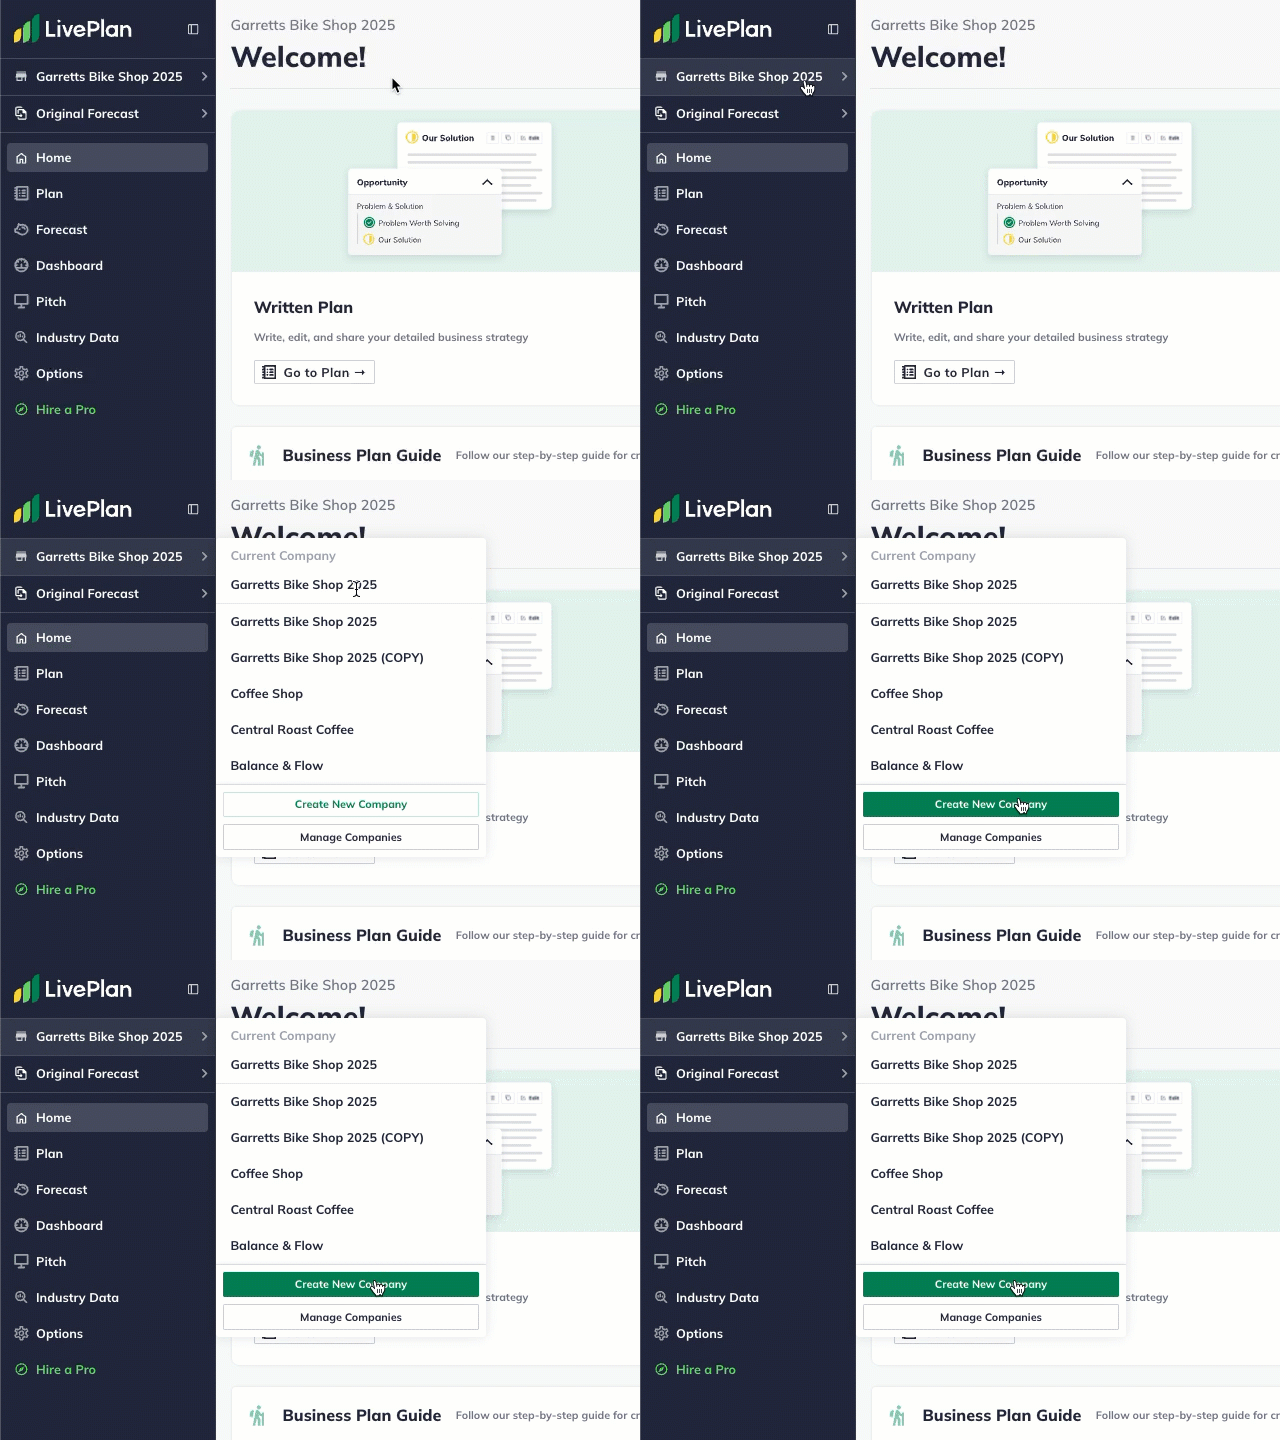
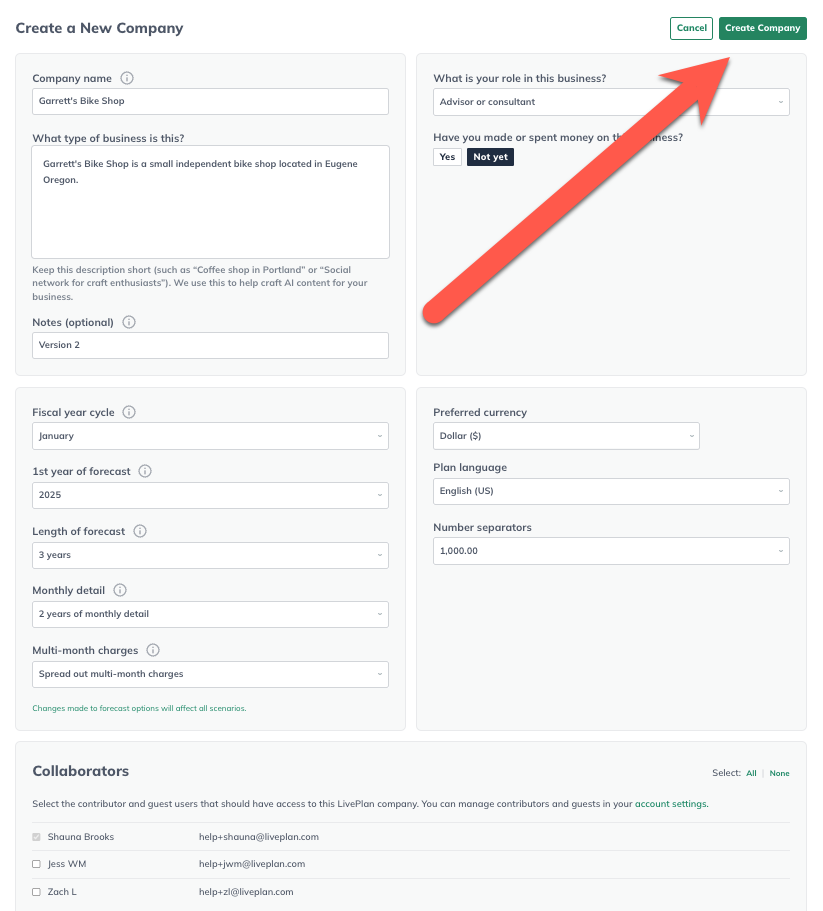
This will take you to a page where you’ll name the company, set the starting forecast settings, and decide which users should have access to the plan. Make sure to click the “Create Company” icon in the top-right to complete the company setup
Adding Contributors
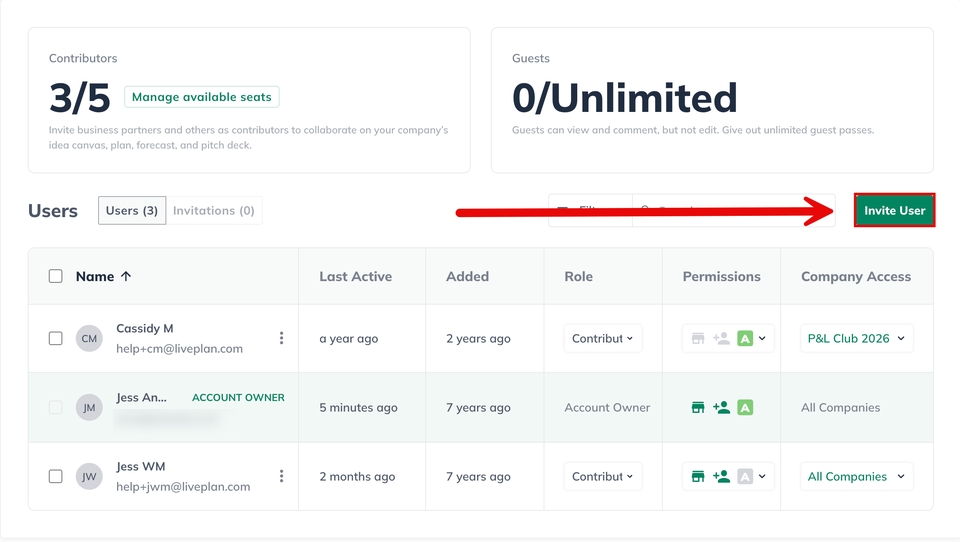
After you have created the company (you may decide to use the name of your client for their company name; you can change this name later), on the left of the LivePlan screen, click Invite Users:

Click on the Invite User:
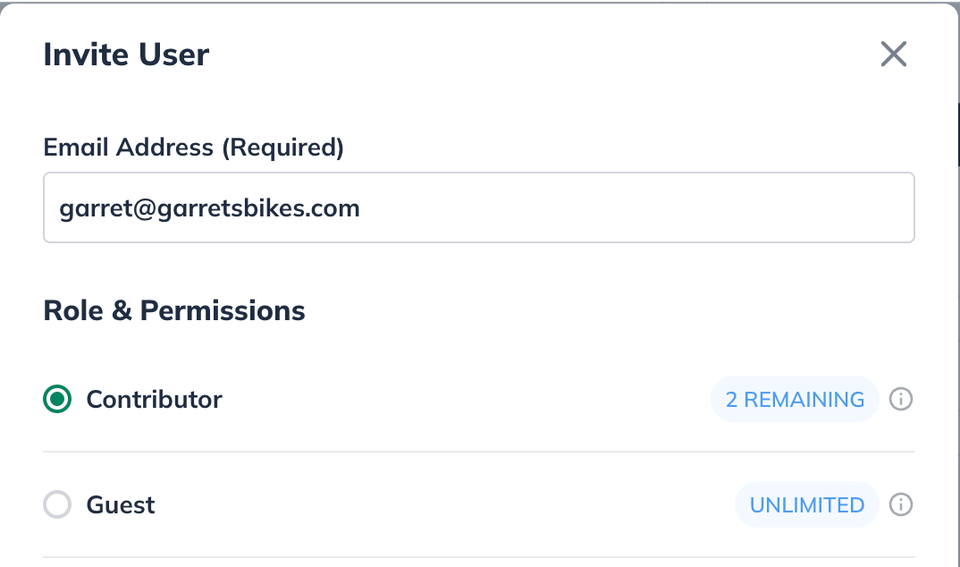
In the Add a Contributor overlay, do the following:
Enter the contributor’s email address.
Make sure the option is set to Contributor
Click on Advanced to check the boxes to specify what permissions to grant the contributor.
On that screen, you should ONLY select the
See actual financial results:
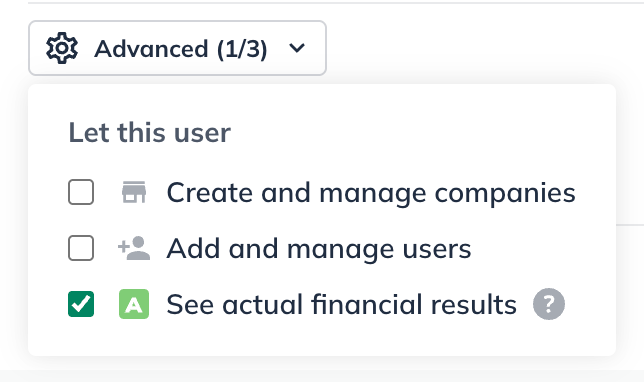
DO NOT give the client access to “Create and manage companies” or “Add and manage users”
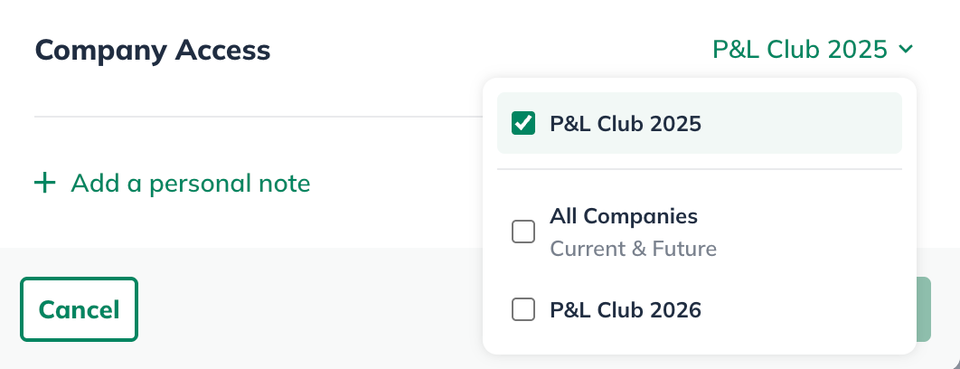
Click on Company Access to select the companies the contributor should have access to. ONLY give them access to the company you created for them. If you don't specify a company, your contributor cannot access any company in your account:
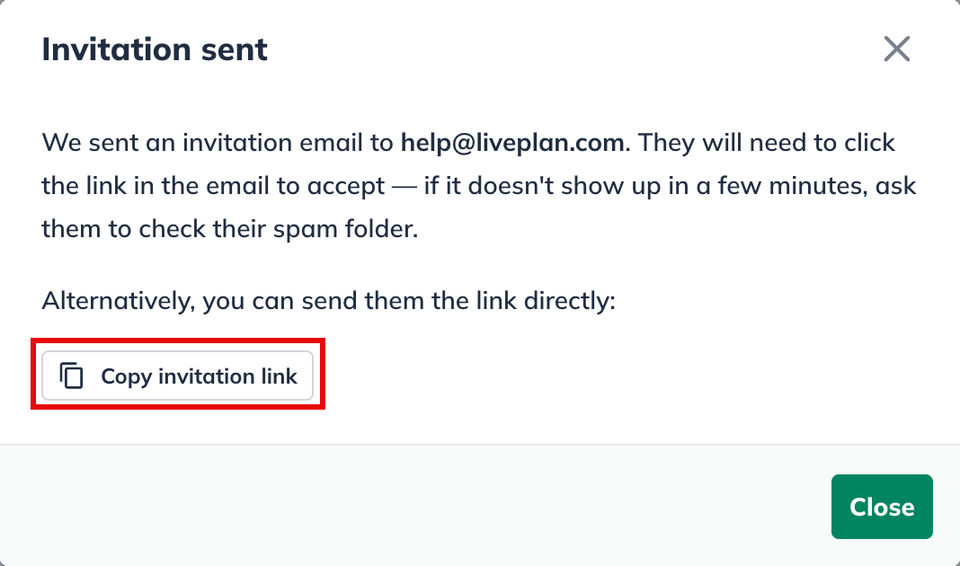
The contributor will receive an email invitation containing a link to your LivePlan account. LivePlan also immediately displays the link for you so you can copy and paste it into your email or direct message to the person.
Once the contributor clicks the link and creates login credentials, access will be granted, and the person will be added to your list of users.
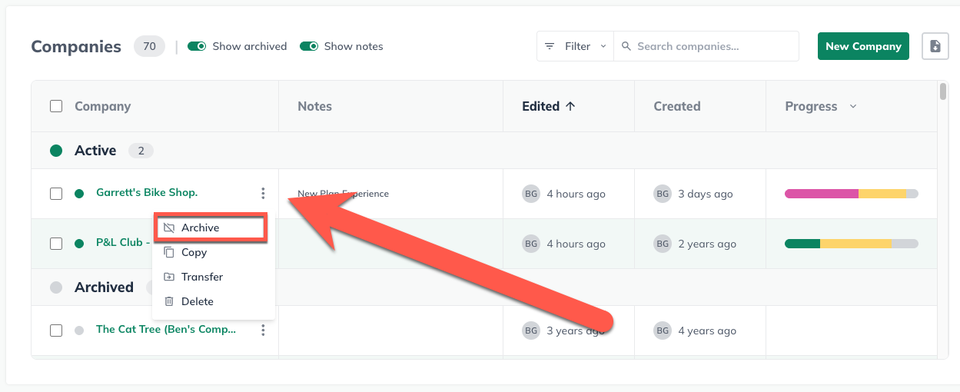
When your client is finished in LivePlan, make sure to archive their plan, which will free up that seat for another client to use. At the top of your LivePlan window, click on the name of your current active company. Next, click View all companies:
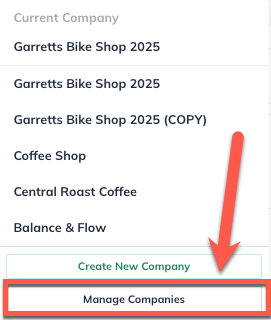
Under the desired company, click Archive:
Viewing the status of an invitation
When you invite an advisor or client to your SBDC master account, the invitation remains active for 30 days. You can check on its status at any time by visiting the Users page of the master account.
Click the Account menu and select Invite Users:
From the Users management screen click on Invitations:

You'll see how long ago the user was added and can make changes to their role, permissions, and companies they have access to here. Users who accept the invitation will move into the Users from Invitations section:
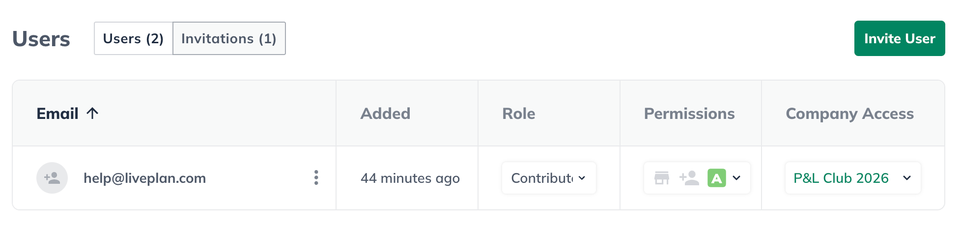
Note: If the invitation has expired after 30 days, you can click the Resend/Edit Invitation link to generate a new invitation.
To exit the account management page, click the back arrow in the upper left corner: