
Collaborating With Others
Adding and removing contributors and guests
There are three user roles within LivePlan, and each one has its own level of access:
Account Owner: Each account can have only one owner. The owner is the only one with access to the account management tools, such as canceling or upgrading the account and changing payment information. The owner can also create, delete, archive, and restore companies and edit or delete their comments and those of guests and contributors. The owner counts as one Contributor on the account.
Contributor: Contributors can access and edit anything in an account except the owner’s profile data and the billing and payment information. If the owner grants them the additional level of access, contributors can create new companies, add new users, change the roles and permissions of existing users, and view actual financial results, if available. They can also download a copy of the plan. New LivePlan accounts come with five contributor users, one of whom is the account owner. The account owner can upgrade the account to add more contributors at any time.
Guest: Guests can view (but not edit) the Pitch, Forecast, and Schedule tabs. They can also view and post comments in the Plan tab and download a copy of the plan. If the account owner grants them additional access, guests can see actual financial results, if available. Guests can’t access any account management details. Each LivePlan account comes with unlimited guest passes.
Adding a contributor to your account
Contributors can access and edit anything in an account except the owner’s profile data and the billing and payment information. The number of contributors is limited by your current user limit — which you can change at any time. Follow the step-by-step instructions below for detailed guidance.
To add a contributor:
In the top right menu bar, click the Invite Users button:

Click on the Invite User:
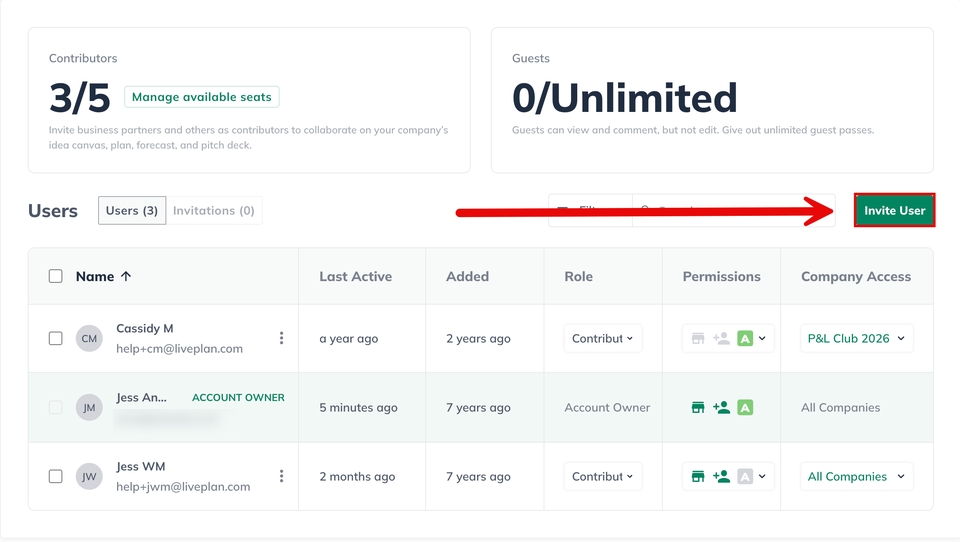
Note: The number of available contributor “slots” for your account is in the Contributor box above the list of users on the account. You can only send as many invitations as you have slots open. If you need additional spaces for contributors, click the Manage available seats link to upgrade your account.

In the Add a Contributor overlay, do the following:
Enter the contributor’s email address.
Make sure the option is set to Contributor
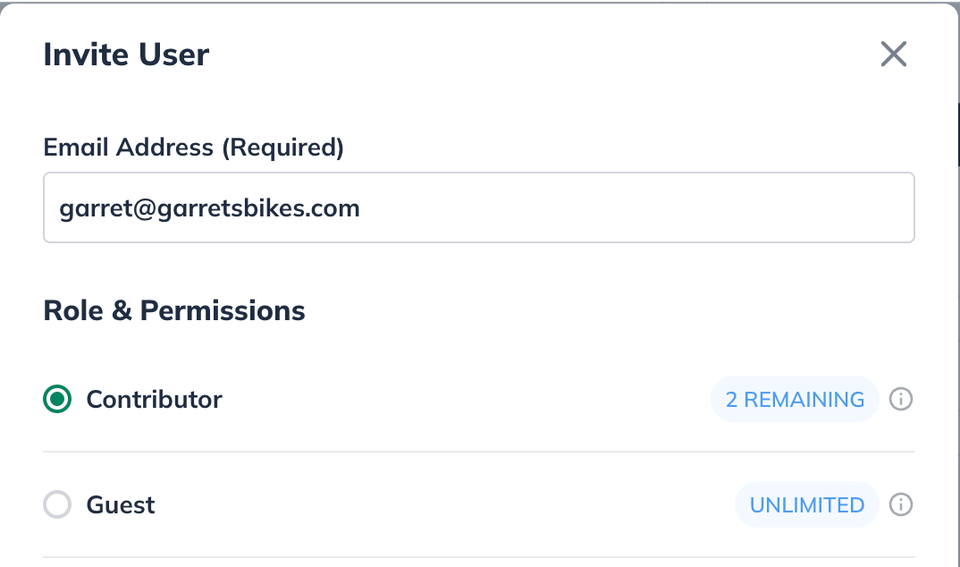
Click on Advanced to check the boxes to specify whether the contributor will have permission to add and edit users, create new companies or see actual financial results:
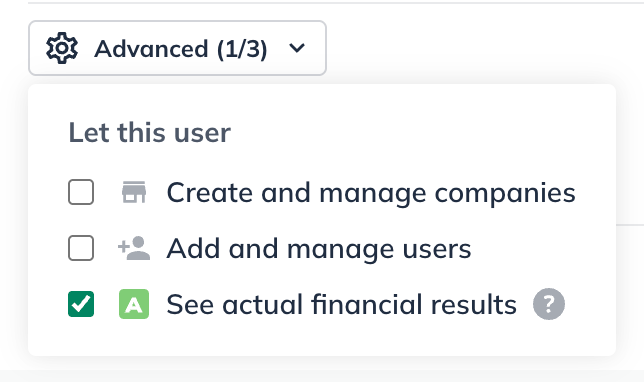
Click on Company Access to select the companies the contributor should have access to. There is also an option to let them have access to All Companies (current & future). If you don't specify a company, your contributor cannot access any company in your account:
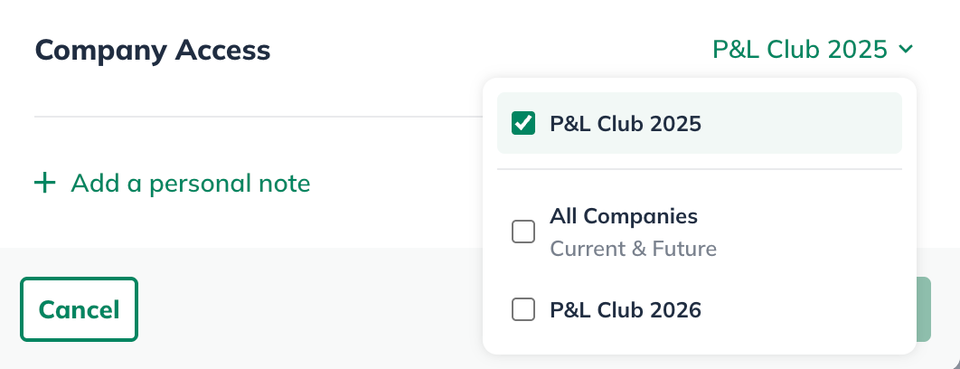
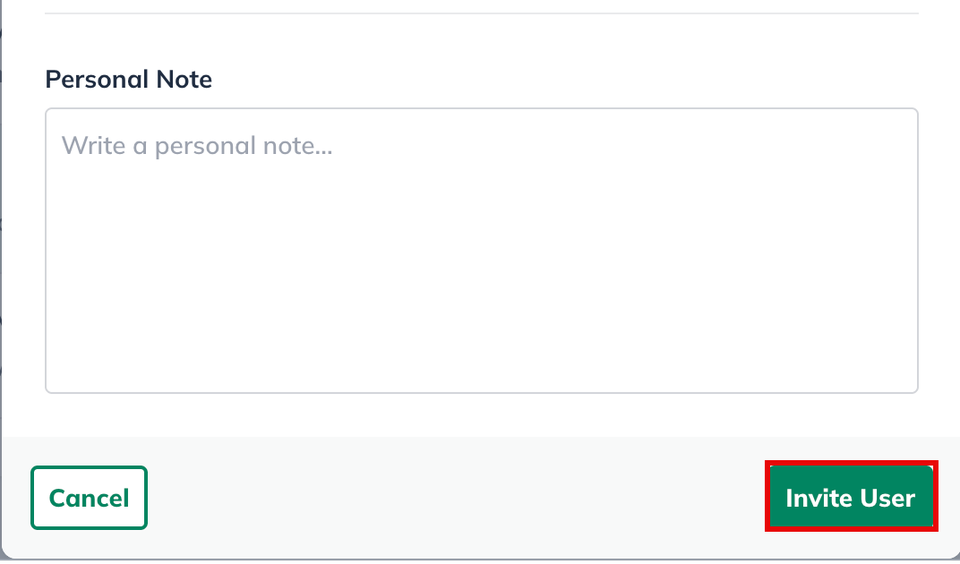
You can send a Personal note before clicking the Invite User button:
To exit the account management page, click on the back arrow at the upper-left corner of your window.

Once the contributor clicks the link and creates login credentials, they can log into the account and access the companies you've assigned to them.
Adding a guest to your account
You can invite as many guests as you'd like to view your company and comment on your plan document.
To add a guest:
In the top right of the menu bar, click the Invite Users button:
Click Invite User
In the Invite User overlay, do the following:
Enter the guest’s email address.
Make sure the option is set to Guest
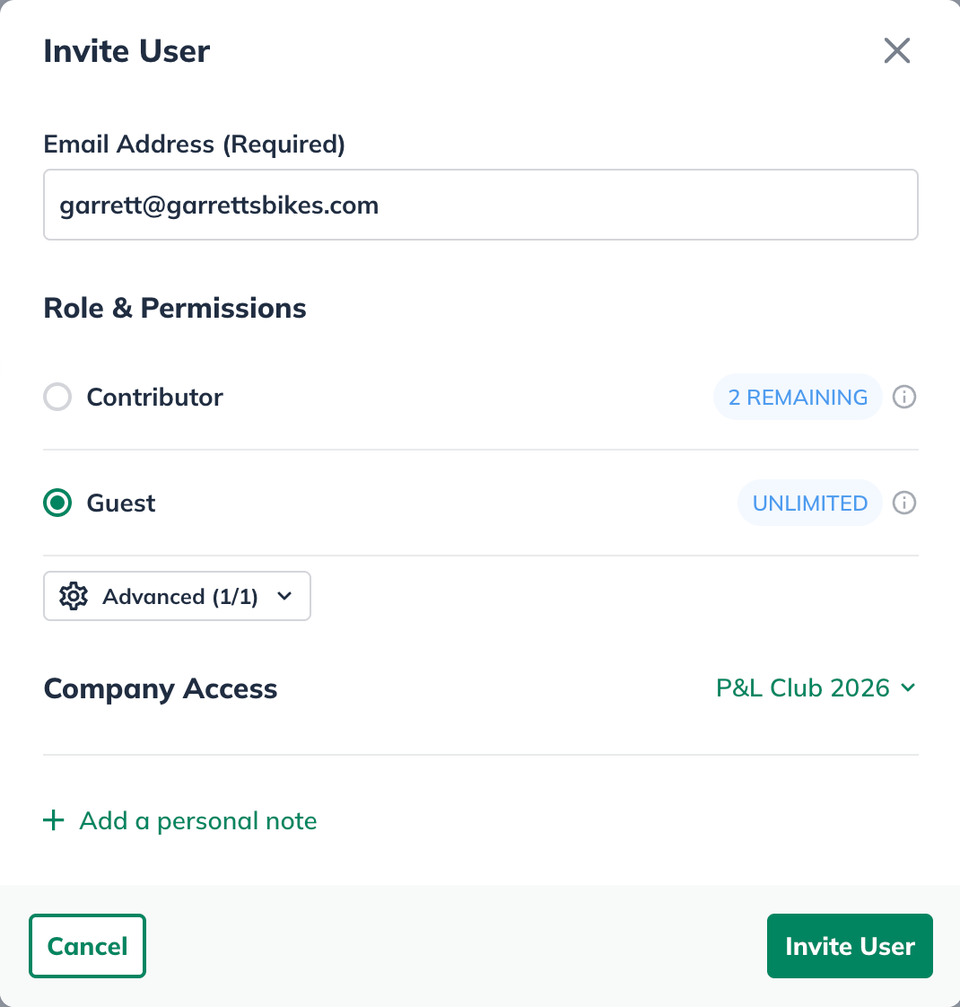
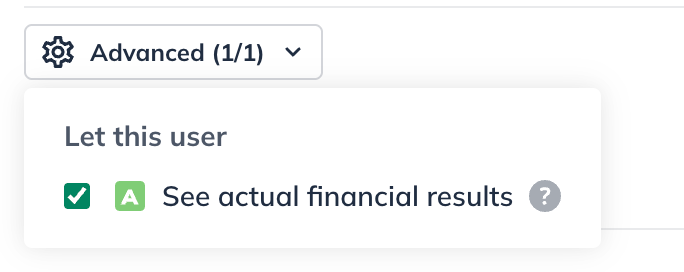
Click on Advanced to check the boxes to specify whether the guest can see actual financial results:
Select the companies the guest should have access to. (This is a required step. If you don't specify a company, your guest will not be able to access any company in your account.)
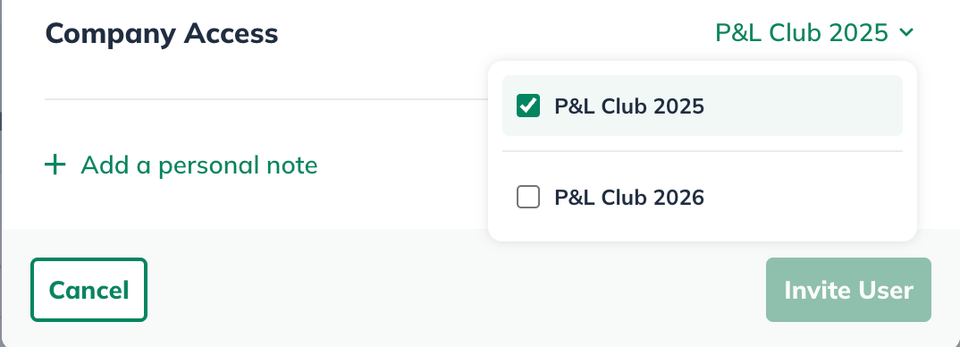
Note: Guests do not have the All Companies option since only contributors have access to the permissions for company creation and management.
You can send a Personal note before clicking the Invite User button:
To exit the account management page, click on the back arrow at the upper-left corner of your window.
The guest will receive an email invitation containing a link to your LivePlan account. LivePlan also immediately displays the link for you so that you can message the user directly with the invitation link.
Once the guest clicks the link and creates login credentials, they can log into the account and access the companies you've assigned to them.
Changing a guest to a contributor, or vice versa
Account owners and contributors with Add and manage users permission can change roles for users on the account by clicking on the drop down option in the Role column on the user management screen.
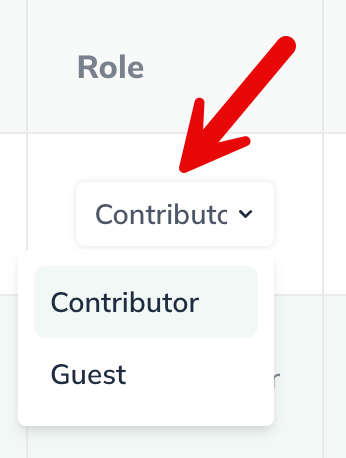
Note: You can see step by step instructions here.
Removing a contributor or guest
When you remove a contributor or guest from your LivePlan account, any changes they've made to your company content will be retained, but the user will no longer be able to log into the account.
In the top right of the menu bar, click Invite Users
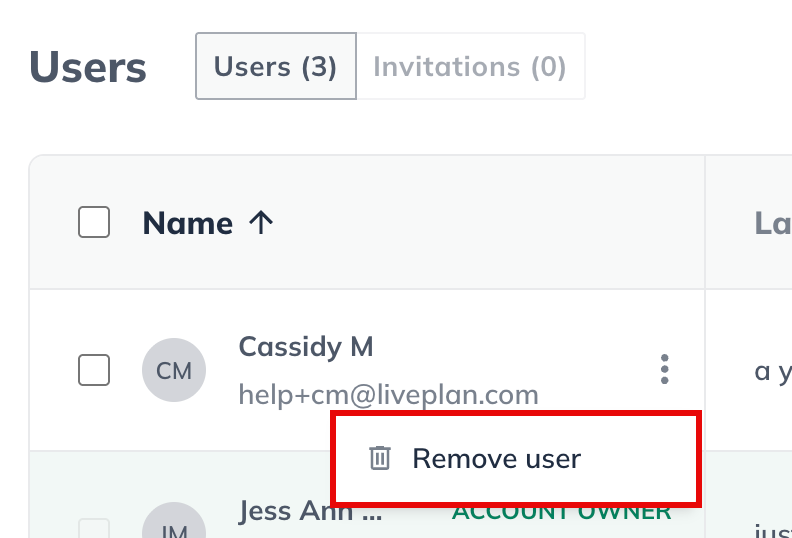
Next to the user name, click on the 3 stacked dots:
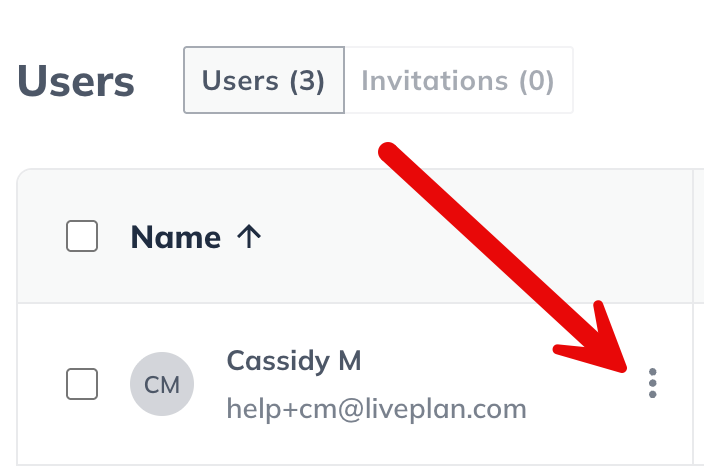
In the overlay that appears, click Remove user:
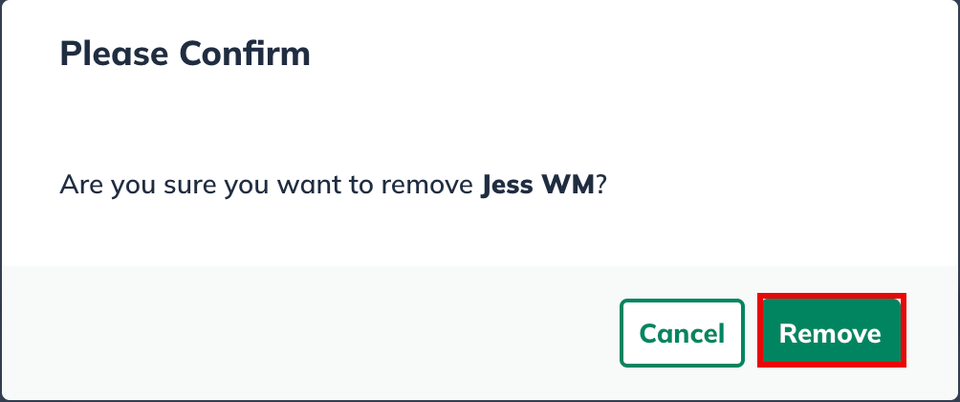
Click Remove User when the confirmation window displays:
To exit the account management page, click on the back arrow at the upper-left corner of your window.