Forecasting: Revenue, Expenses, Direct Costs, & Personnel
Forecasting revenue-only streams
The revenue-only stream is suitable for any situation, including revenue you have forecast in detail elsewhere or that doesn't fit the other revenue stream options here. For example, suppose you have already prepared a detailed revenue forecast in an Excel spreadsheet. In that case, you can enter just the revenue totals into LivePlan so that those details appear in your business plan.
Revenue-only includes scenarios where a source of revenue is based on and scaled from another source of revenue. For example, if you have a catering business, you can forecast your drink sales as a percentage of your food sales. Similarly, you can forecast downloadable content per subscription if you offer a software subscription. Using a revenue-only stream can help you model this type of revenue projection easily.
Adding a revenue-only stream to your forecast
In the Forecast Overview, select Revenue:
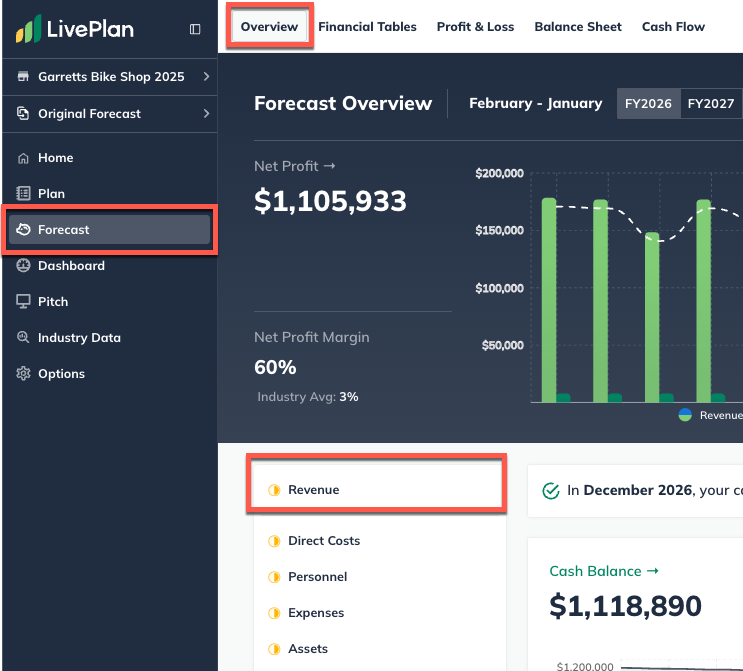
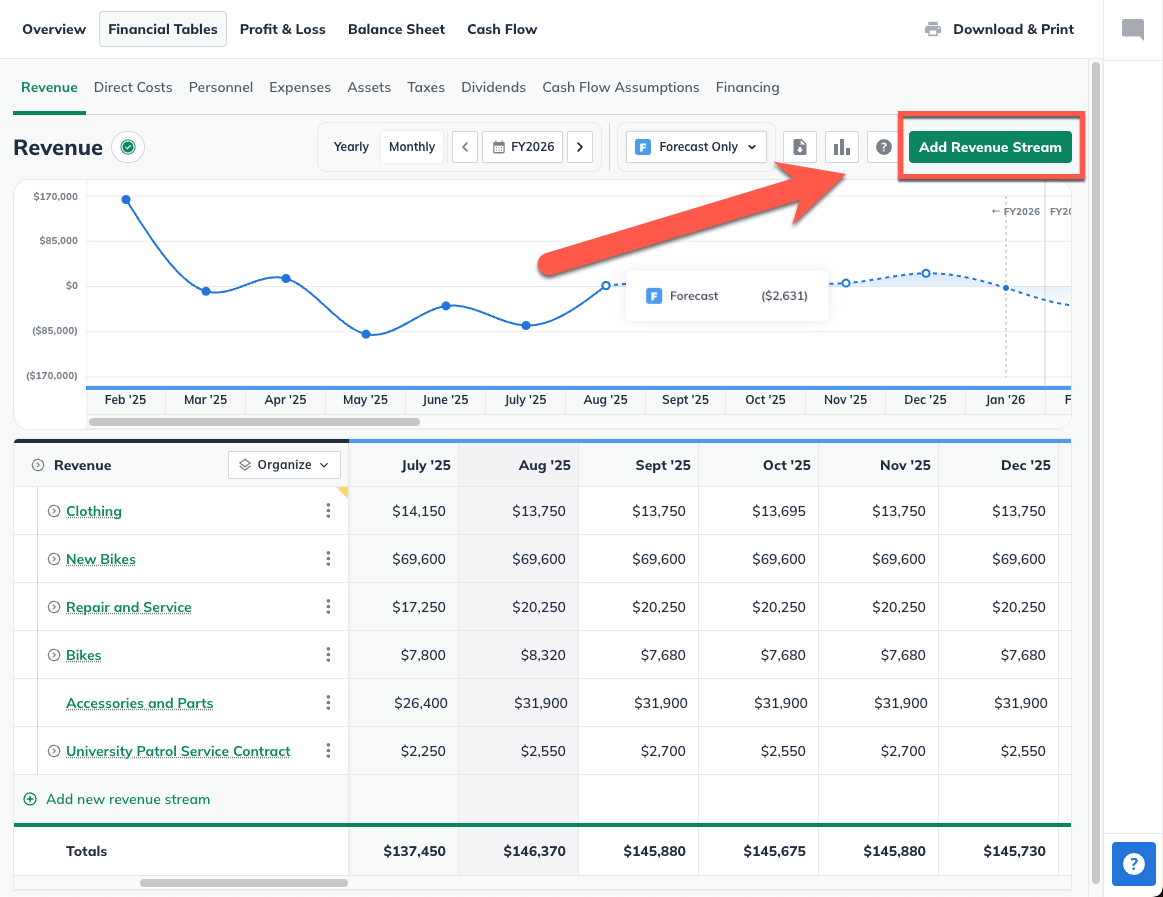
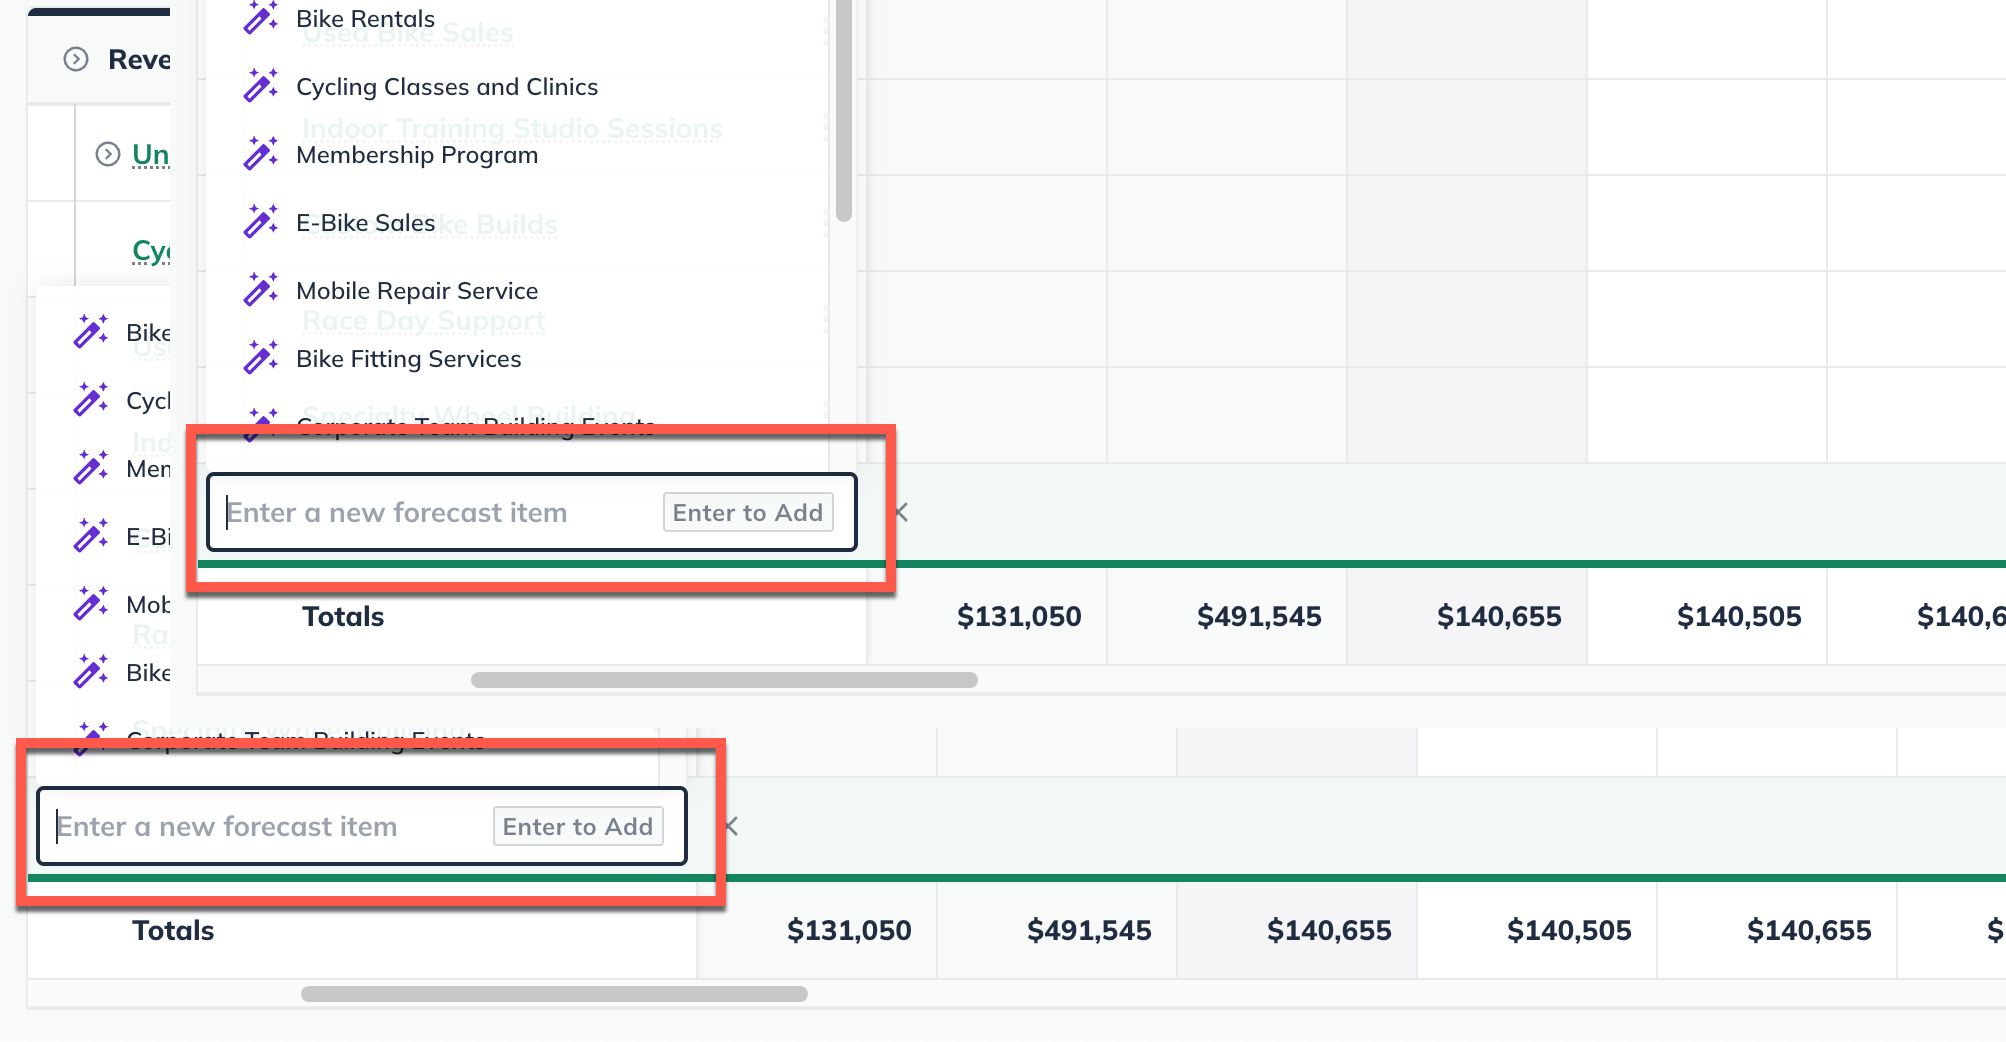
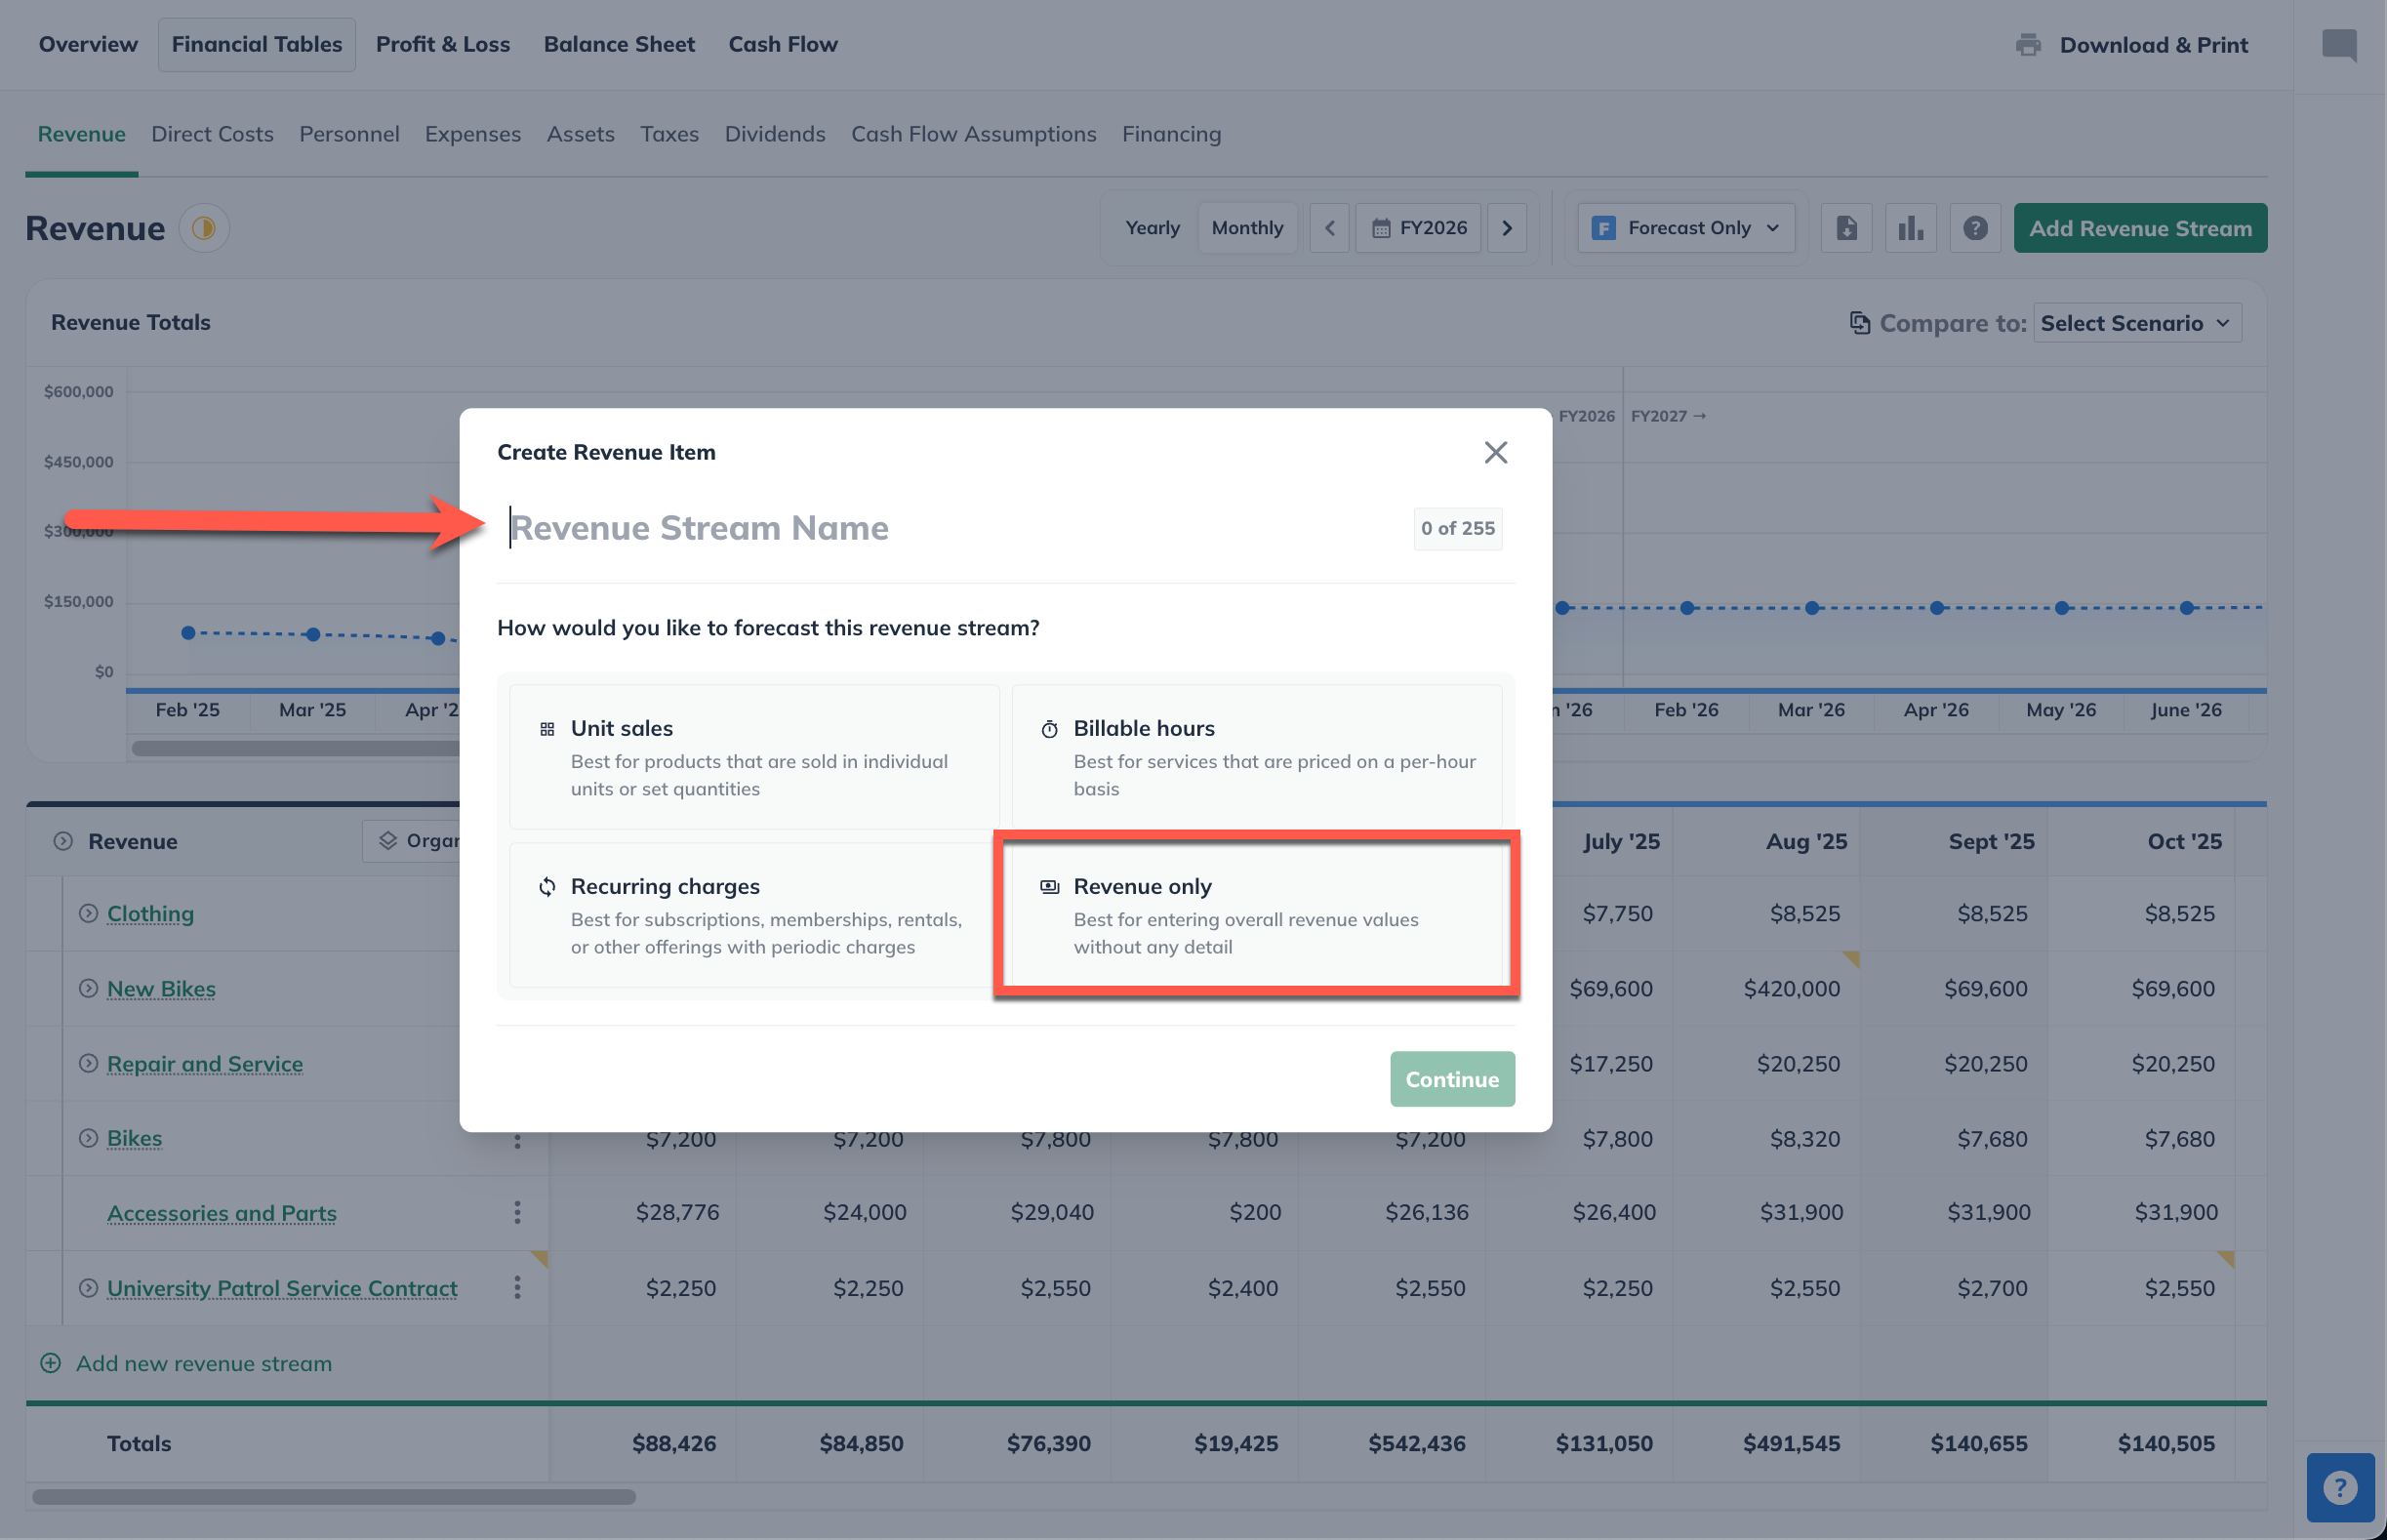
Click the Add revenue stream button near the top-right of your LivePlan window to enter a single revenue stream, or click Add new revenue stream at the bottom of the revenue table to add multiple streams:
If you are entering multiple revenue streams, enter a name for each, then click Enter to Add:
Note: You can name multiple revenue streams and then return to complete their details later. If you're click a suggested revenue line item from the AI Assistant, then it will automatically be added to the table.
Enter a name for your revenue only stream, then for type select Revenue only :
Select whether you will enter the revenue as a dollar amount or whether this revenue stream will represent a percentage of another revenue stream.
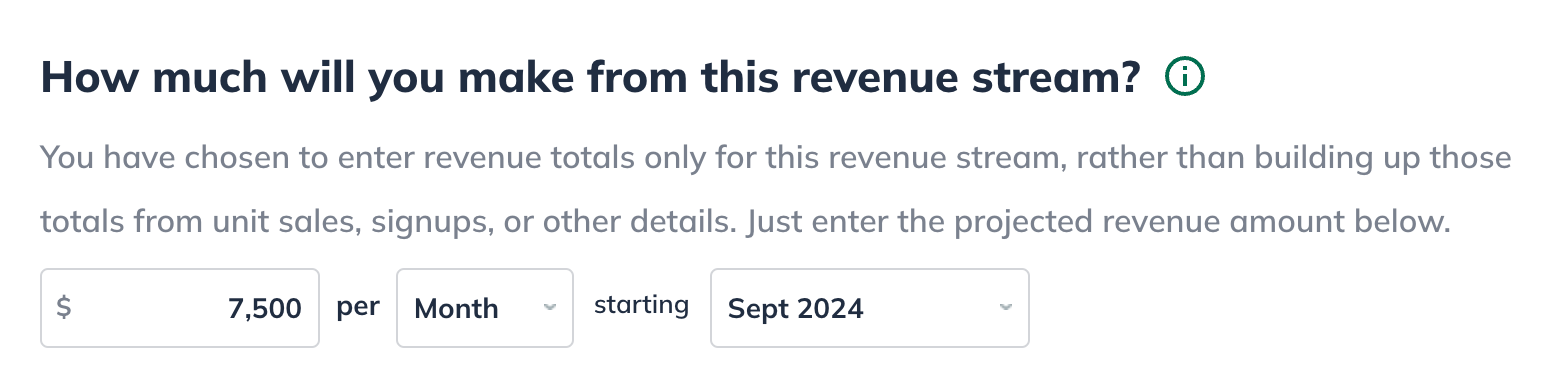
Constant amount: Indicate the amount of revenue, whether you receive it monthly or annually, and when the revenue stream will start:
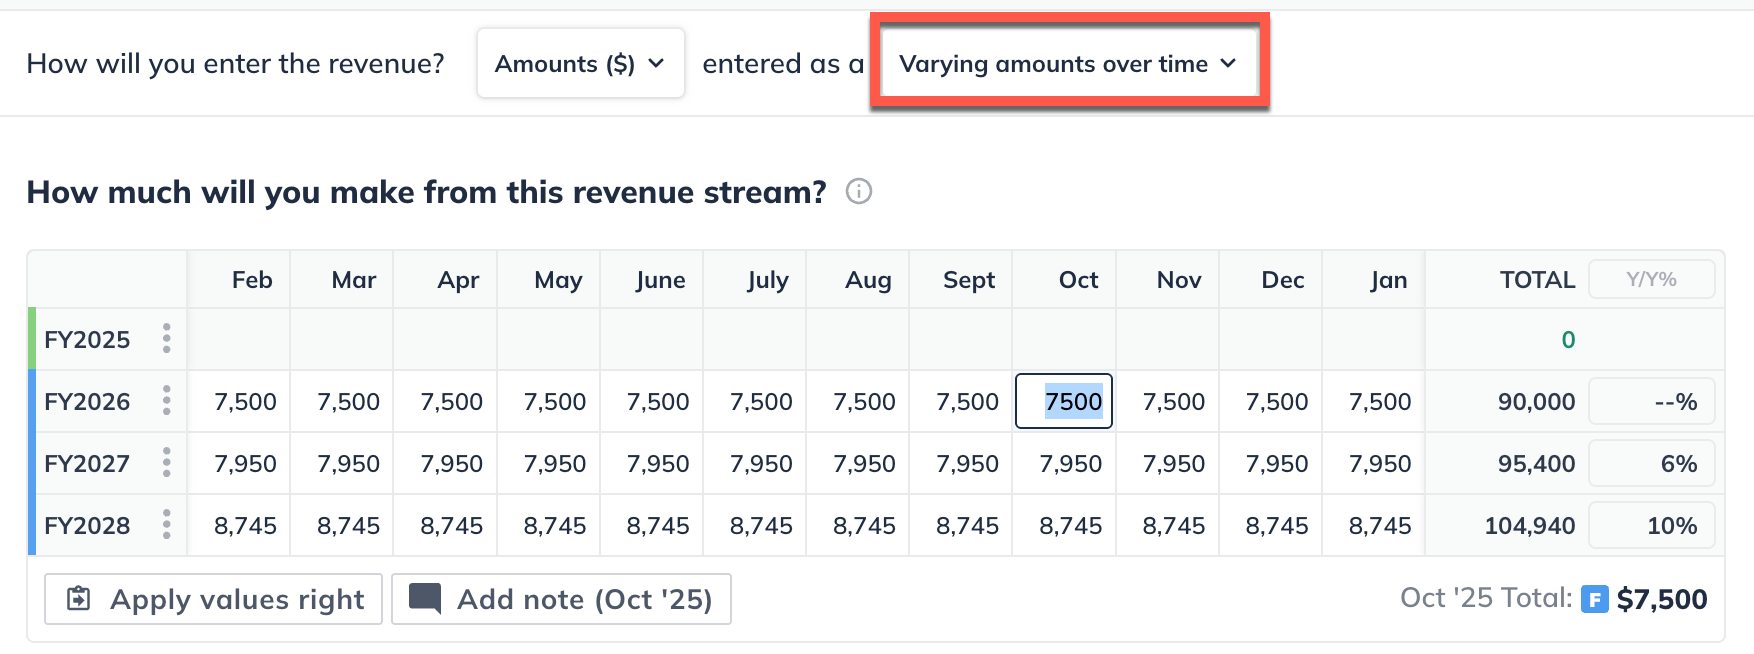
Varying amounts over time: Plot the revenue stream dollar amount or percentage by month:
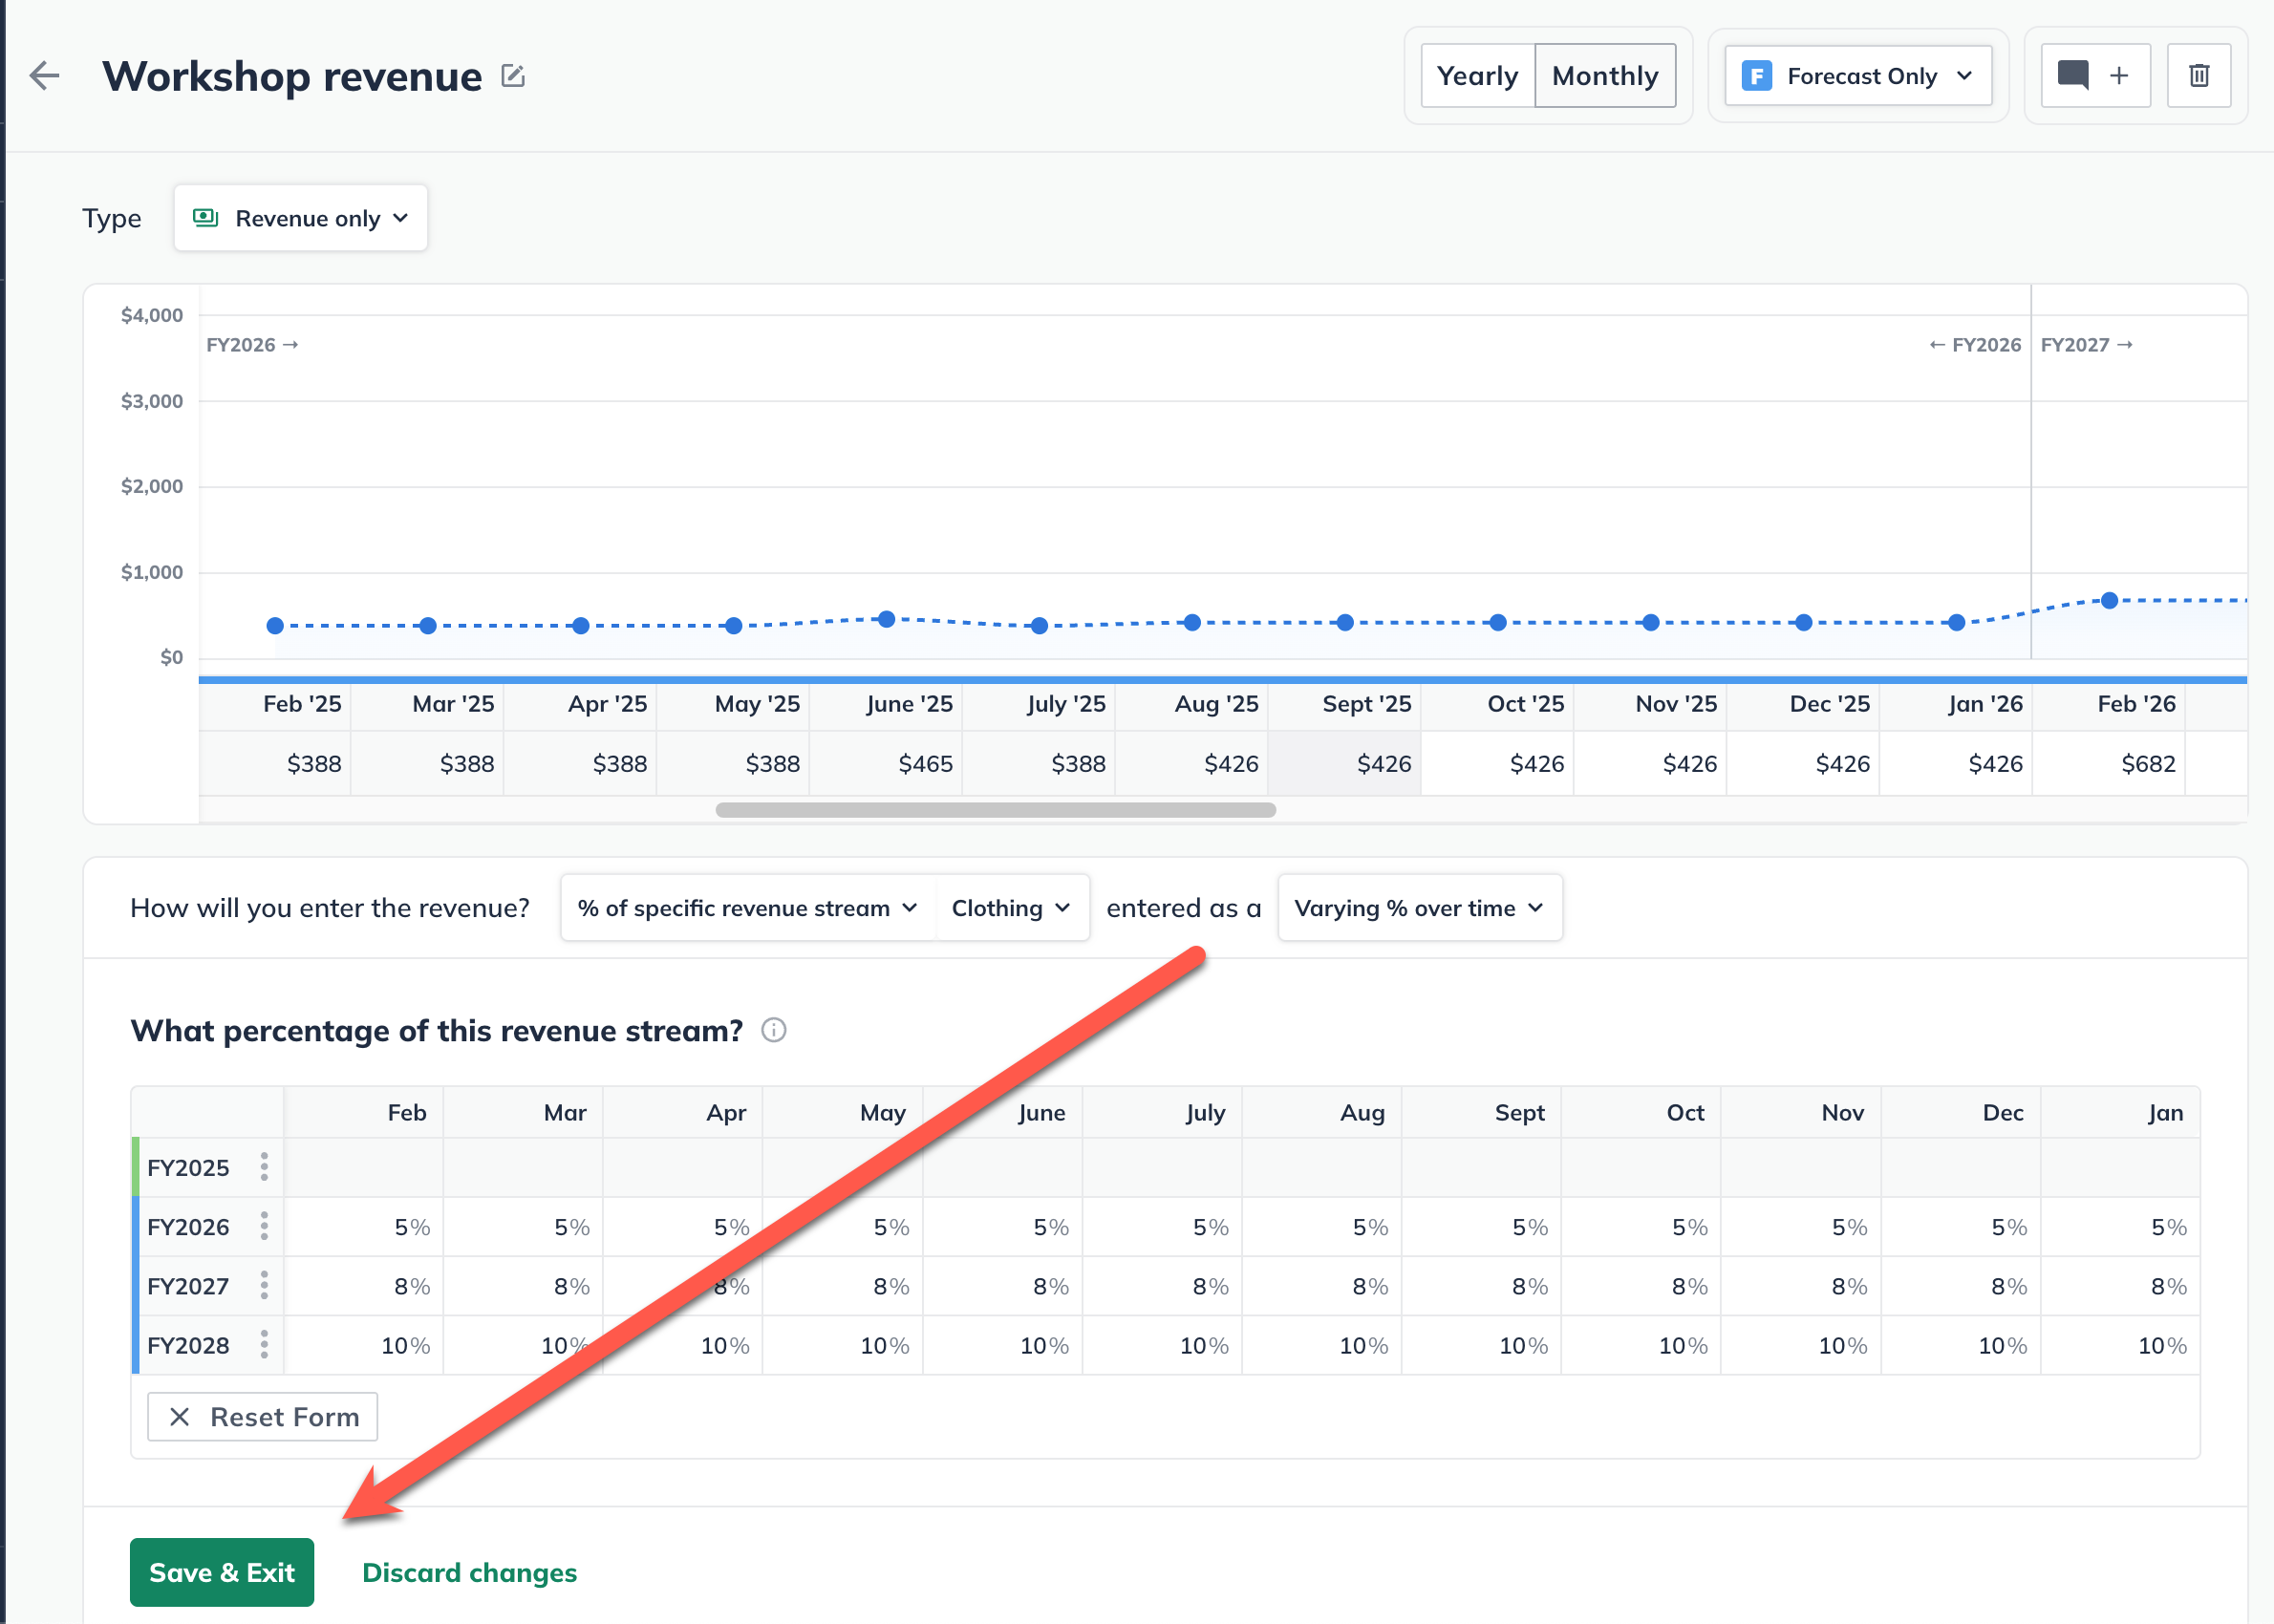
Click Save & Exit in the bottom-left of your LivePlan window to return to the Revenue Overview:

Revenue based upon a % of another revenue stream
Revenue-only includes scenarios when some of your revenue scales in direct proportion to another revenue stream.
In the Forecast Overview, select Revenue:
Click the Add revenue stream
Enter a name for your revenue only stream, then for type select Revenue only :
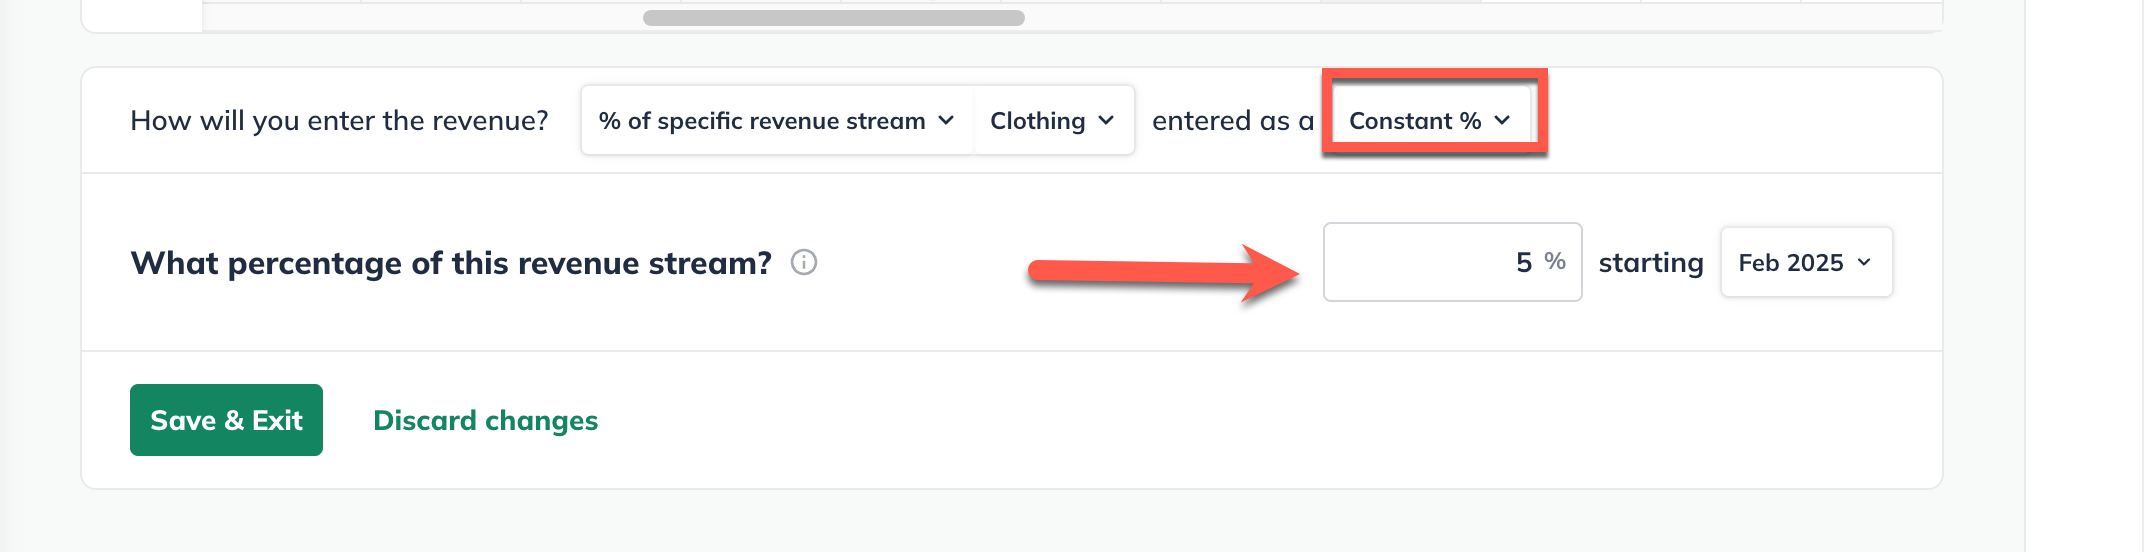
For How will you enter the revenue? select percentage of a revenue stream option and then select the revenue stream:
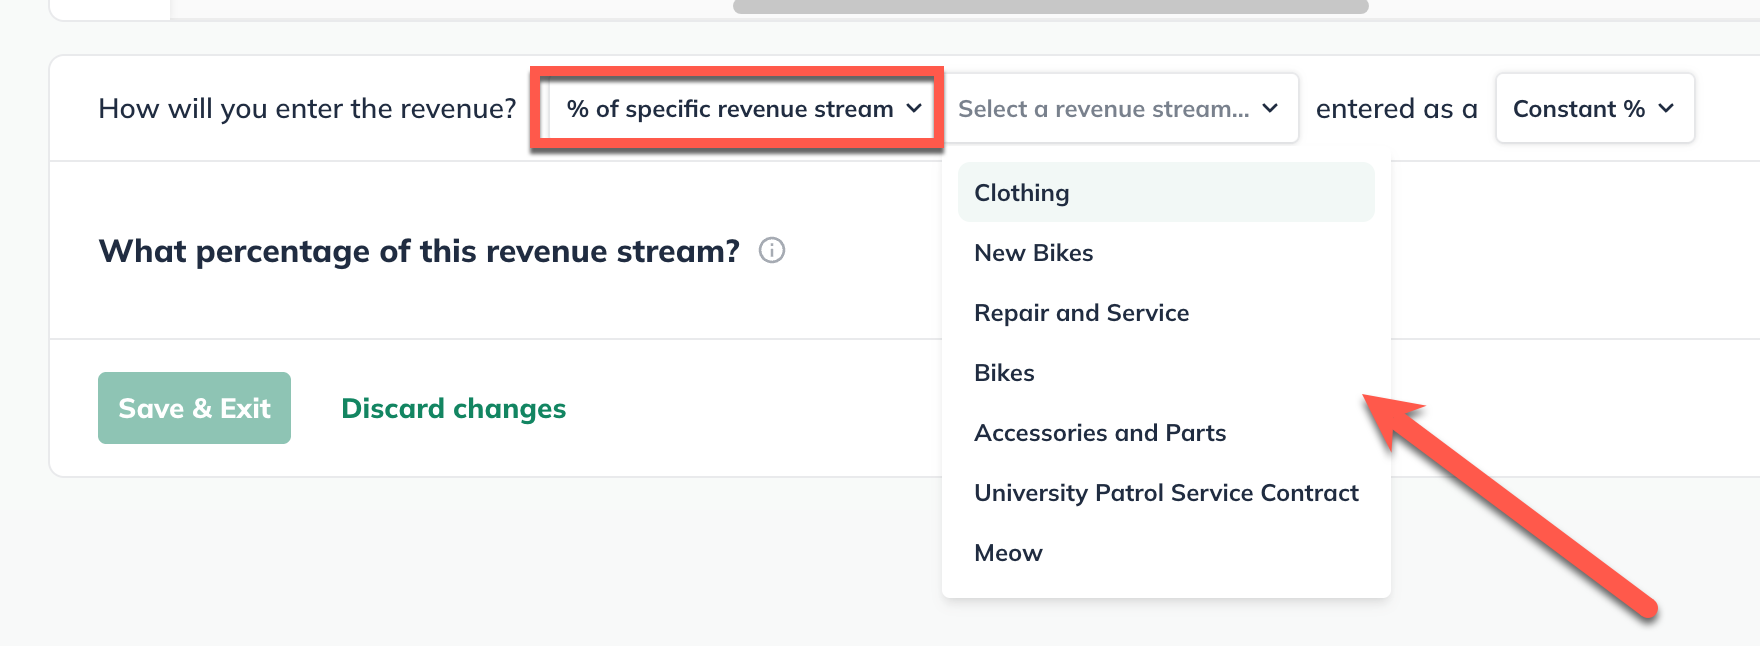
Select Constant and then set the percentage and when the revenue stream starts:
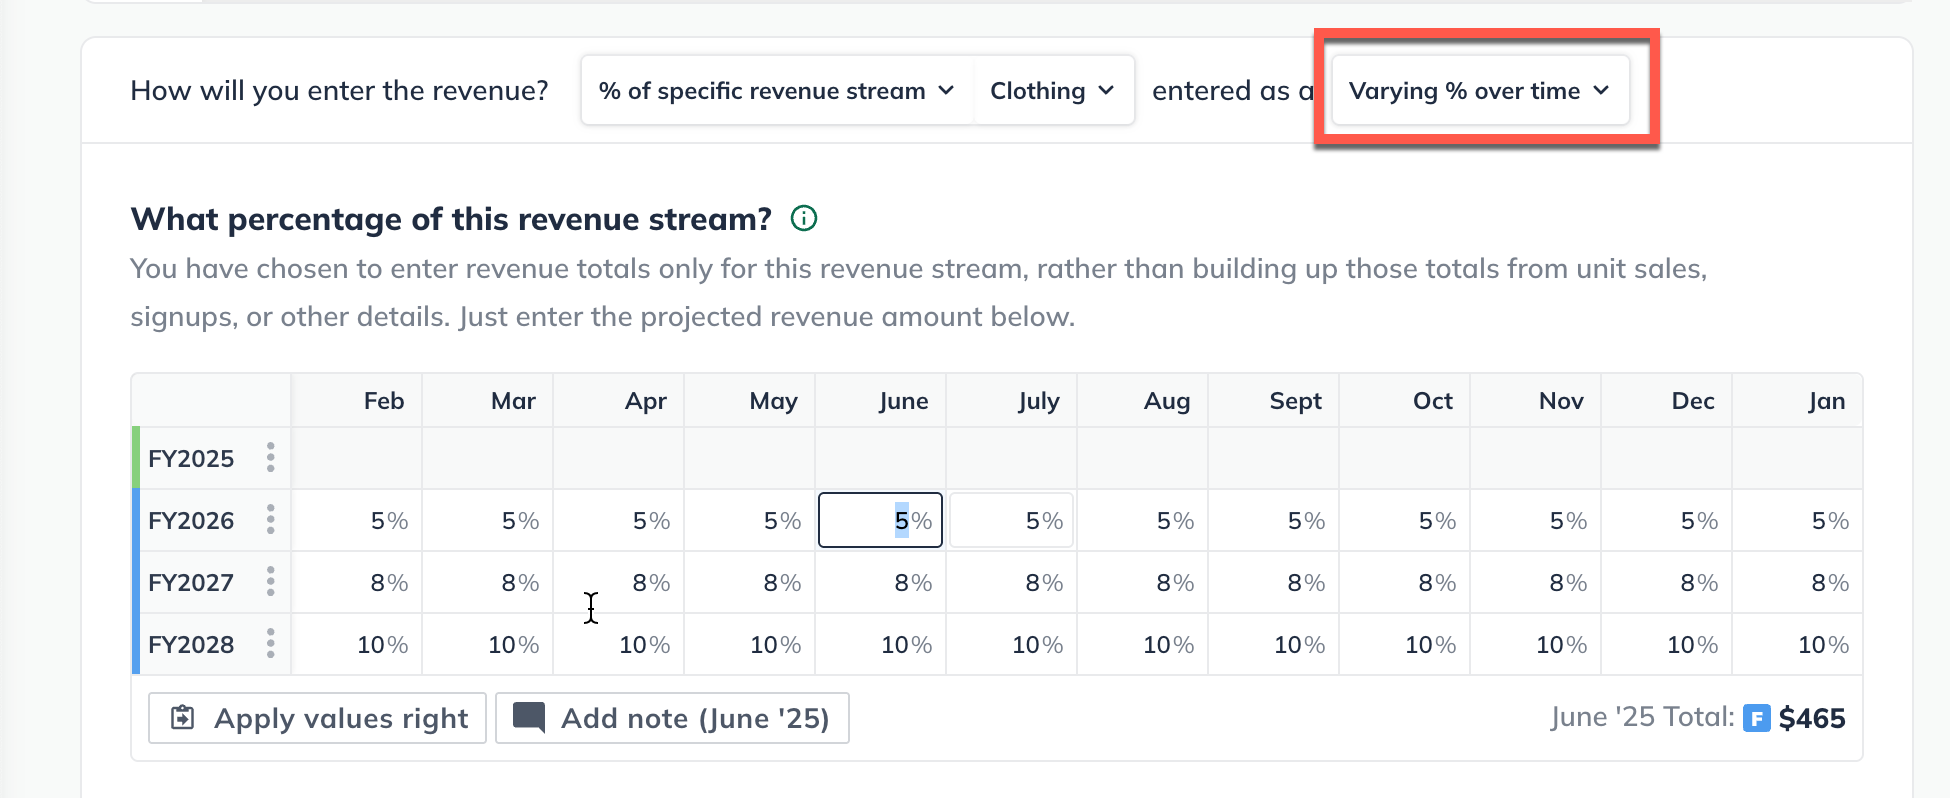
Or select Varying amounts over time for the percentage:
Click Save & Exit
To edit an existing revenue stream:
To edit an item that you have already entered in the forecast (such as a revenue stream, expense, or asset), first navigate to the Forecast Overview. Next, click on the section that contains the entry you wish to edit.
Find the table of your entries at the bottom of the page, then click on the green title of the item you want to update.

You can edit any part of your entry. Click Save & Exit when you're done:
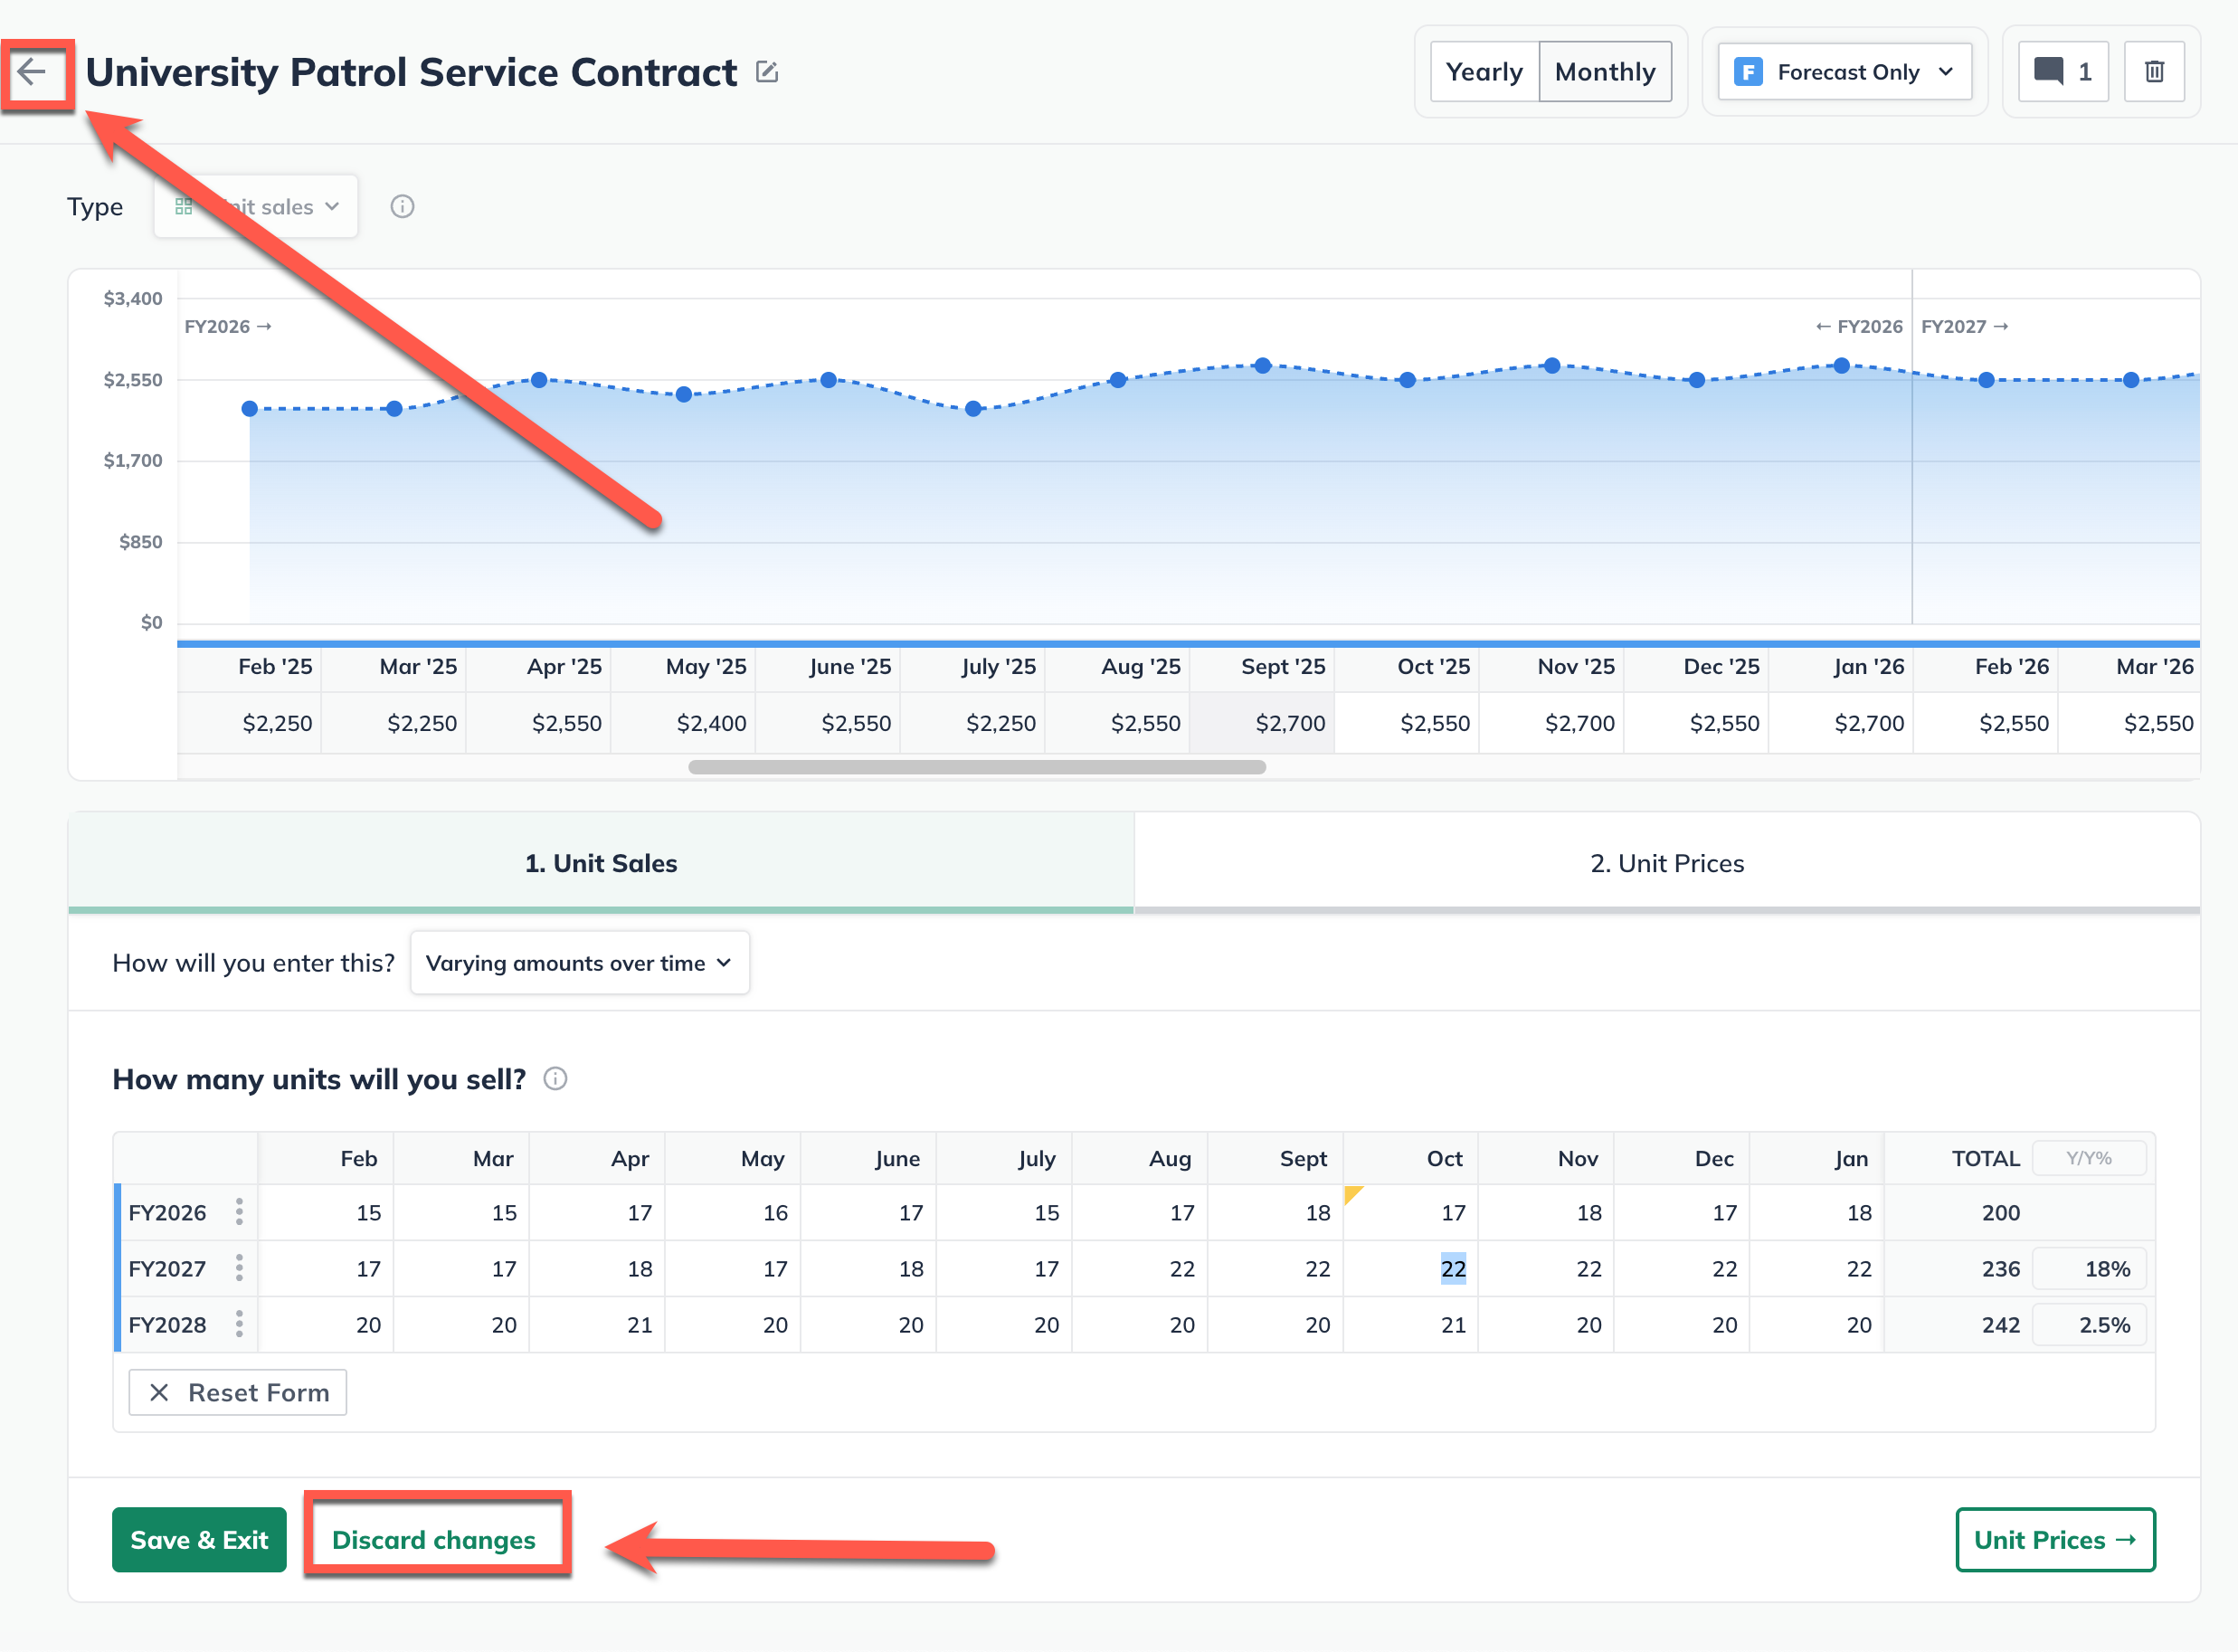
To discard changes, click on the back arrow in the upper-left corner of the editor window or click on Discard changes at the bottom:
Note: In certain tables, such as the Personnel and Financing tables, you may need to click the triangle icons to expand the lines so you can access the editable entries, as shown below:
For more details, see How do I edit or delete forecast entries?
To delete a revenue stream:
Forecast items can be deleted from two different places: from the forecast table or list, or from within the editor overlay when viewing a single forecast item.
In the forecast tables:
Click on the action menu (three vertical dots) to the right of the forecast item and select Delete:
In the forecast editors:
Click the More actions dropdown near the top-right of the forecast editor and select Delete:

Note: If a direct cost has been linked to this revenue stream, it will be automatically removed upon the deletion of the revenue stream.
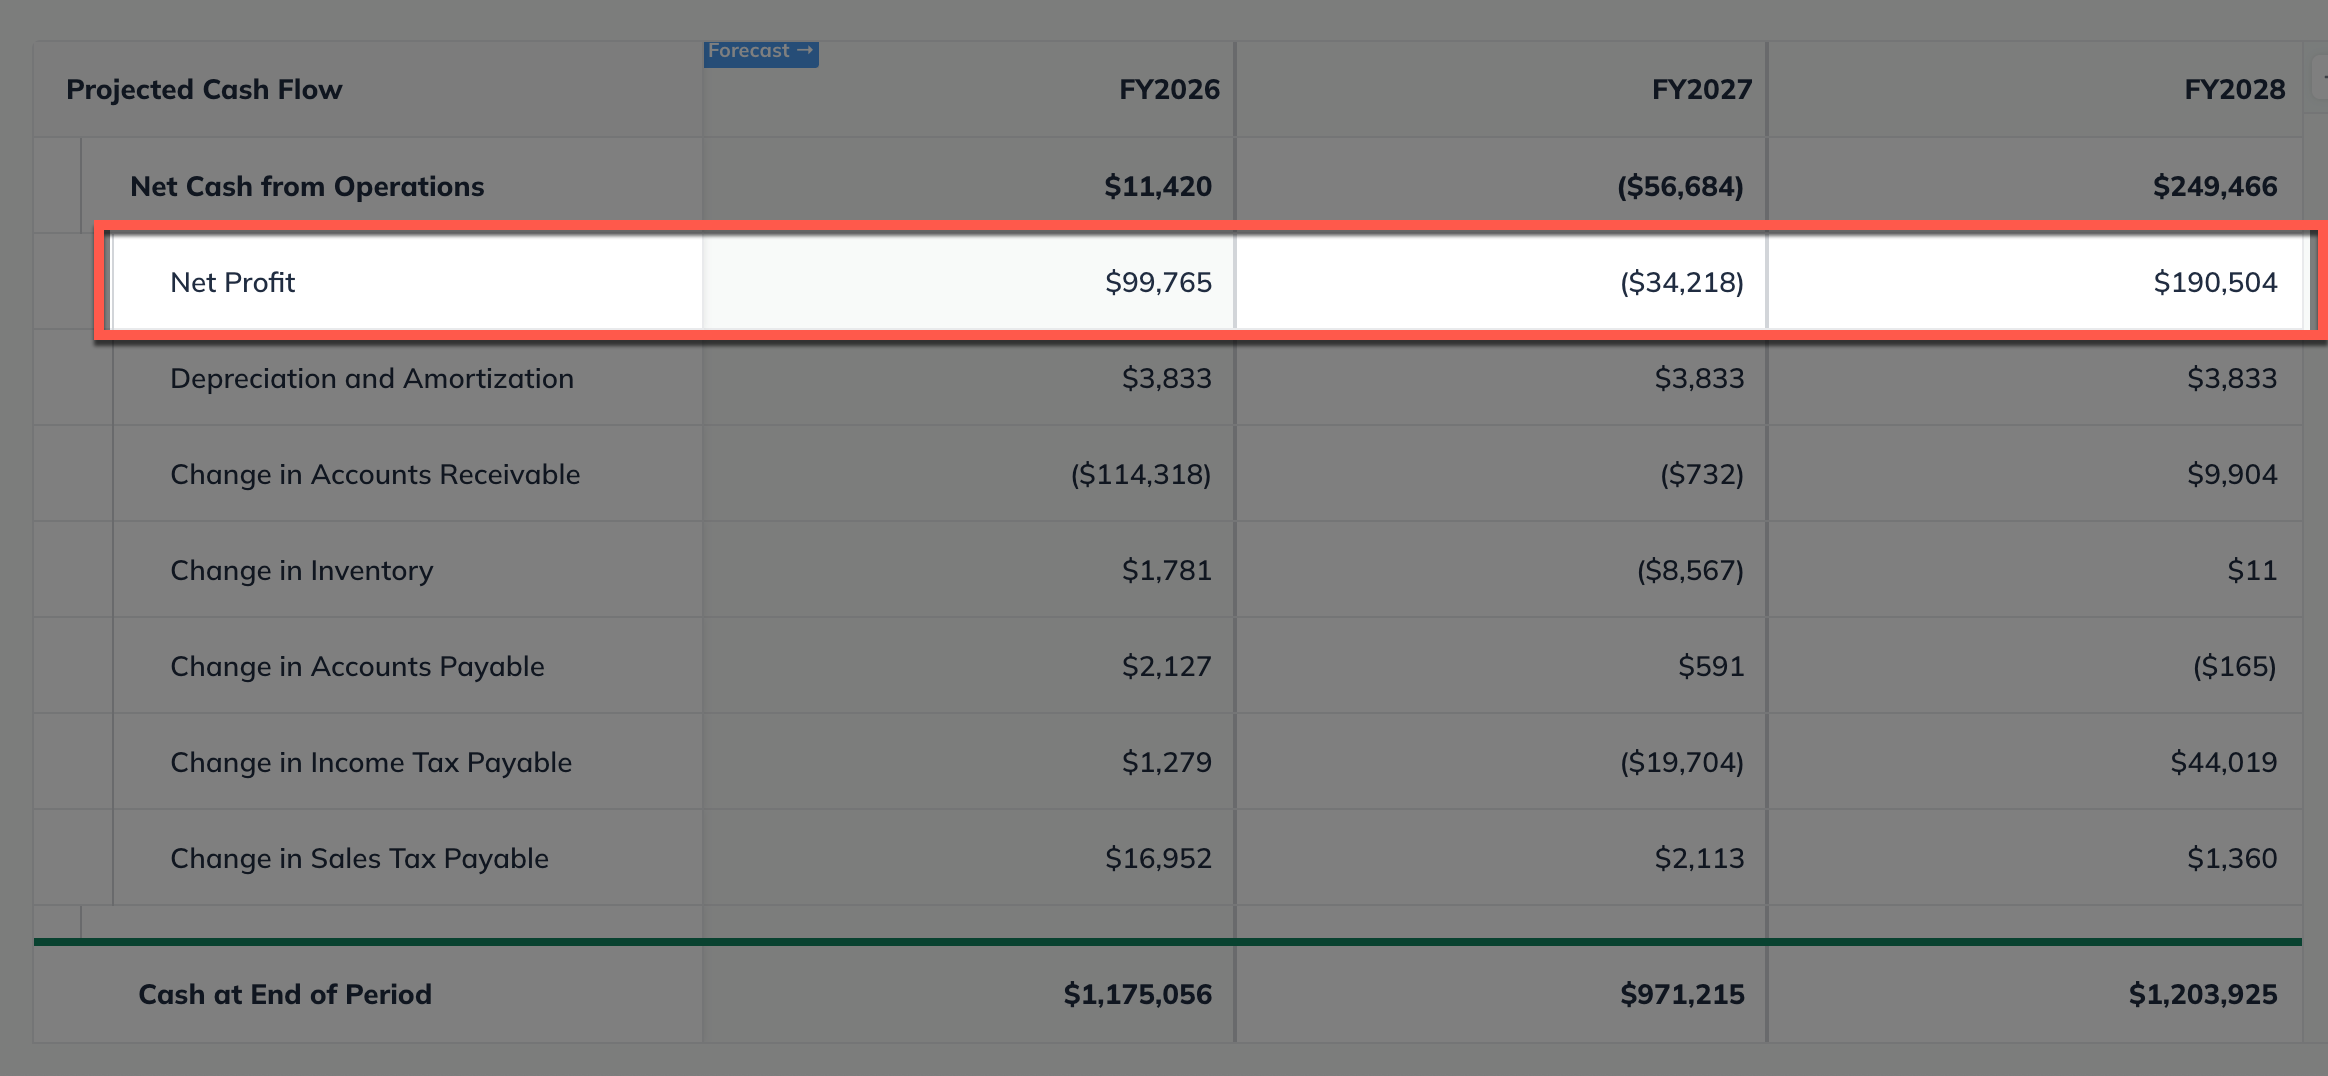
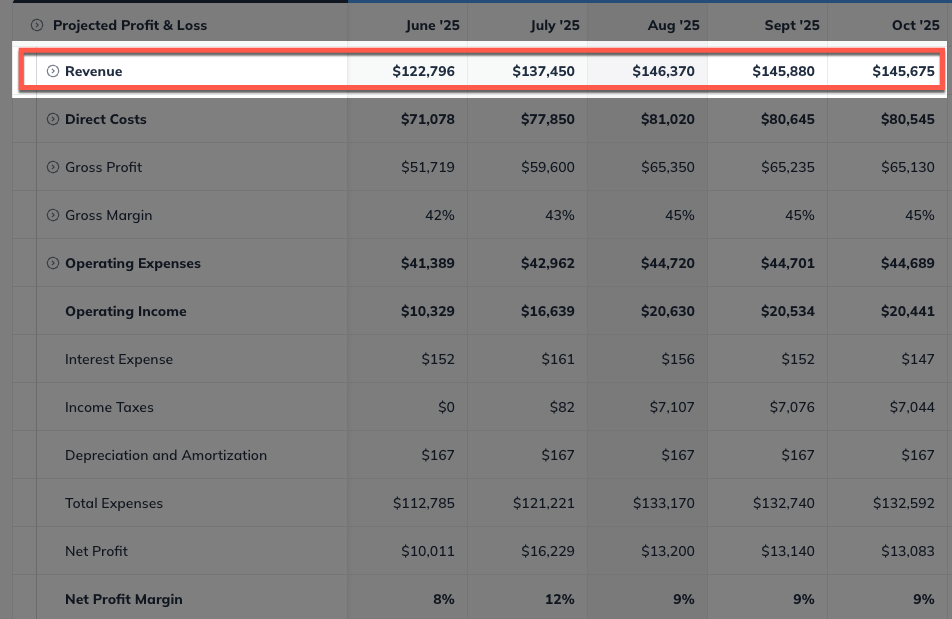
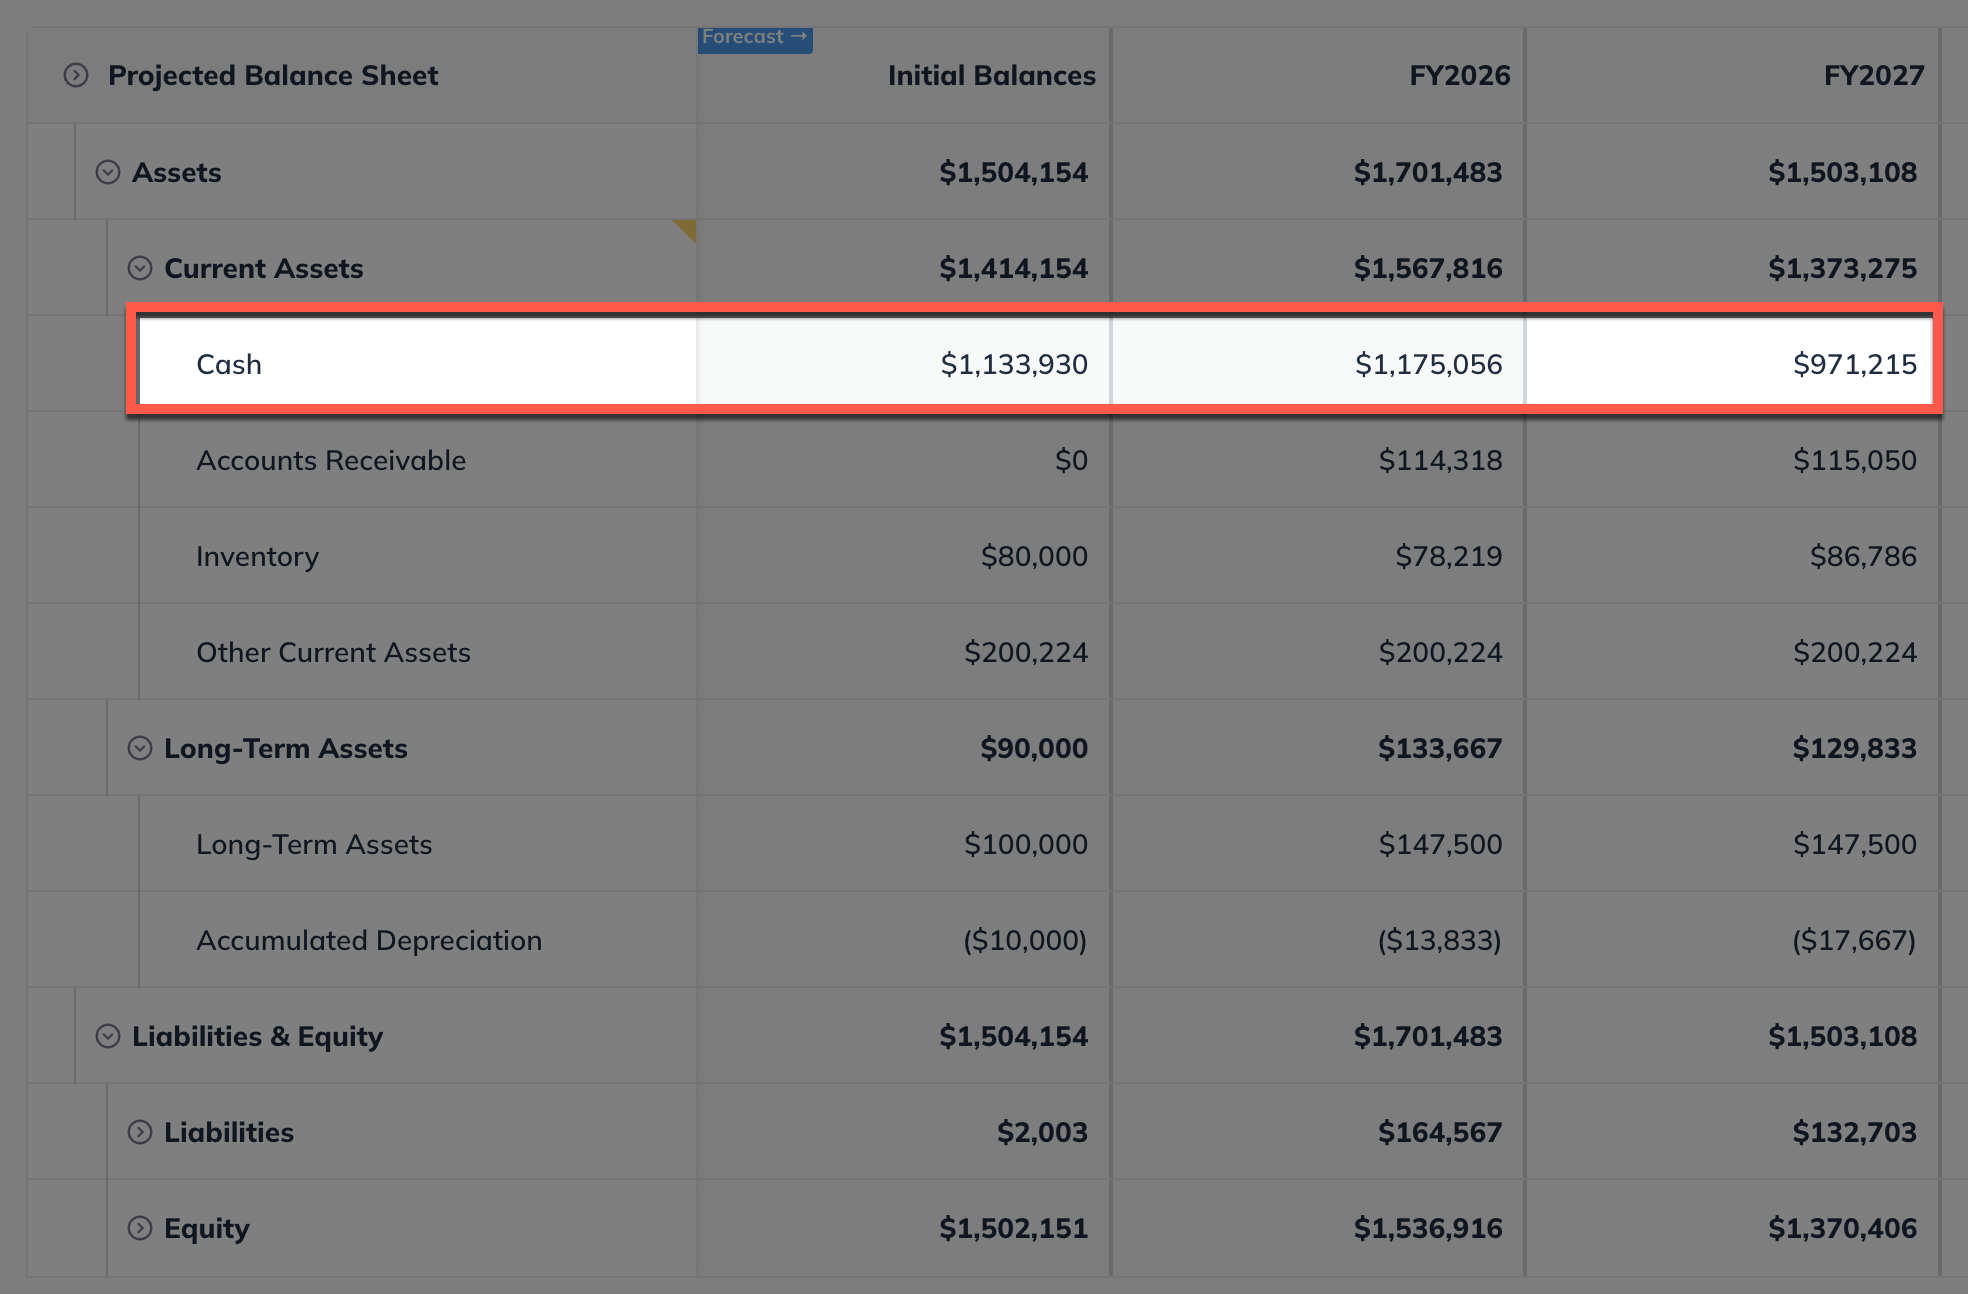
Where does this entry appear in the financial statements?
Your revenue streams will be used to calculate the highlighted lines in the Profit & Loss, Balance Sheet, and Cash Flow table shown below:
Projected Profit & Loss
Projected Balance Sheet
Projected Cash Flow