Forecasting Setup And Management
How do I edit, delete, and copy forecast entries?
In LivePlan, each forecast item can be modified as needed. This means you can easily update any of the data, delete entries that are no longer relevant, or make a copy of an existing entry to use as a template for new projections.
Editing a forecast entry
To edit an item that you have already entered in the forecast (such as a revenue stream, expense, or asset), first navigate to the Forecast Overview. Next, click on the section that contains the entry you wish to edit.

Find the table of your entries at the bottom of the page, then click on the green title of the item you want to update.

Click Save & Exit when you're finished editing any part of the forecast entry:

To discard changes, click Discard changes in the lower-left corner of the editor window:

Note: In certain tables, such as the Personnel and Financing tables, you may need to click the triangle icons to expand the lines so you can access the editable entries, as shown below:
Inline editing in the forecast tables
Line entries that have been entered using the varying amounts over time can also be edited more directly in the Forecast’s Table View using inline editing.
To use the inline editing you’ll need to expand your forecast entries so that you can access the editable portions of the entry. When you hover your mouse over the figures you’ll see a smaller inner box highlight the figures that can be changed.
Please note that you’ll only be able to inline edit the values that have been input using the varying amounts over time entry method.
Deleting a forecast entry
Forecast items can be deleted from two different places: from the forecast table or list, or from within the editor overlay when viewing a single forecast item.
In the forecast: Click on the action menu (three vertical dots) to the right of the forecast item and select Delete:
In the editor: Click the More actions dropdown near the top-right of the forecast editor and select Delete:

Copying a forecast entry
You can make a copy of any forecast item that you've already created. LivePlan will take all settings and figures entered in the original item and apply them to the new forecast item.
Note: Forecast items can only be copied from the same category as the original. For example, copies of a revenue item will always be copied to the revenue section of the forecast.
To copy an item you have already entered in the forecast (such as a revenue stream, expense, or asset.) navigate to the Forecast Overview and click on the section that contains the entry you wish to copy.
Find the table of your entries and click on the actions menu (three vertical dots) next to the forecast item you wish to copy.

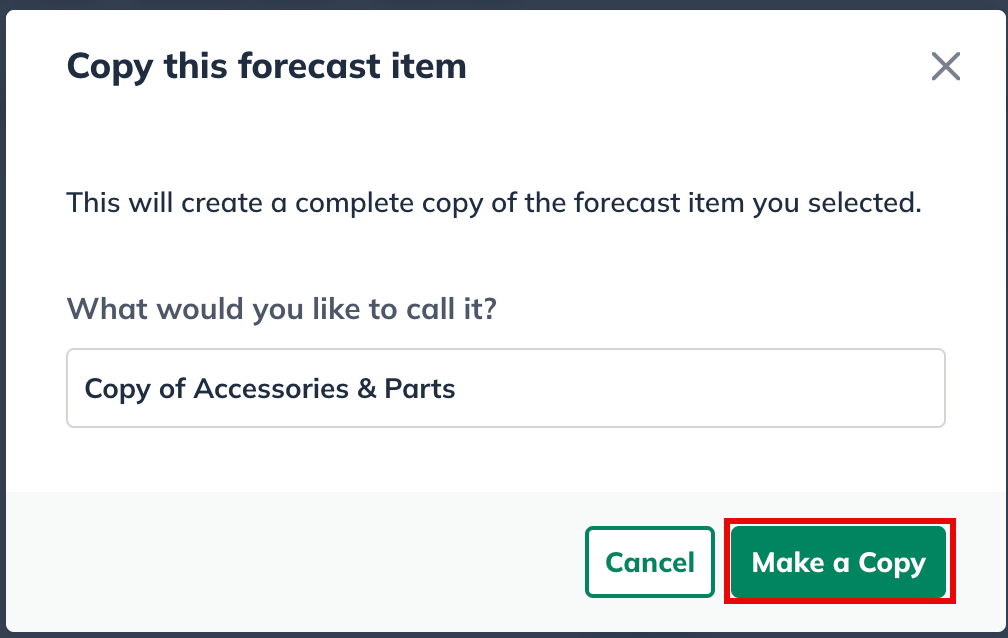
Select Duplicate from the menu:

Name the duplicate forecast item and click Make a copy:
Note: Duplicated forecast items will retain all settings and forecast figures of the original.
Grouping items in the forecast
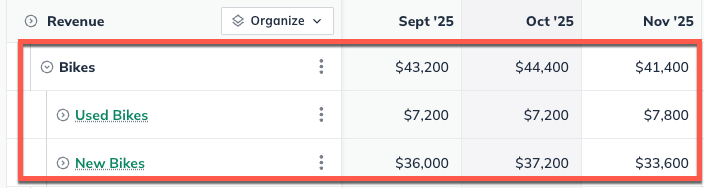
In your financial tables, you can create groups that include one or more individual items. Each group is displayed as a parent entry, with the total for the group shown at the parent level and the corresponding subtotals for each item listed beneath it in a nested structure.
Navigate to the Forecast Overview and click on the section that contains the entries you would like to edit.
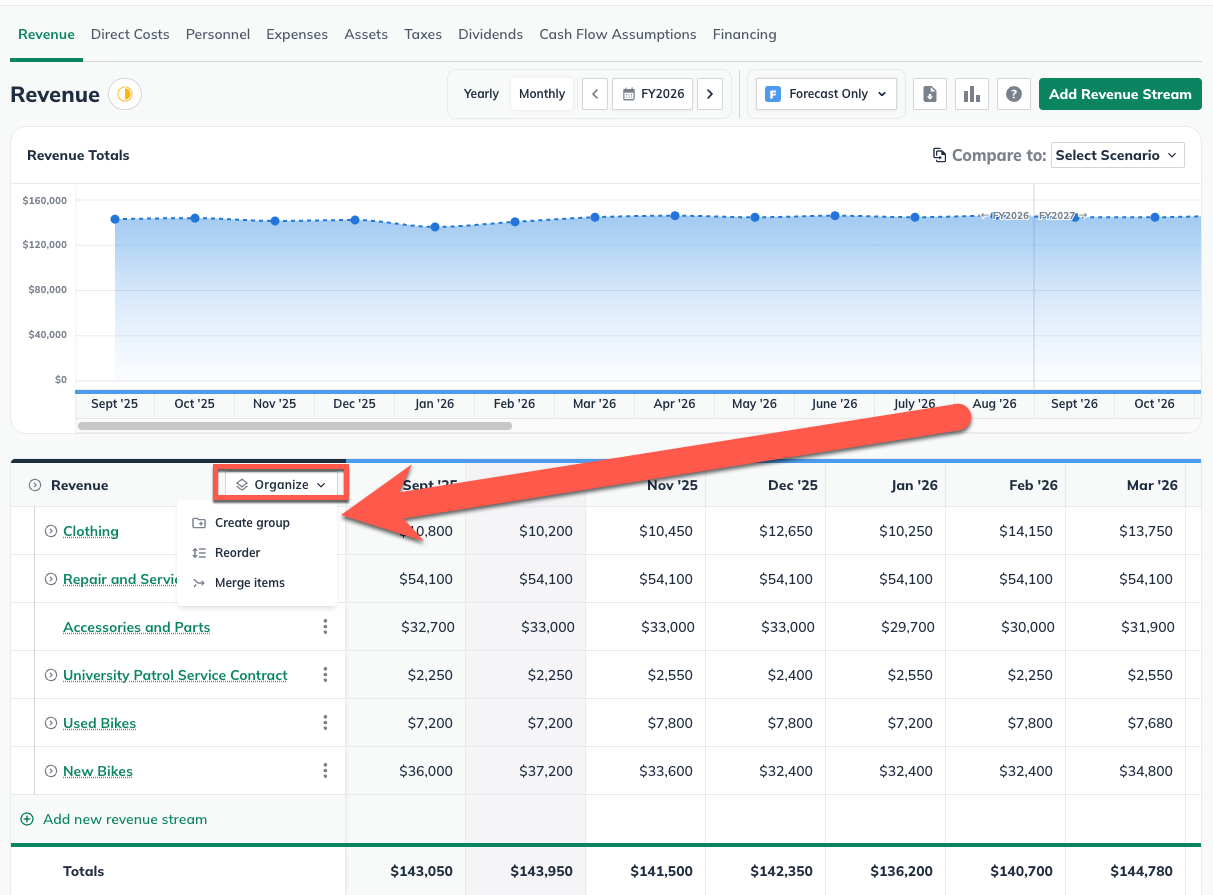
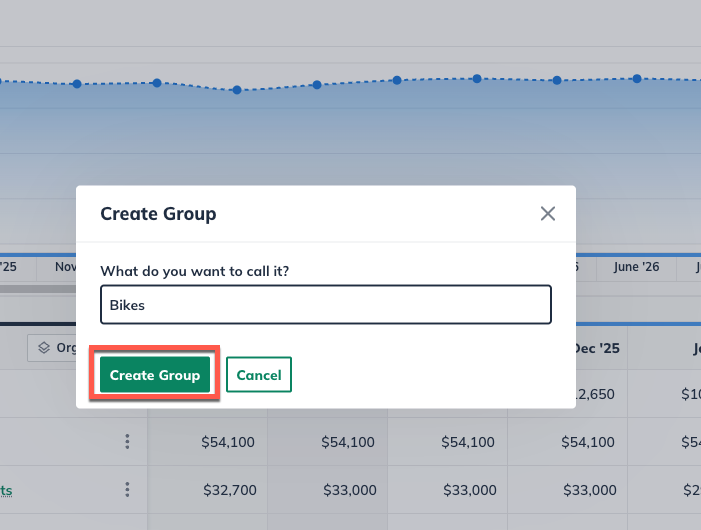
To create a group, select Organize at the top left of the financial table and select Create Group from the dropdown.
In the pop up, create a name for the group and select Create Group.
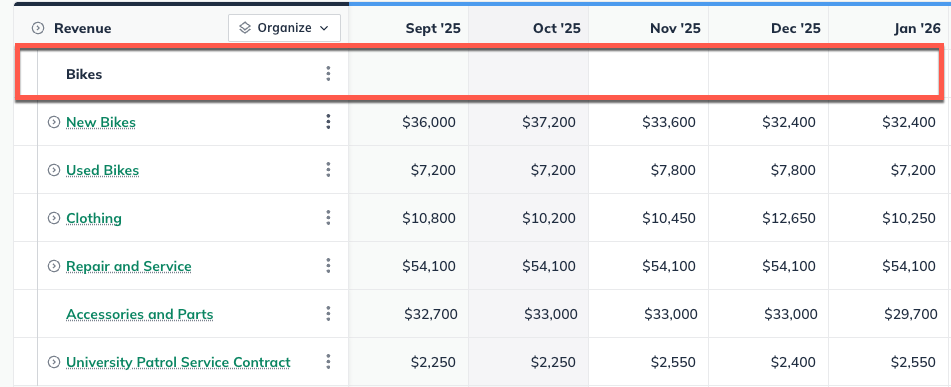
Once a group has been created, the new empty group will be represented by a non-clickable entry in the financial table without accompanying financial figures in the table.
New forecast entries can be added to a group by clicking on the actions menu (three vertical dots) next to the group and selecting the option to add the type of forecast item appropriate to the financial table you are working in.
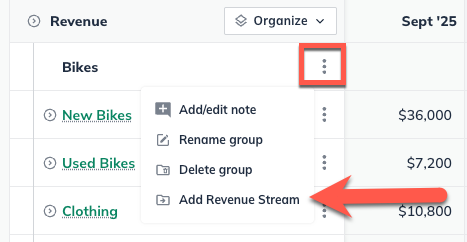
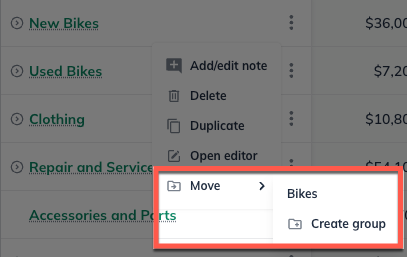
Existing forecast entries can be moved to a group by clicking on the actions menu (three vertical dots) next to the forecast item you wish to add to the group.
After clicking the actions menu, select Move, and then either select the group you would like to move it to, or Create Group to start a new group that starts with that forecast entry.
Once items have been added to a forecast group, the parent group row will reflect the sum of the grouped entries, while the individual entries will be displayed in indented rows below
Removing forecast items from groups
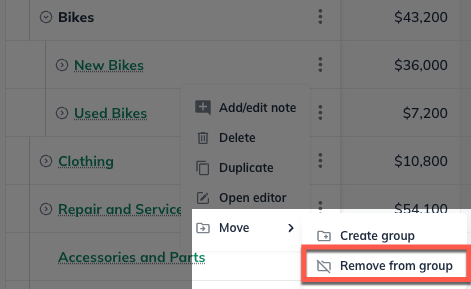
Forecast entries can be removed from a group by clicking on the actions menu (three vertical dots) next to the forecast item you wish to remove from the group.
Select Move and then Remove from group to return a forecast entry to an ungrouped state.
Forecast groups can be broken up into their individual parts in a single action by clicking on the actions menu (three vertical dots) next to the forecast group you wish to break up.
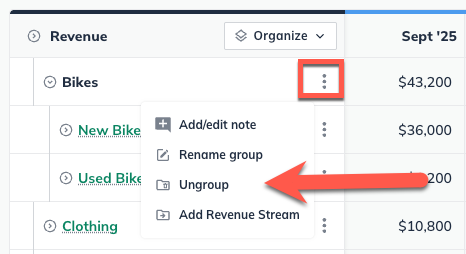
Select Ungroup and the grouped entries will return to being ungrouped individual entries.
Merging items in the forecast
You can merge two or more items together that you have already entered in the forecast.
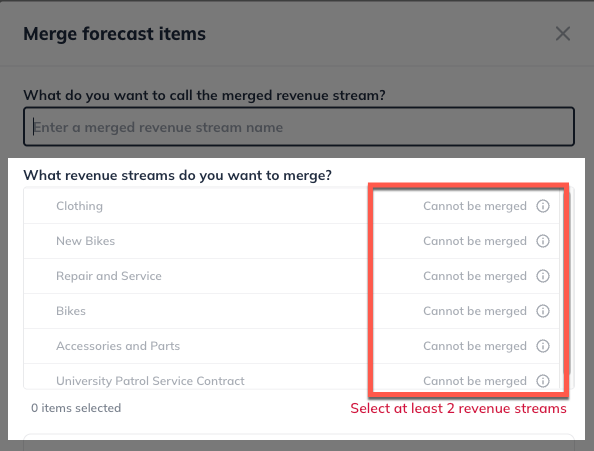
Note: Only revenue, direct costs, and expense entires can be merged with other entries of the same type.
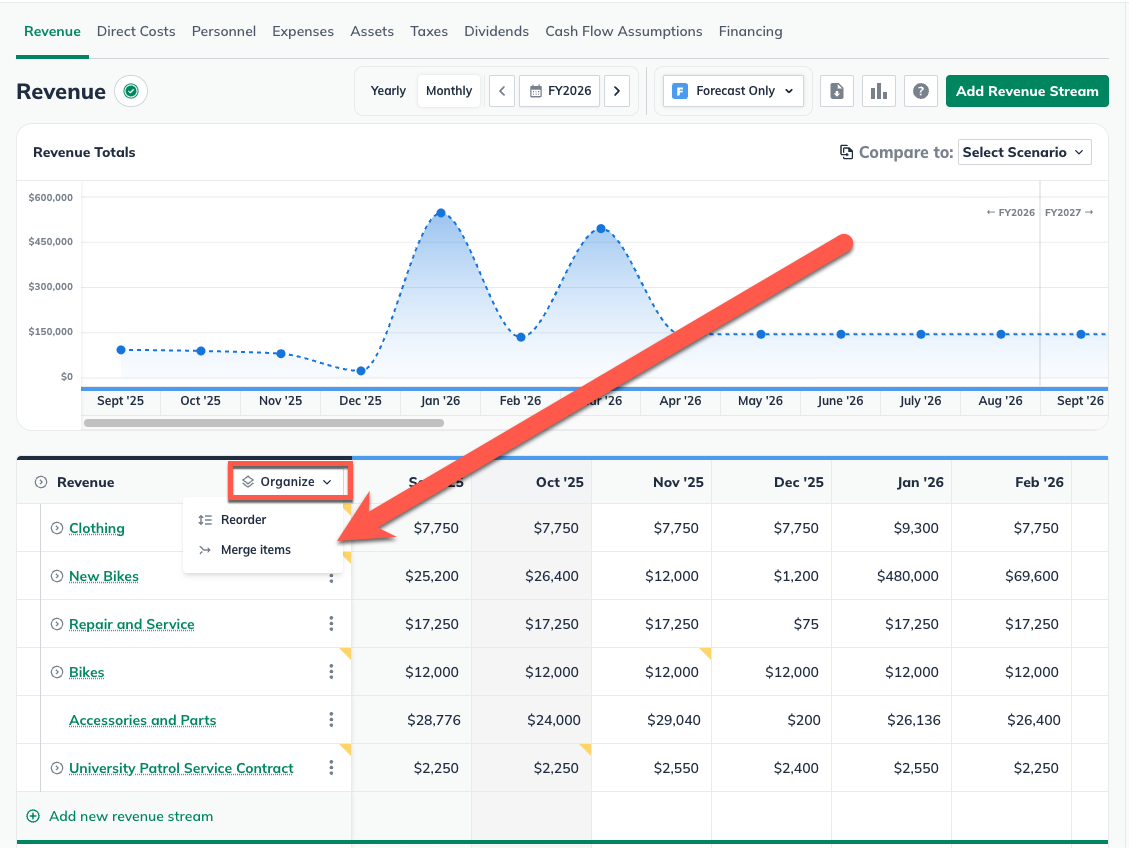
To merge forecast entries, navigate to the Forecast Overview and click on the section that contains the entries you would like to merge.
Find the table of your entries and click on the organize menu at the top left of the table and select Merge Items from the dropdown.
In the Merge Item pop up window, you will see options for merging different forecast items in that table.
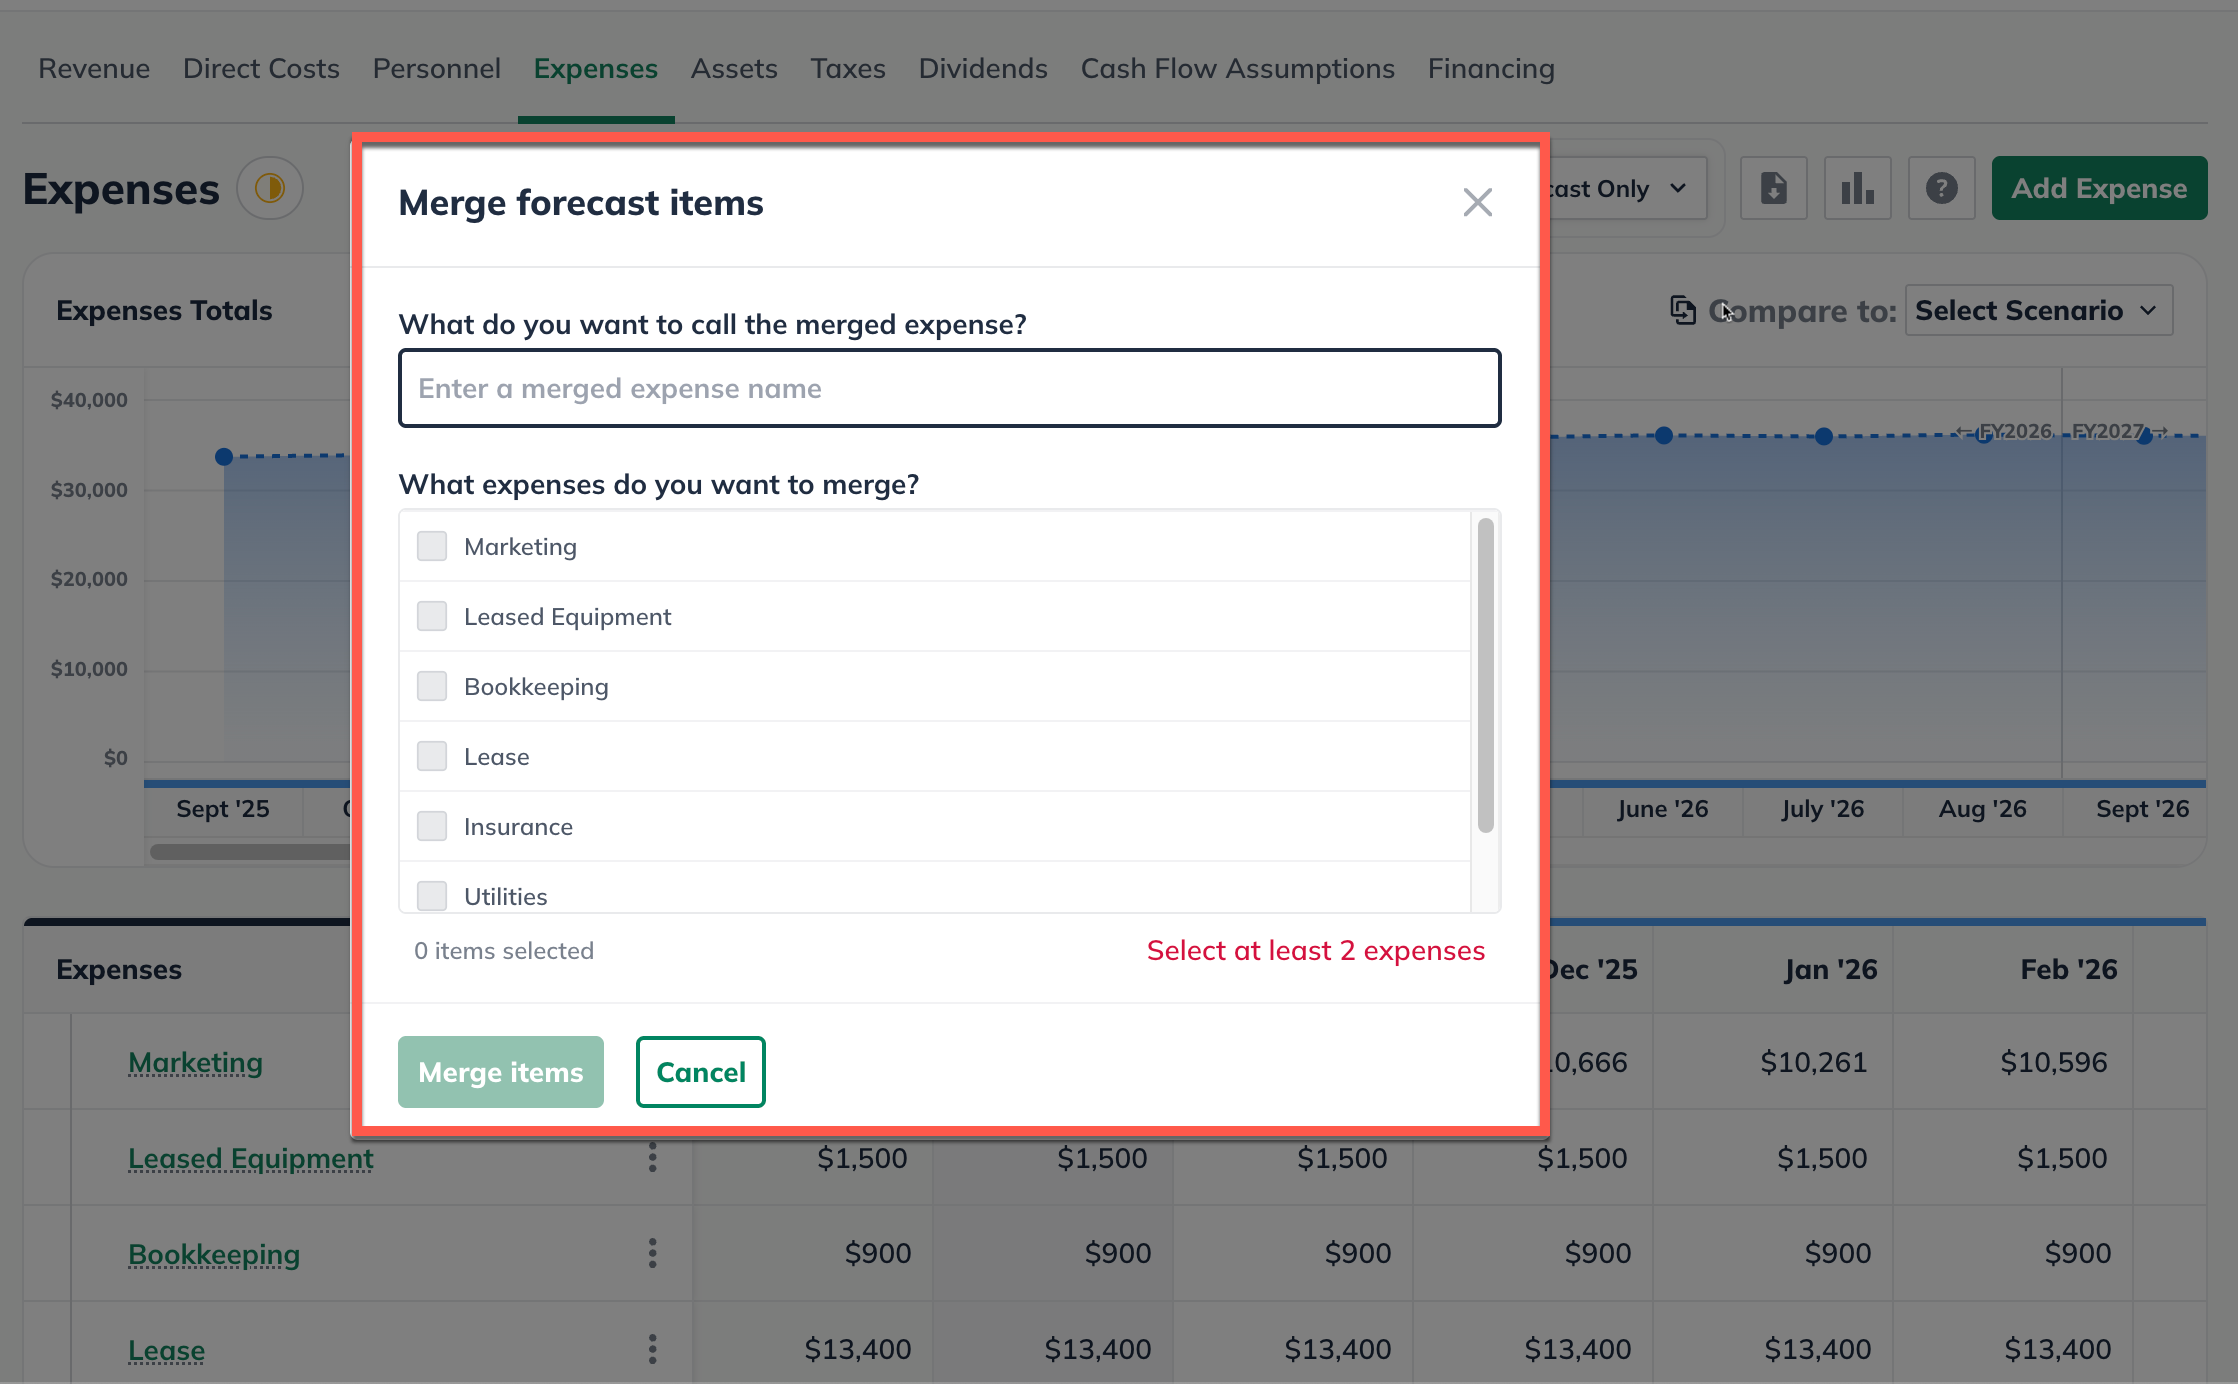
Create a name for the new combined entry and select at least 2 entries to merge together from the list.
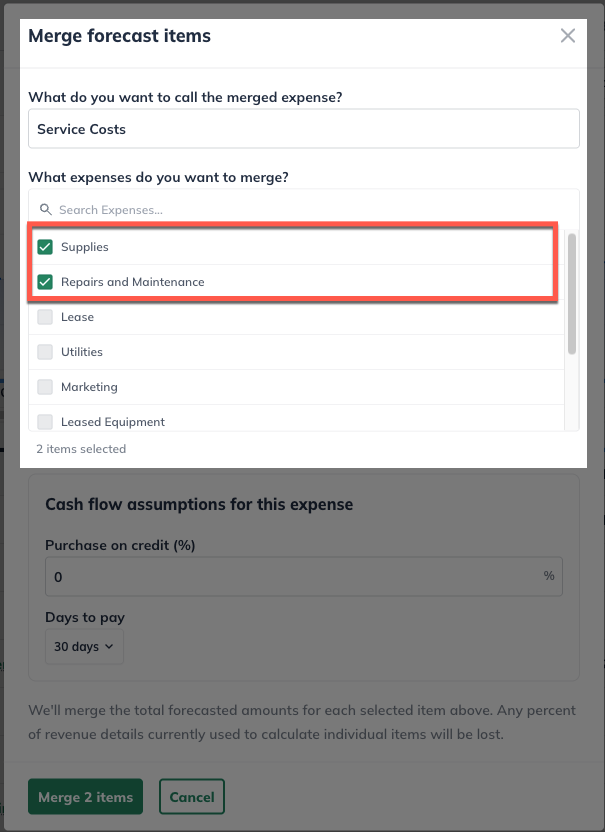
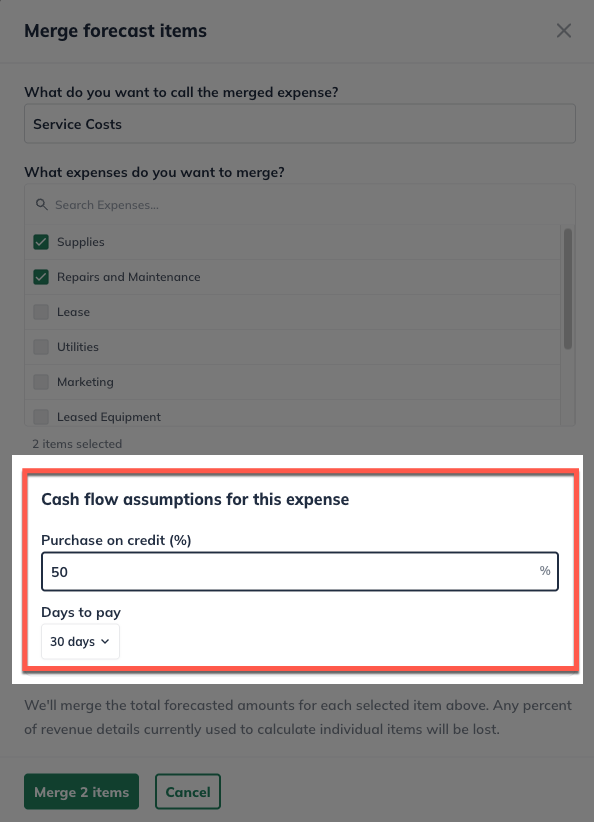
If these forecast entries include Cash flow assumptions such as Accounts Receivable or Accounts Payable, you can set up those assumptions for this merged forecast entry.
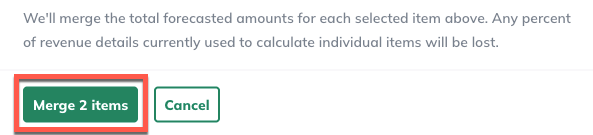
Select Merge items to finish merging your forecast entries.
Returning to the forecast table, you will see the new, merged forecast item in the table.
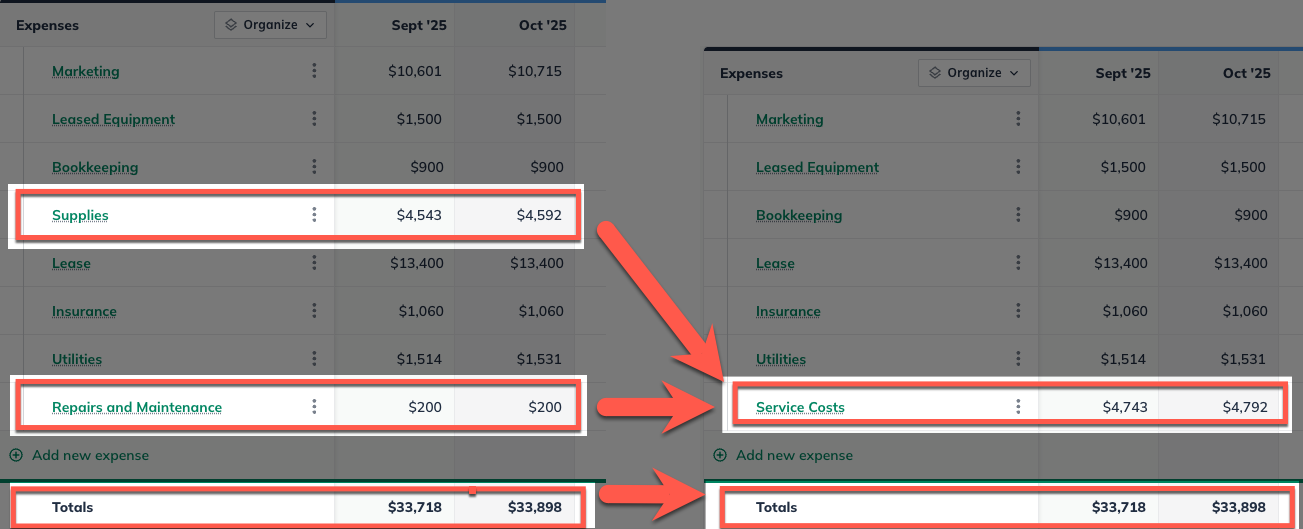
The new merged forecast item should reflect the combined figures of the previous entries without changing your totals in the forecast table.
Note: Revenue items with dependent Direct Cost or Expense entries cannot be merged. To merge a revenue entry with a dependent direct cost or Expense, you must unlink that cost first.
You can learn more about dependent direct cost entries in the following guide.