Downloading And Printing
Adding a table of contents
You can choose to add a Table of Contents at the beginning of your plan document. Keep in mind that once you add the Table of Contents, you can preview it using the Print Preview option before exporting your plan.
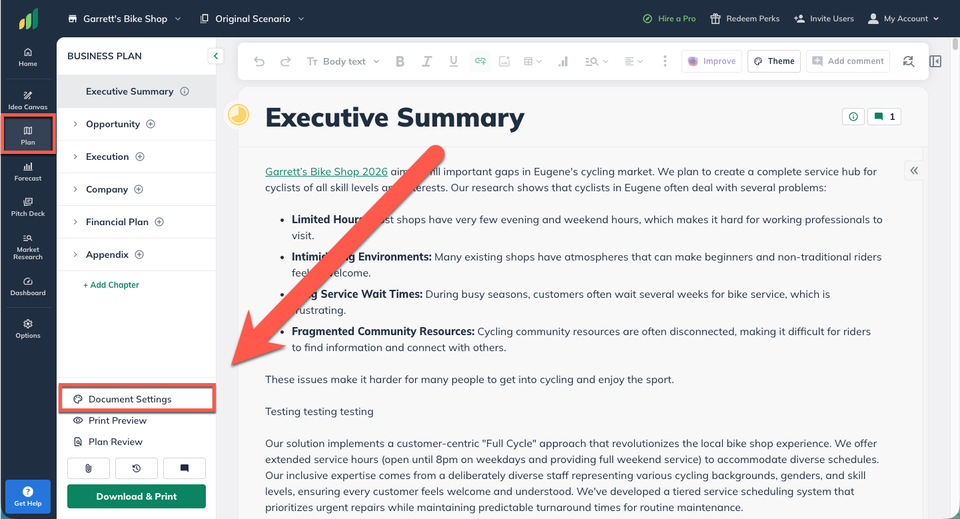
Below the Plan section, click Download & Print or Document Settings:
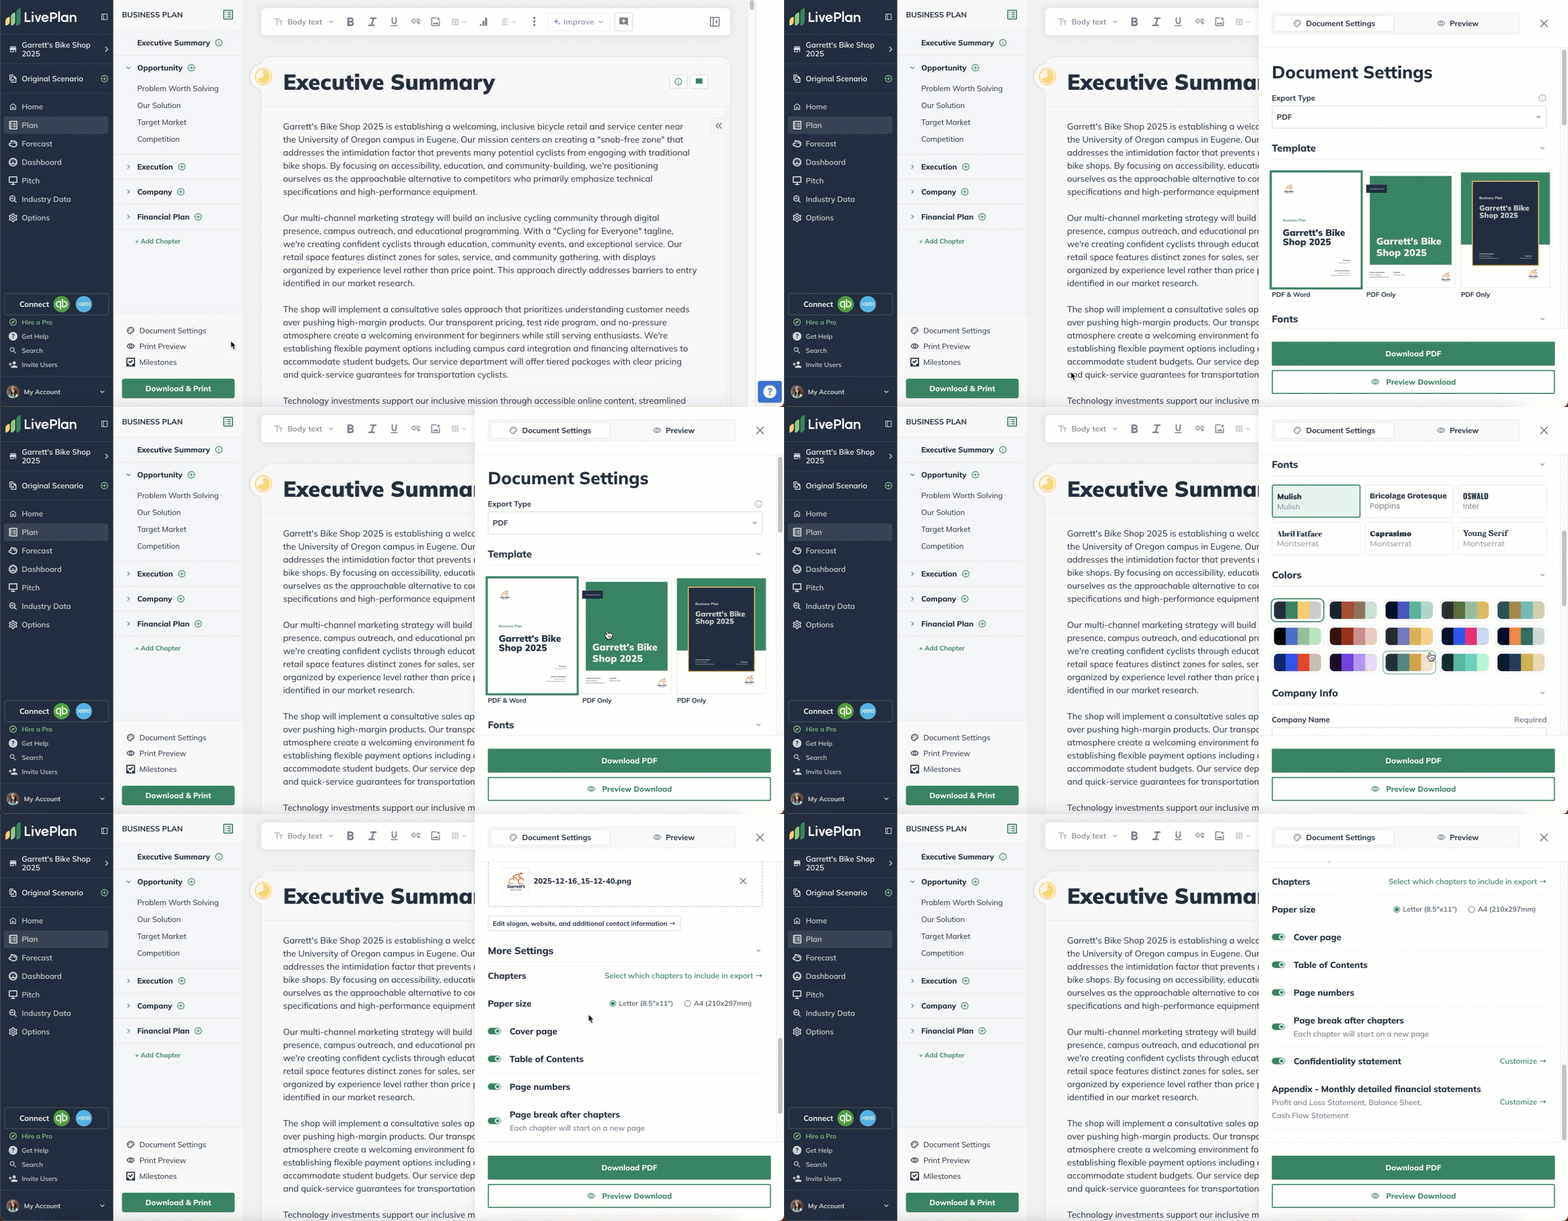
Selecting either Download & Print or Document Settings will cause the Document Settings screen to slide out from the right:
Scroll down until you find the Table of Contents toggle under More Settings:
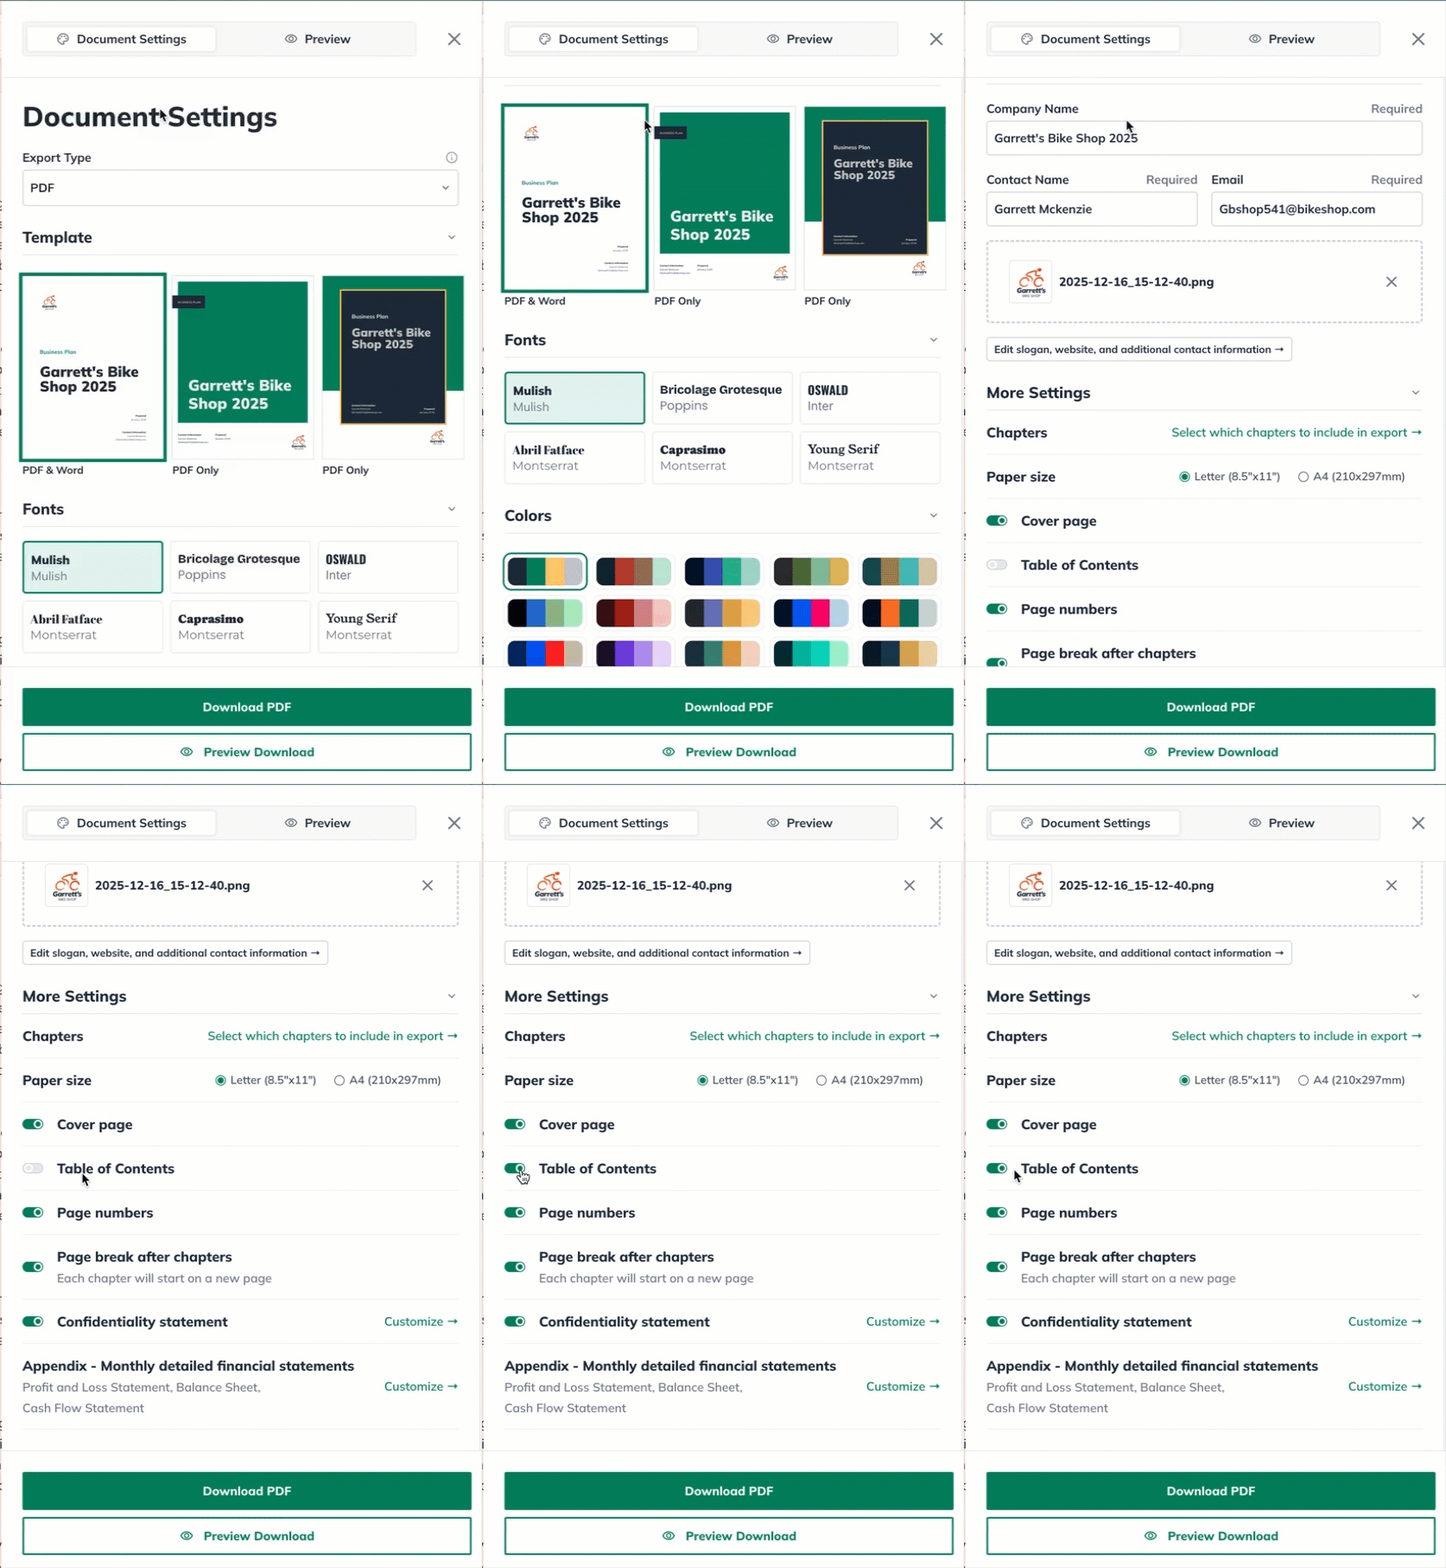
After you toggle on the Table of Contents, you can click Print Preview—either in the lower-left corner or in the top-right of the Document Settings slide-out—to see how it will display in the export.
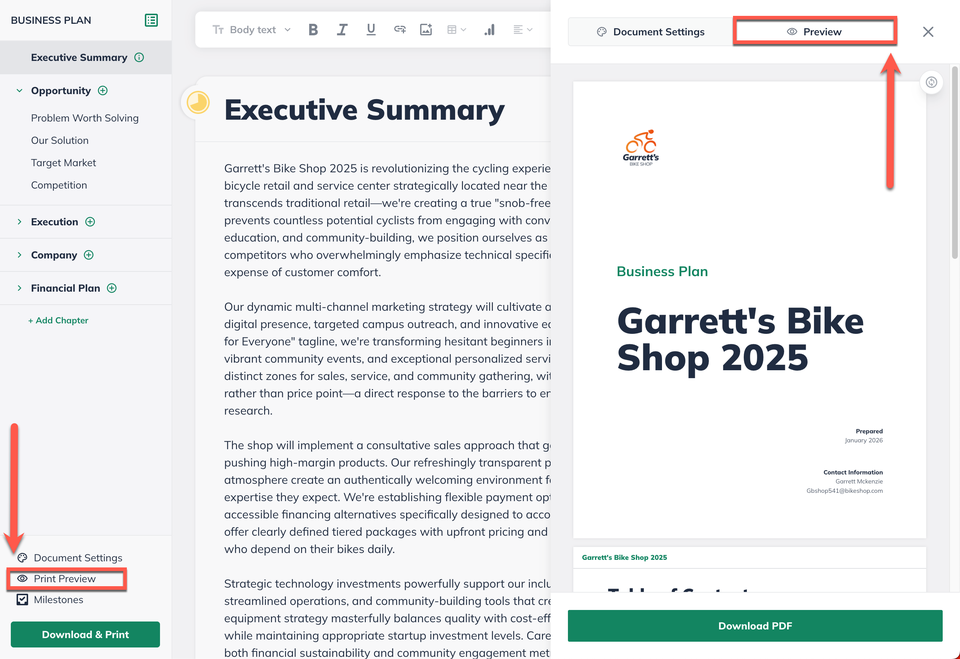
You can then scroll to the section of the Print Preview to check out how your Table of Contents will display in the export:
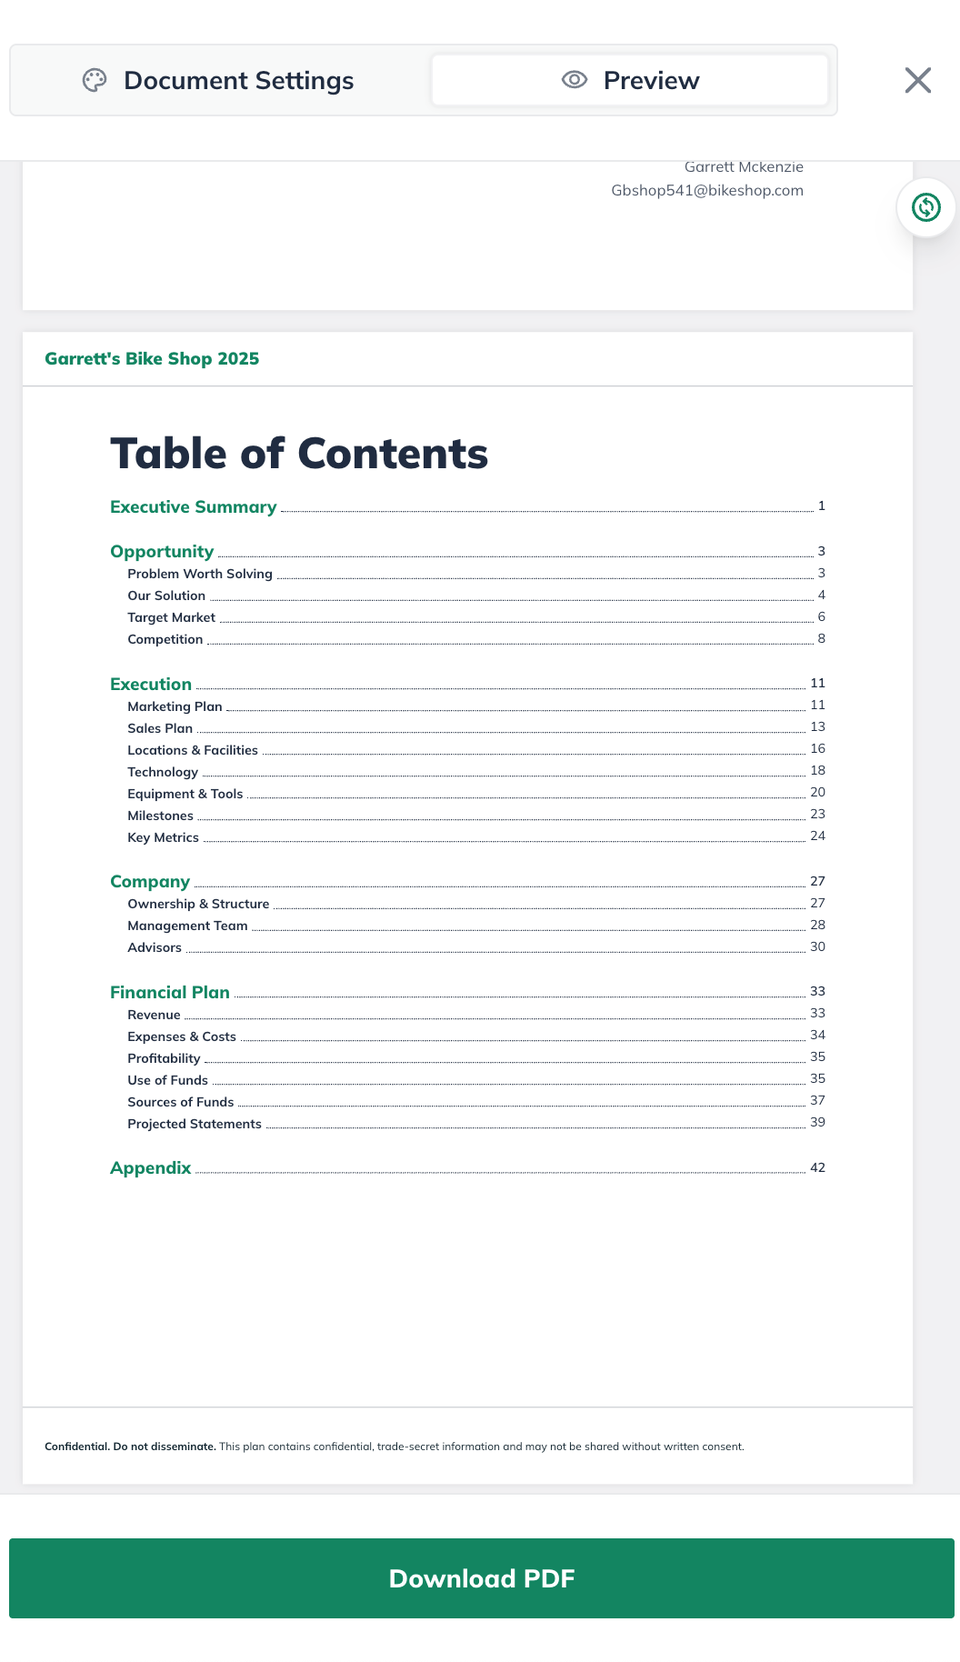
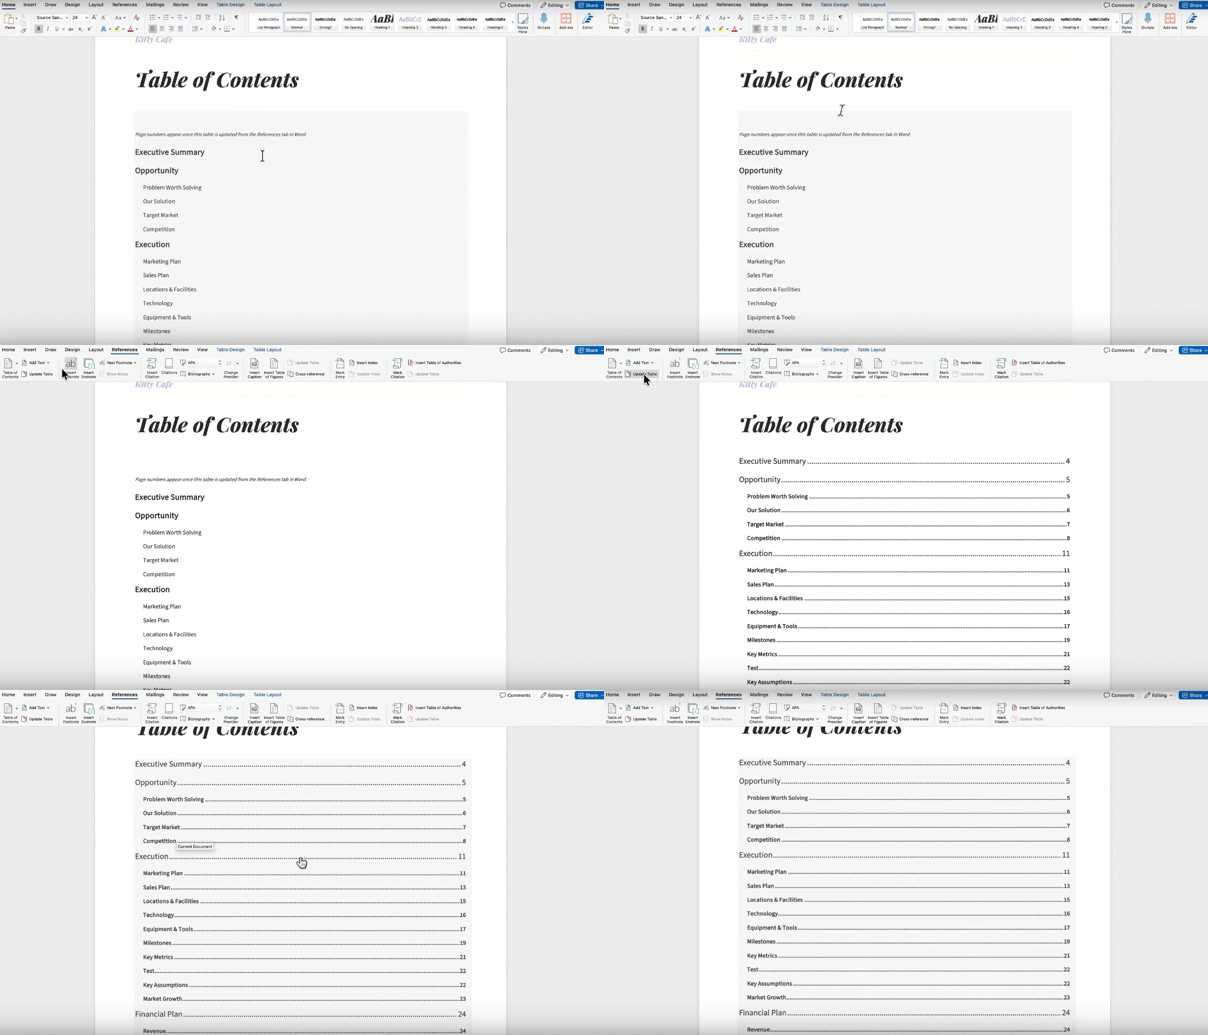
Note: Exports to Word will need to have a table of contents added after the initial export from LivePlan.
In Word, click the 'References' button in the Ribbon in the top menu, then choose 'Update Table of Contents' and Word will create one for you!