Creating Your Pitch
Preparing your Pitch
Jump to
Whether you are trying to raise money for your business or just want to perfect your business strategy, a solid pitch is an essential tool for achieving your goals. A pitch is also a quick way to define and share the vision for your business.
The LivePlan Pitch tab focuses on documenting the core problems your business will solve and what those solutions will look like.
This article will help you work through each section of the Pitch. Read the entire thing from start to finish, or use the links in the sidebar to jump to a specific section.
Note: The Pitch and the Plan tabs in LivePlan are designed to build separate documents for different uses. In other words, you don't need to combine your Pitch and Plan.
Editing your Pitch
When you click LivePlan’s Pitch page to get started, you’ll find controls directly below it that allow you to view, edit, publish, or present your Pitch:

There are two ways to work through the sections of your Pitch. First, you can click Edit to open the Pitch editor, which lets you move step-by-step through the sections in the Pitch:
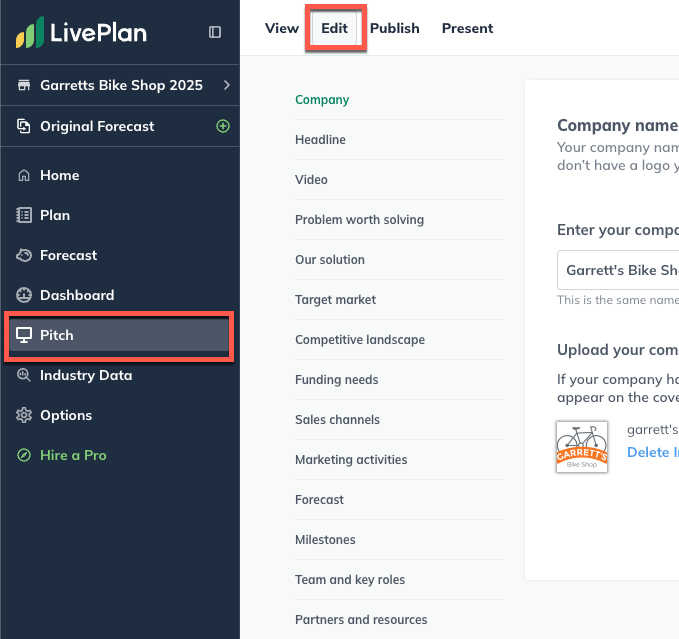
Or, you can click on View and then click Edit this section within specific sections of the Pitch to edit them:

Company name and logo
Your company name and logo will appear at the very top of your Pitch. If you don’t have a logo yet, that’s fine - your Pitch will still look good without one.
In the Pitch viewer, click on the company name (or in the Pitch editor, click on the Company step):

The company name is already populated with your plan name. If you want to change it, type something different in the field provided:

Note: The name you enter here will also appear on your Plan’s cover page.
Upload your company logo (optional). To do this, click Select an image from your computer,
Or drag and drop an image into the upload box. A preview of your logo will be displayed:

Note: If you upload the incorrect image, click Delete Image to remove it:

To move to the next section in the Pitch editor, click Continue, or to return to the Pitch viewer, click I’m Done.

Headline
Distilling your company’s purpose into a straightforward sentence may feel challenging, but it's incredibly valuable. It helps you, as an entrepreneur, to focus on precisely what you do and who you’re doing it for. It also helps you clearly market your business. Crafting a simple headline for your Pitch will communicate the core essence of your company and generate interest in learning more about what you do.
Note: The headline will be centered in this area if you did not upload a logo.

In the Pitch viewer, click on the headline section (or in the Pitch editor, choose the Headline step).
In the box provided, enter a description of your company and business opportunity (140 characters or less):
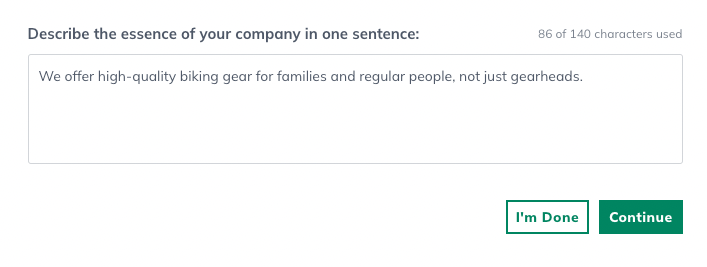
To move to the next section in the Pitch editor, click Continue, or to return to the Pitch viewer, click I’m Done.

Video
You also have the option to upload a video to make your Pitch more engaging. You can link a published video from platforms like YouTube, Vimeo, Wistia, Facebook, Dailymotion, Mixcloud, Vidyard, or Twitch. Once a video is added, both Guests and Contributors with access to your LivePlan account can view the video within the app, and it will also display on the secret web page for your published Pitch. This feature is a great way to make your Pitch more dynamic and engaging for your audience.

Note: Videos will not be included when downloading the Pitch as a PDF or when exporting it as a PowerPoint, as these formats don't support embedded video content.
Problem worth solving
In this part of the Pitch, you’ll describe a key problem your business solves for the customer. The most important thing is to ensure you’ve identified a problem that is worth solving. If your product or service doesn’t solve a problem your potential customers have, your business idea probably isn’t viable.
You can describe the problem in a couple of sentences or create a numbered list. The problem worth solving will appear in the upper left-hand corner of the Our Opportunity section of the Pitch view.
In the Pitch viewer, click on the Problem Worth Solving section (or in the Pitch editor, choose the Problem Worth Solving step).

Choose whether to write a description or create a short list:

Note: If you enter a description and then decide you’d rather create a list, the text you entered for the description will be retained if you come back to it later.
To write a description, enter your text in the field provided (300 characters maximum):
 To create a short list, click within the first item and enter a solution. Continue until you’ve entered up to five solutions:
Note: The short list items are limited to 70 characters in length
To erase what you’ve written for an item, click the X to the right of the name. To reorder your list, use the drag controls to the left of the list to move the items around.

To move to the next section in the Pitch editor, click Continue, or to return to the Pitch viewer, click I’m Done.

Our solution
This section of the Pitch is closely related to the Problem worth solving section because, of course, here you’ll describe how you'll solve the problem you’ve outlined. The clearer your problem statement is, the more easily you'll be able to describe your solution. Also, be sure to give the reader a sense of how your products and services solve the problem in a novel or superior way.
Again, try and distill your solution description down to as few words as possible. You should be able to describe your solution in just a few sentences or bullet points.
In the Pitch viewer, click on the Our solution section (or in the Pitch editor, choose the Our solution step).

Choose whether to write a description or create a short list:

Note: If you enter a description and then decide you’d rather create a list, the text you entered for the description will be retained if you come back to it later.
To write a description, enter your text in the field provided (300 characters maximum):
 To create a short list, click within the first item and enter a solution. Continue until you’ve entered up to five solutions:
Note: The short list items are limited to 70 characters in length
To erase what you’ve written for an item, click the X to the right of the name. To reorder your list, use the drag controls to the left of the list to move the items around.

To move to the next section in the Pitch editor, click Continue, or to return to the Pitch viewer, click I’m Done.

Target market
In this section, the idea is to identify the best customers for your solution. Selling to everyone isn’t a good approach or even necessarily possible.
Identifying your market segments involves doing some research:
Talk to knowledgeable people in your industry.
Talk to potential customers.
Use geographic data (location, area size, population density, and climate).
Use demographic data (age, gender, income, family composition, occupation, and education).
Talk to your local chamber of commerce for local market data.
Visit www.business.gov, which is a good source of information from the Department of Labor, the Department of Commerce, and others.
Once you have created a good list of target market segments, you’ll need to estimate how many people are in each segment. If you live in the United States, the US Census website is an invaluable resource. The Small Business Administration website also has a great collection of links for market research. Not all the information you need will be publicly available, and you may have to settle for educated estimates. Sometimes you'll have to extrapolate information from different sources to get the information you seek.
Next, estimate what an average person in each group spends each year on their current solution to the problem you are solving. LivePlan will multiply the number of people by how much they spend to give you a realistic “market size” number for each segment.
In this section of the Pitch, you can present your target market information either in a chart or a short list.
In the Pitch viewer, click on the Target market section (or in the Pitch editor, choose the Target market step).
Choose Chart:
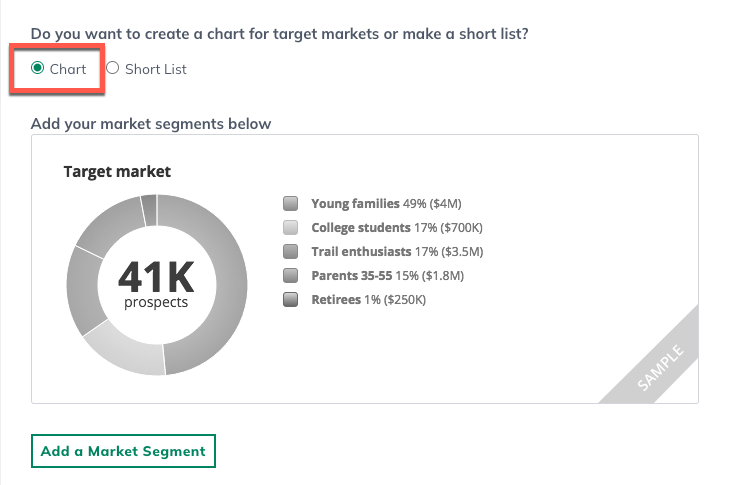
Click Add a Market Segment.
In the overlay that appears, enter a name for the segment:

Estimate the number of potential customers (prospects) you think might be in this segment. Remember, this is the number of customers your business can reach in your local area or online:

Estimate how much money the average customer in that segment would spend per year on your products/services:

Click OK. You’ll see a donut chart showing the segment you entered. The total market size so far, calculated by LivePlan, is displayed below the donut chart:

Repeat steps 2 through 7 for your remaining segments. You can add up to five of them.
As you add each segment, it will be listed next to the donut chart. Use the options to the right of each segment to Edit or Delete segments:

To move to the next section in the Pitch editor, click Continue, or to return to the Pitch viewer, click I’m Done.

To list your target markets:
Click the first item in the list and enter a target market.
Continue until you’ve entered up to five markets. Note that you'll be entering the names of the segments only, not estimated size or value:
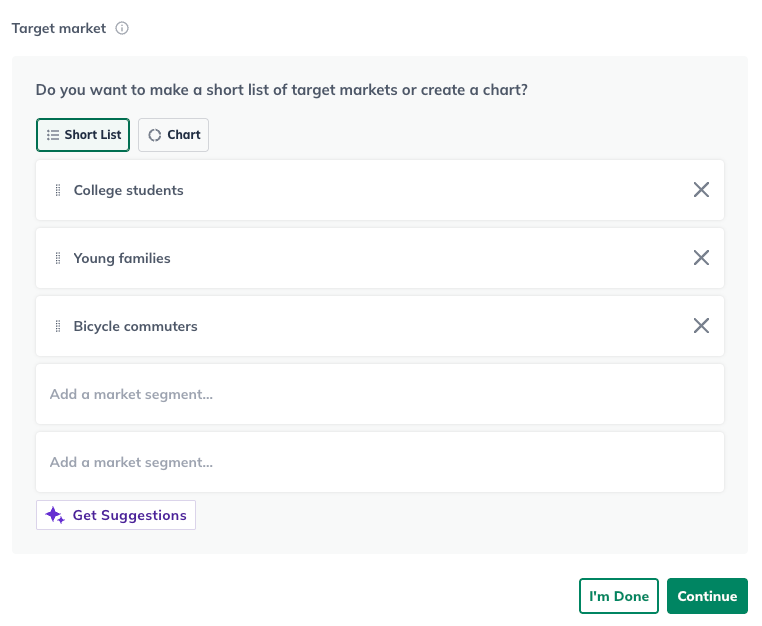
Note: The short list items are limited to 40 characters in length.
To reorder your list, use the drag controls to the right of the list to move the items around.
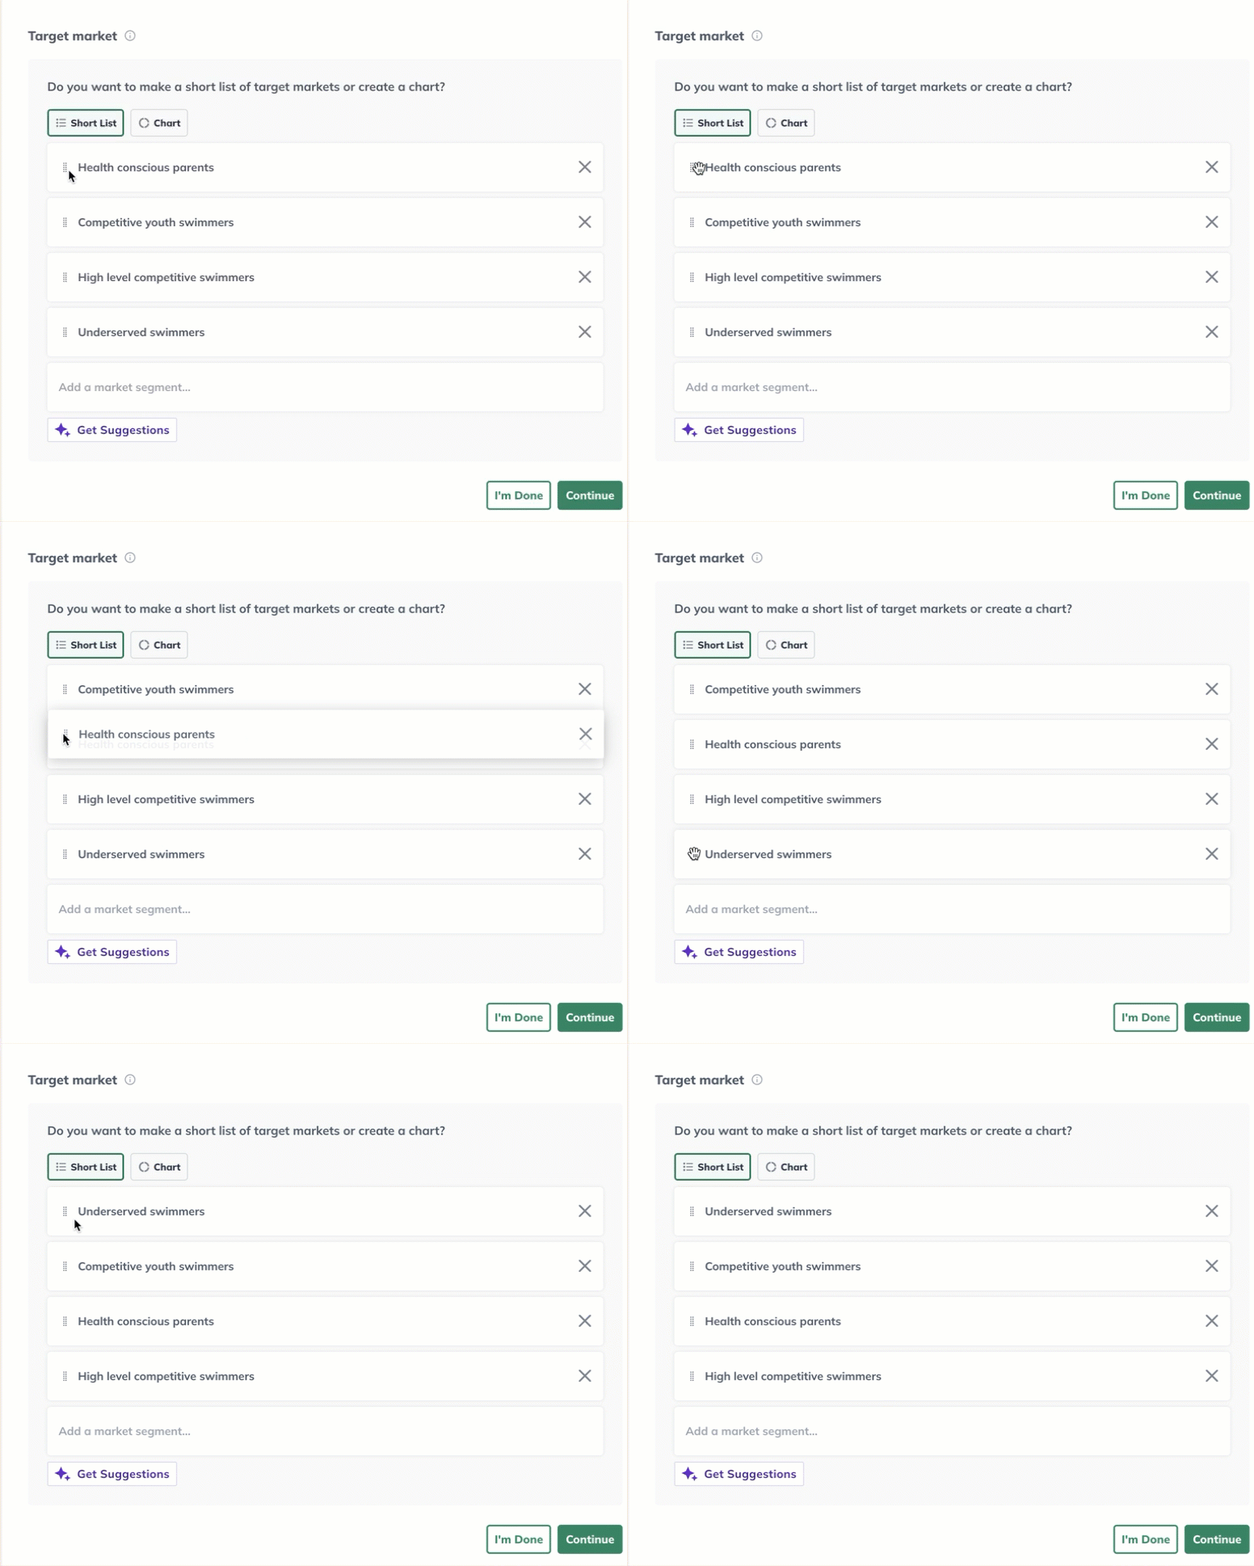
To move to the next section in the Pitch editor, click Continue, or to return to the Pitch viewer, click I’m Done.

Competitive landscape
Every business has competition. Even if no one has come up with a similar solution, your potential customers are currently using some method to solve the problem they have. For example, the competitors of the first cars weren’t other cars; they were horses and getting around on foot.
So, if you don’t have obvious direct competitors, focus on other ways that your target customers satisfy their needs now. You may have the only bowling alley in town, for example, but consider that you’re still competing for entertainment spending that might otherwise go to movie theaters, restaurants, or the local skating rink.
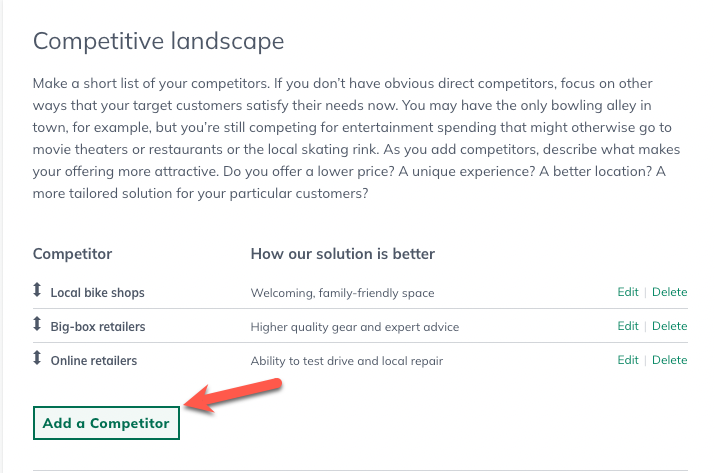
In the Pitch viewer, click on the Competitive landscape section (or in the Pitch editor, choose the Competitive landscape step).
Click Add a Competitor:
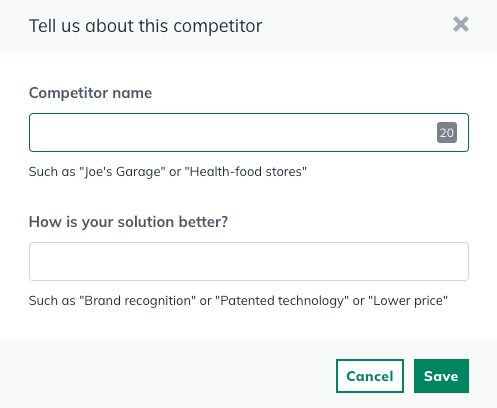
Enter a name for the competitor, and using a short phrase, enter your advantages over this competitor. Click Save:
The competitor will be added as the first line in the table and will also be listed below it in the Pitch builder. Repeat steps 2 and 3 for your remaining competitors. You can list up to five.
Use the controls to the right of the list to Edit or Delete competitors. The competitors can be re-ordered by clicking and dragging the arrows to the left of the competitor name to the desired place in the table:

To move to the next section in the Pitch editor, click Continue, or to return to the Pitch viewer, click I’m Done.

Funding needs
If your company is seeking funding, this section allows you to enter the amount you would like to raise and describe how you intend to use that money to reach your goals. If you are not seeking funding, you can hide this section of the Pitch.
Note: LivePlan will round your funding number up or down to the nearest thousand.

If you do not want to include this section in your published Pitch, check the Hide this section of the Pitch option:

To complete the funding needs section:
In the Pitch viewer, click on the Funding needs section (or in the Pitch editor, choose the Funding needs step).
Enter the amount of funding you're seeking:

Write a short paragraph describing how you plan to use the funds:

To move to the next section in the Pitch editor, click Continue or to return to the Pitch viewer, click I'm Done.

Sales channels
In this section, you'll describe how you plan to get your products or services to market. Are you selling to your target customers directly through a retail store, website, or catalog? Do you have a sales team? Do you sell through intermediaries — distributors, dealers, resellers, or others? Identifying your sales channels is essential to understanding the economics of your business model.
You can describe your sales channels in a short paragraph or a bulleted list.
To hide this section:
If you do not want to include this section in your published Pitch, check the Hide the Sales and Marketing sections option:

Note: When you hide the Sales channels section, the Marketing activities section is hidden simultaneously. These two sections must be shown or hidden together.
To complete this section:
In the Pitch viewer, click on the Sales channels section (or in the Pitch editor, click the Sales channels step).
Choose whether to write a description or create a short list:

Note: If you enter a description and then decide you'd rather create a list, the text you entered for the description will be retained if you come back to it later.
To write a description, enter your text in the field provided (250 characters maximum):

To create a short list, click next to the first item in the list and enter a sales channel. Continue until you’ve entered up to five channels:

Note: The short list items are limited to 40 characters in length.
To erase what you’ve written for an item, click Clear.
To reorder your list, use the drag controls to the right of the list to move the items around.
To move to the next section in the Pitch builder, click Continue, or to return to the Pitch view, click I’m Done.

Marketing activities
Use this section to explain how you plan to attract attention, build interest in your product or service, and convert prospects into customers. Describe your web presence and any online marketing you’re doing. Do you advertise online, in print, or elsewhere? Do you attend trade shows or sponsor events? If resellers or dealers largely do your direct marketing, what kind of marketing will you do to attract and keep those key partners?
You can either describe your marketing activities in short paragraph form or create a bulleted list.
To hide this section:
If you do not want to include this section in your published Pitch, check the Hide the sales and marketing sections option:

Note: When you hide the Marketing activities section, the Sales channels section is hidden simultaneously. These two sections must be shown or hidden together.
To complete the marketing activities section:
In the Pitch viewer, click on the Marketing activities section (or in the Pitch editor, click on the Marketing activities step).
Choose whether to write a description or create a short bullet list:

Note: If you enter a description and then decide you’d rather create a list, the text you entered for the description will be retained if you come back to it later.
To write a description, enter text in the field provided (250 characters maximum):

To create a short list, click next to the first item in the list and enter an activity. Continue until you’ve entered up to five marketing activities:
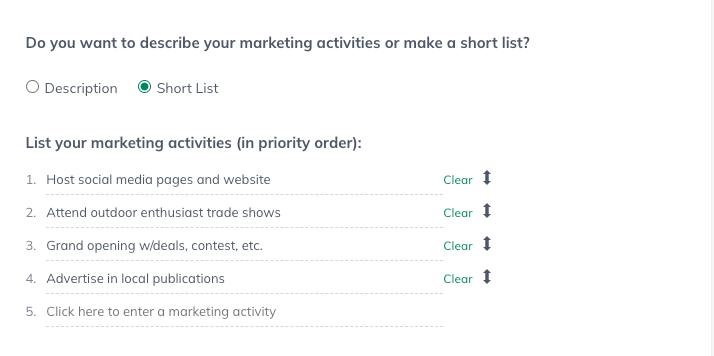
Note: The short list items are limited to 40 characters in length.
To reorder your list, move the items around using the drag controls to the right of the list.
To erase what you’ve written for an item, click Clear.
To move to the next section in the Pitch builder, click Continue, or to return to the Pitch view, click I’m Done.

Forecast
Now it's time to put together a quick set of financial projections. Can you actually turn a profit? Some opportunities look good at a glance but don't hold up to financial scrutiny.
For a great Pitch, you don’t necessarily have to show a detailed 5-year forecast. What’s more important is that you understand your business model. All you need to know is how you'll earn your revenue and what expenses you will have. For example, if you are starting an online news site, your customers are advertisers, and they are paying your bills. Your costs will be writers, graphic designers, and web hosting.
To complete the forecast:
In the Pitch viewer, click on the Forecast section (or in the Pitch editor, choose the Forecast step).
In this section, you can choose to summarize your revenue and expenses with a short description/list or to include charts/data from your forecast:

If you choose Input descriptions or lists, describe or list your revenue streams and major costs. Up to 5 items may be entered as a list, or up to 250 characters when Description is selected.
If you choose Forecast charts & data, charts will automatically be prepared based on data entered in your Forecast tab. These charts update automatically as your forecast is updated.
Including forecast charts and data
Click Go to Forecast:

Complete the desired forecast sections. (For help, see Preparing a Forecast.) The completed charts will appear in your Pitch.
To move to the next section in the Pitch builder, click Continue, or to return to the Pitch viewer, click I’m Done.
Writing descriptions/short lists
Under Revenue streams, choose whether to write a description or create a short bullet list:

Note: If you enter a description and then decide you’d rather create a list, the text you entered for the description will be retained if you come back to it later.
To write a description, enter text in the field provided:

To create a short list, click next to the first item in the list and enter a revenue stream:

Continue until you’ve entered up to five revenue streams.
To erase what you’ve written for an item, click Clear.
To reorder your list, use the drag controls to move the items around.
In the major costs section, again choose whether to write a description or create a short bullet list:

To write a description, enter text in the field provided:

To create a short list, click next to the first item in the list and enter a major cost:
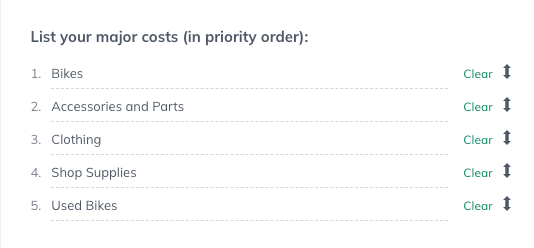
Continue until you’ve entered up to five major costs.
To erase what you’ve written for an item, click Clear.
To reorder your list, use the drag controls to move the items around.
To move to the next section in the Pitch builder, click Continue, or to return to the Pitch viewer, click I’m Done.

Milestones
Make a quick list of important milestones for your business. Remember that no matter how many Milestones you create, only the first five upcoming ones will show on your Pitch.
Talk about your upcoming goals and when you plan to achieve them. If you have already accomplished milestones, you should mention those. For example, if you have invented a new medical device, potential investors will want to know where you are in the clinical trial process. What steps have been accomplished, and what’s the projected schedule for final approvals from the FDA? If you are opening a restaurant, investors will want to know when you plan to sign a lease, design the interior, and open for business.
To hide this section:
If you do not want to include this section in your published Pitch, check the Hide this section of the Pitch option:

To add milestones:
In the Pitch viewer, click on the Milestones section (or in the Pitch editor, choose the Milestones step).
Click Add a milestone.
Name the milestone, assign a due date, and indicate who is responsible for completing it (optional):
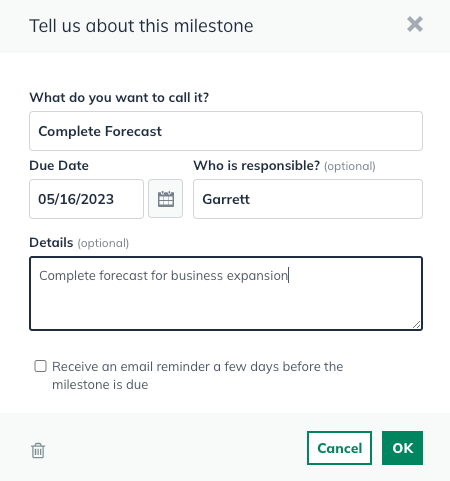
To set up a milestone reminder, click the checkbox next to the Receive an email reminder option:

Note: Email reminders will be sent to the email address attached to the LivePlan account.
Click OK.
Use the controls next to a milestone to Edit or Delete it:
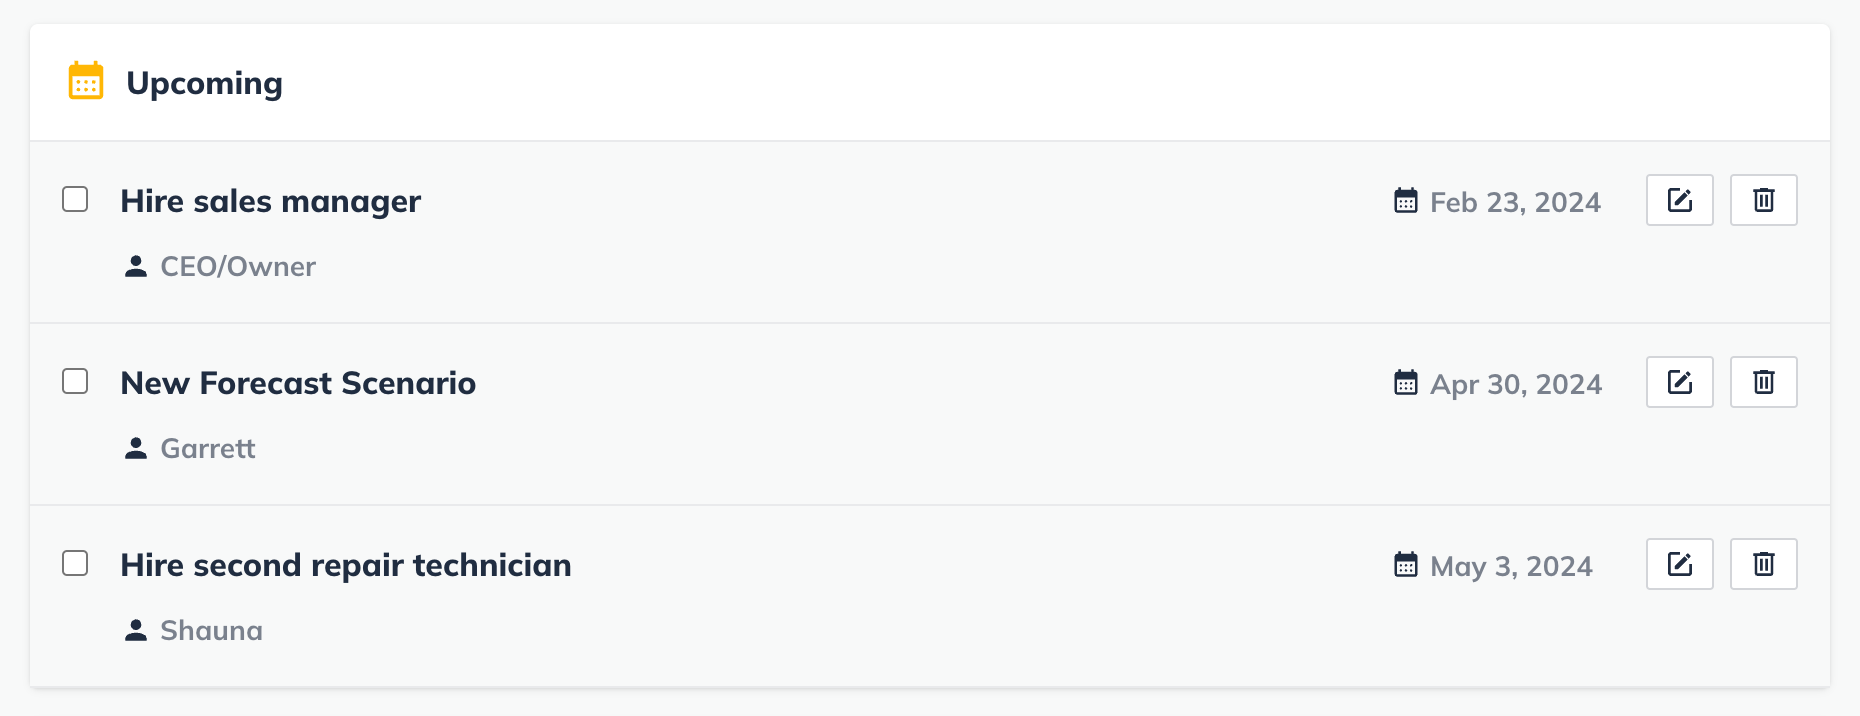
To move to the next section in the Pitch editor, click Continue, or to return to the Pitch viewer, click I’m Done.

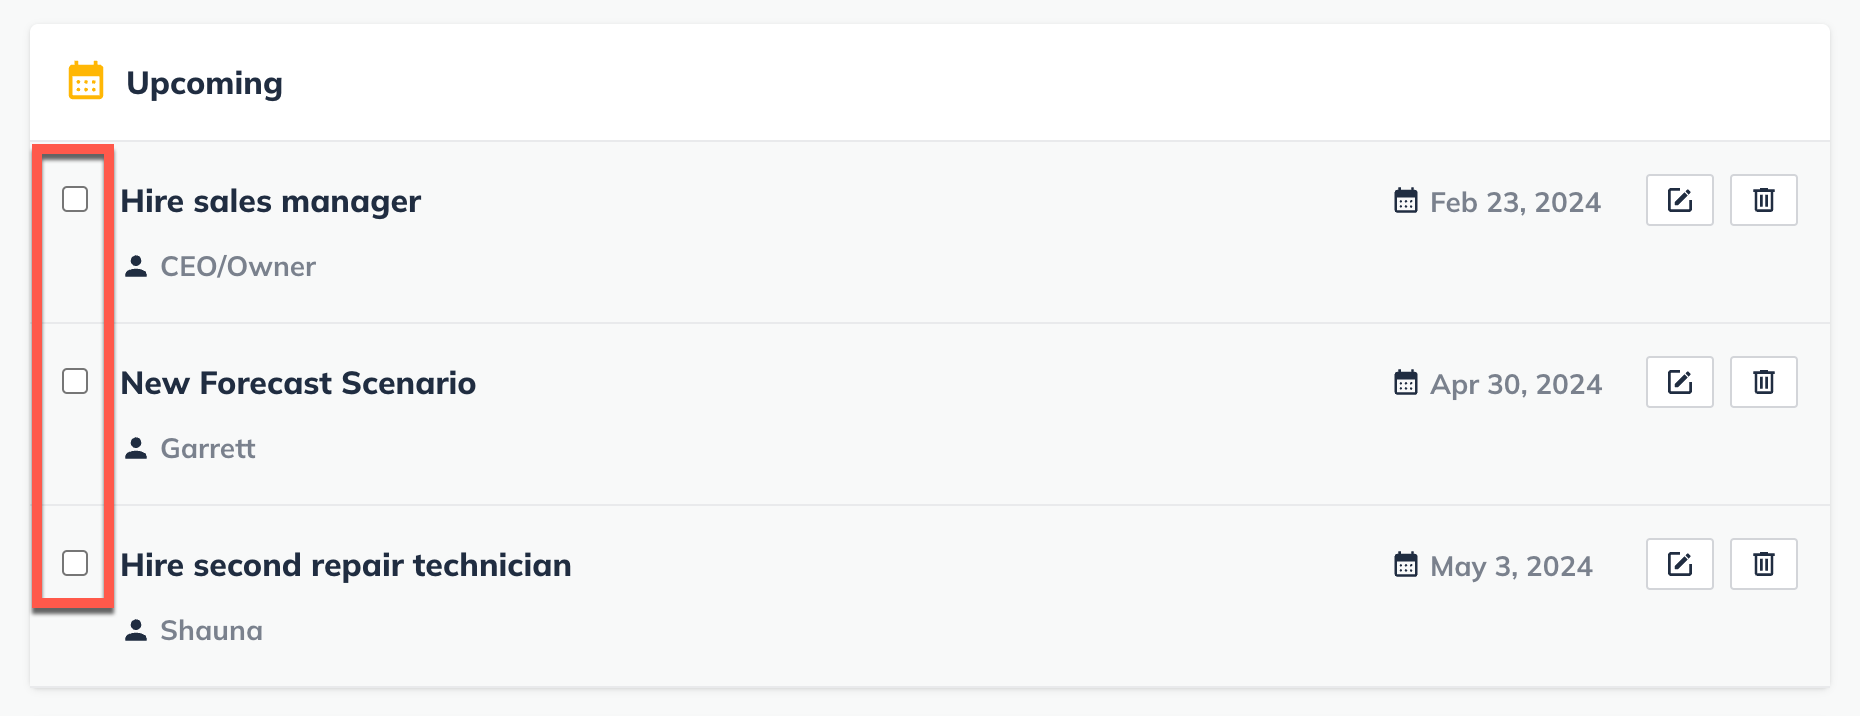
To mark a milestone completed:
Click the check box next to the milestone:
Team and key roles
In this section, you'll identify the key members of your organization and explain why their involvement is important to your future success. As great as your idea is, it takes the right team to execute it effectively.
It’s also okay not to have an entire team in place at this point - you can also use this section to describe the key roles you need to fill.
To hide this section:
If you do not want to include the Team and key roles section in your published Pitch, check the Hide this section of the Pitch option:

To add a team member:
In the Pitch viewer, click on the Team and key roles section (or in the Pitch editor, choose the Team and key roles step).
Click Add someone.
Enter the person’s name followed by their job title/role:

Optionally, type a short bio (140 characters).
To upload a photo of the person, click Select an image from your computer. Or, drag and drop an image into the upload box.
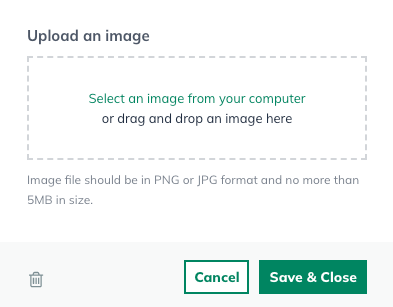
Note: If you upload the incorrect image, click Remove Image and then upload another one.
Click Save & Close.
Repeat steps 2 through 6 for additional team members (you can add up to eight).
Use the controls next to the team members list to Edit or Delete a member:

To return to the Pitch viewer, click I’m Done.

To reorder team members:
To change the order of team members in your Pitch, use the drag controls to the left of the team members to move them into the desired positions:

Partners and resources
Use this section to identify relationships, equipment, facilities, patents, or other resources strategically important to your business model. You can cover almost anything of note not addressed in the rest of the Pitch.
To hide this section:
This Pitch section is optional, so you can choose to include it or hide it. It is included by default. To hide the partners and resources section, check Hide this section of the Pitch next to the Partners and resources title:

To add a partner or resource:
In the Pitch viewer, click on the Partners and resources section (or in the Pitch editor, click the Partners and resources step).
Click Add a Partner or Resource:
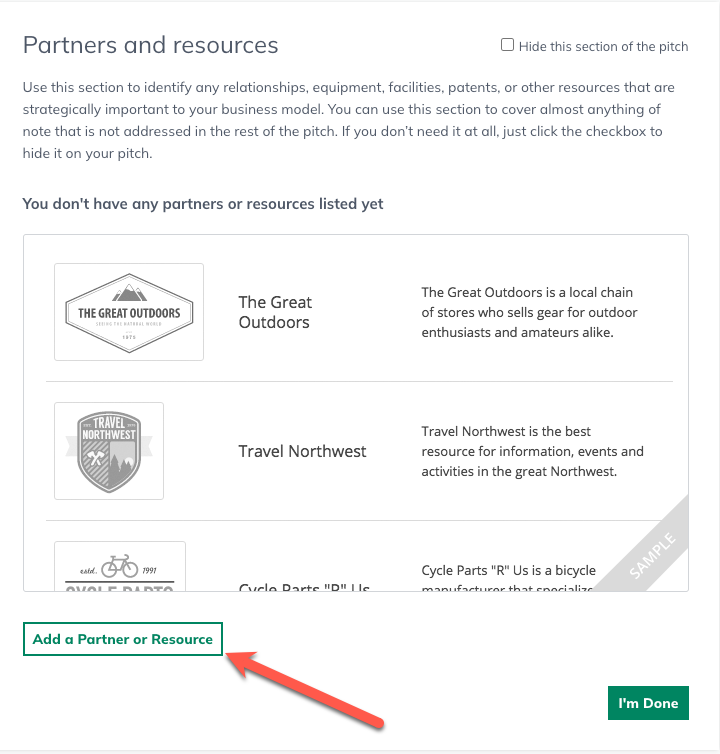
Enter a name for the resource:

Optionally, type a short description (140 characters).
To upload an image or logo for the resource, click Select an image from your computer:

Or, drag and drop an image into the upload box.
Click Save & Close.
Repeat steps 2 through 6 for additional resources (you can add up to eight).
Use the controls next to the resources list to Edit or Delete a resource:

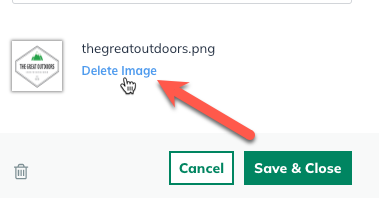
Note: If you uploaded the incorrect image, click the Edit link shown above and then click Delete Image in the overlay:
To reorder partners and resources:
To change the order of partners and resources in your Pitch, use the drag controls to the left of the list to move them into the desired positions:

Frequently asked questions about the Pitch
Hiding sections of the pitch
Hiding Pitch sections is a great way to customize your Pitch content for various audiences. For example, you may want to hide the Team and key roles section if you are a sole entrepreneur without employees.
When you hide a section, LivePlan will remember any content you have entered into that section. If you decide to show the section again later, your content will still be there.
You can hide the following sections of the pitch:
Funding needs
Sales channels/Marketing activities
Milestones
Team and key roles
Partners and resources
Note: Sales channels/Marketing activities are always shown/hidden together because they are on the same horizontal stripe of the Pitch.
To hide a section of the Pitch:
In the LivePlan Pitch editor, navigate to the section you'd like to hide and click the Hide this section of the pitch checkbox:

Note: Hidden sections are not shown on the Web page version of your pitch and are not included if you export your pitch to a slide deck or PDF.
Why are there character limits in the pitch?
The Pitch is meant to be a brief, focused, visual summary of the main points from your company content. To keep the pitch layout looking great for every LivePlan user, there are character limits imposed on the text entry fields.
If you need to avoid character limits, you'll want to work in the Plan section instead of the Pitch section. For details, see What is the difference between the Pitch and the Plan?
Limits in text fields
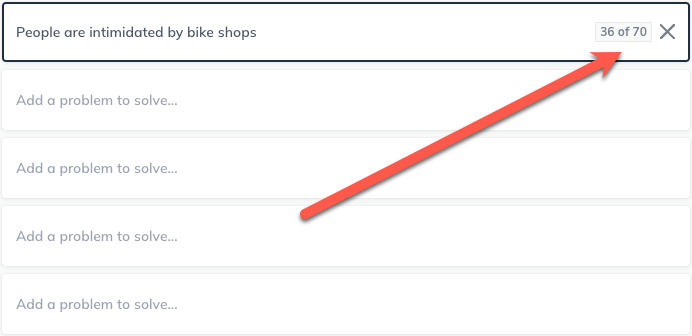
Most short text fields in the Pitch accept 70 characters. The only exception is the company name field, which accepts 60 characters. There are gray character counters on the right side of the fields that display how many characters are remaining:
Limits in text areas
Larger text areas in the pitch are 300 characters long and show a character count message in the lower left of the text entry box.
When the character count approaches the limit, the text box and character counter will turn yellow:

When the character count reaches the limit, the text box and character counter will turn red:

Where can I see a sample pitch?
The Pitch offers a condensed summary of your business idea. Because it's so succinct, you'll likely find that you can just start filling out the sections. If you'd like to view a sample Pitch, we have two available to view as web pages:
